It’s well known in the Photoshop user world that there are always numerous ways to accomplish a specific effect. In this tutorial, I’ll teach a simple and easy method to give any of your images a cartoon effect. The best part of this demonstration is that you can achieve that effect with just one single layer.
For you to follow along you’ll need your own picture or you can download the following free image from Unsplash by Jayson Hinrichsen: Download.
Video Tutorial
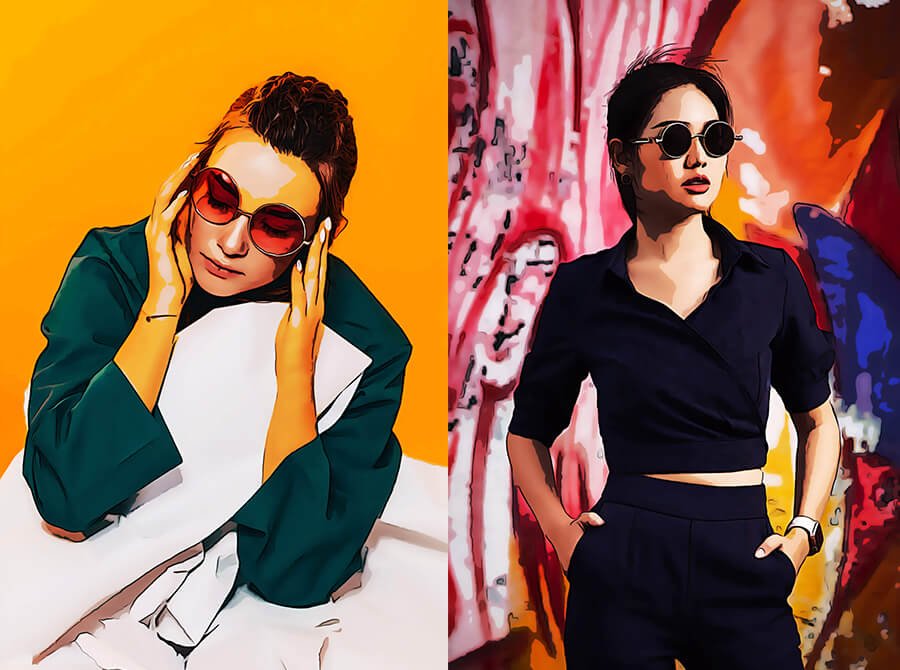
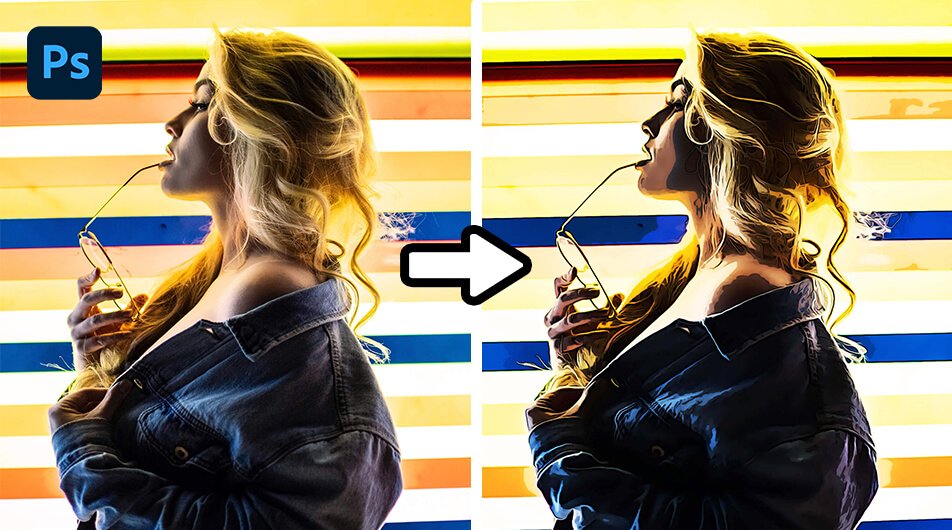
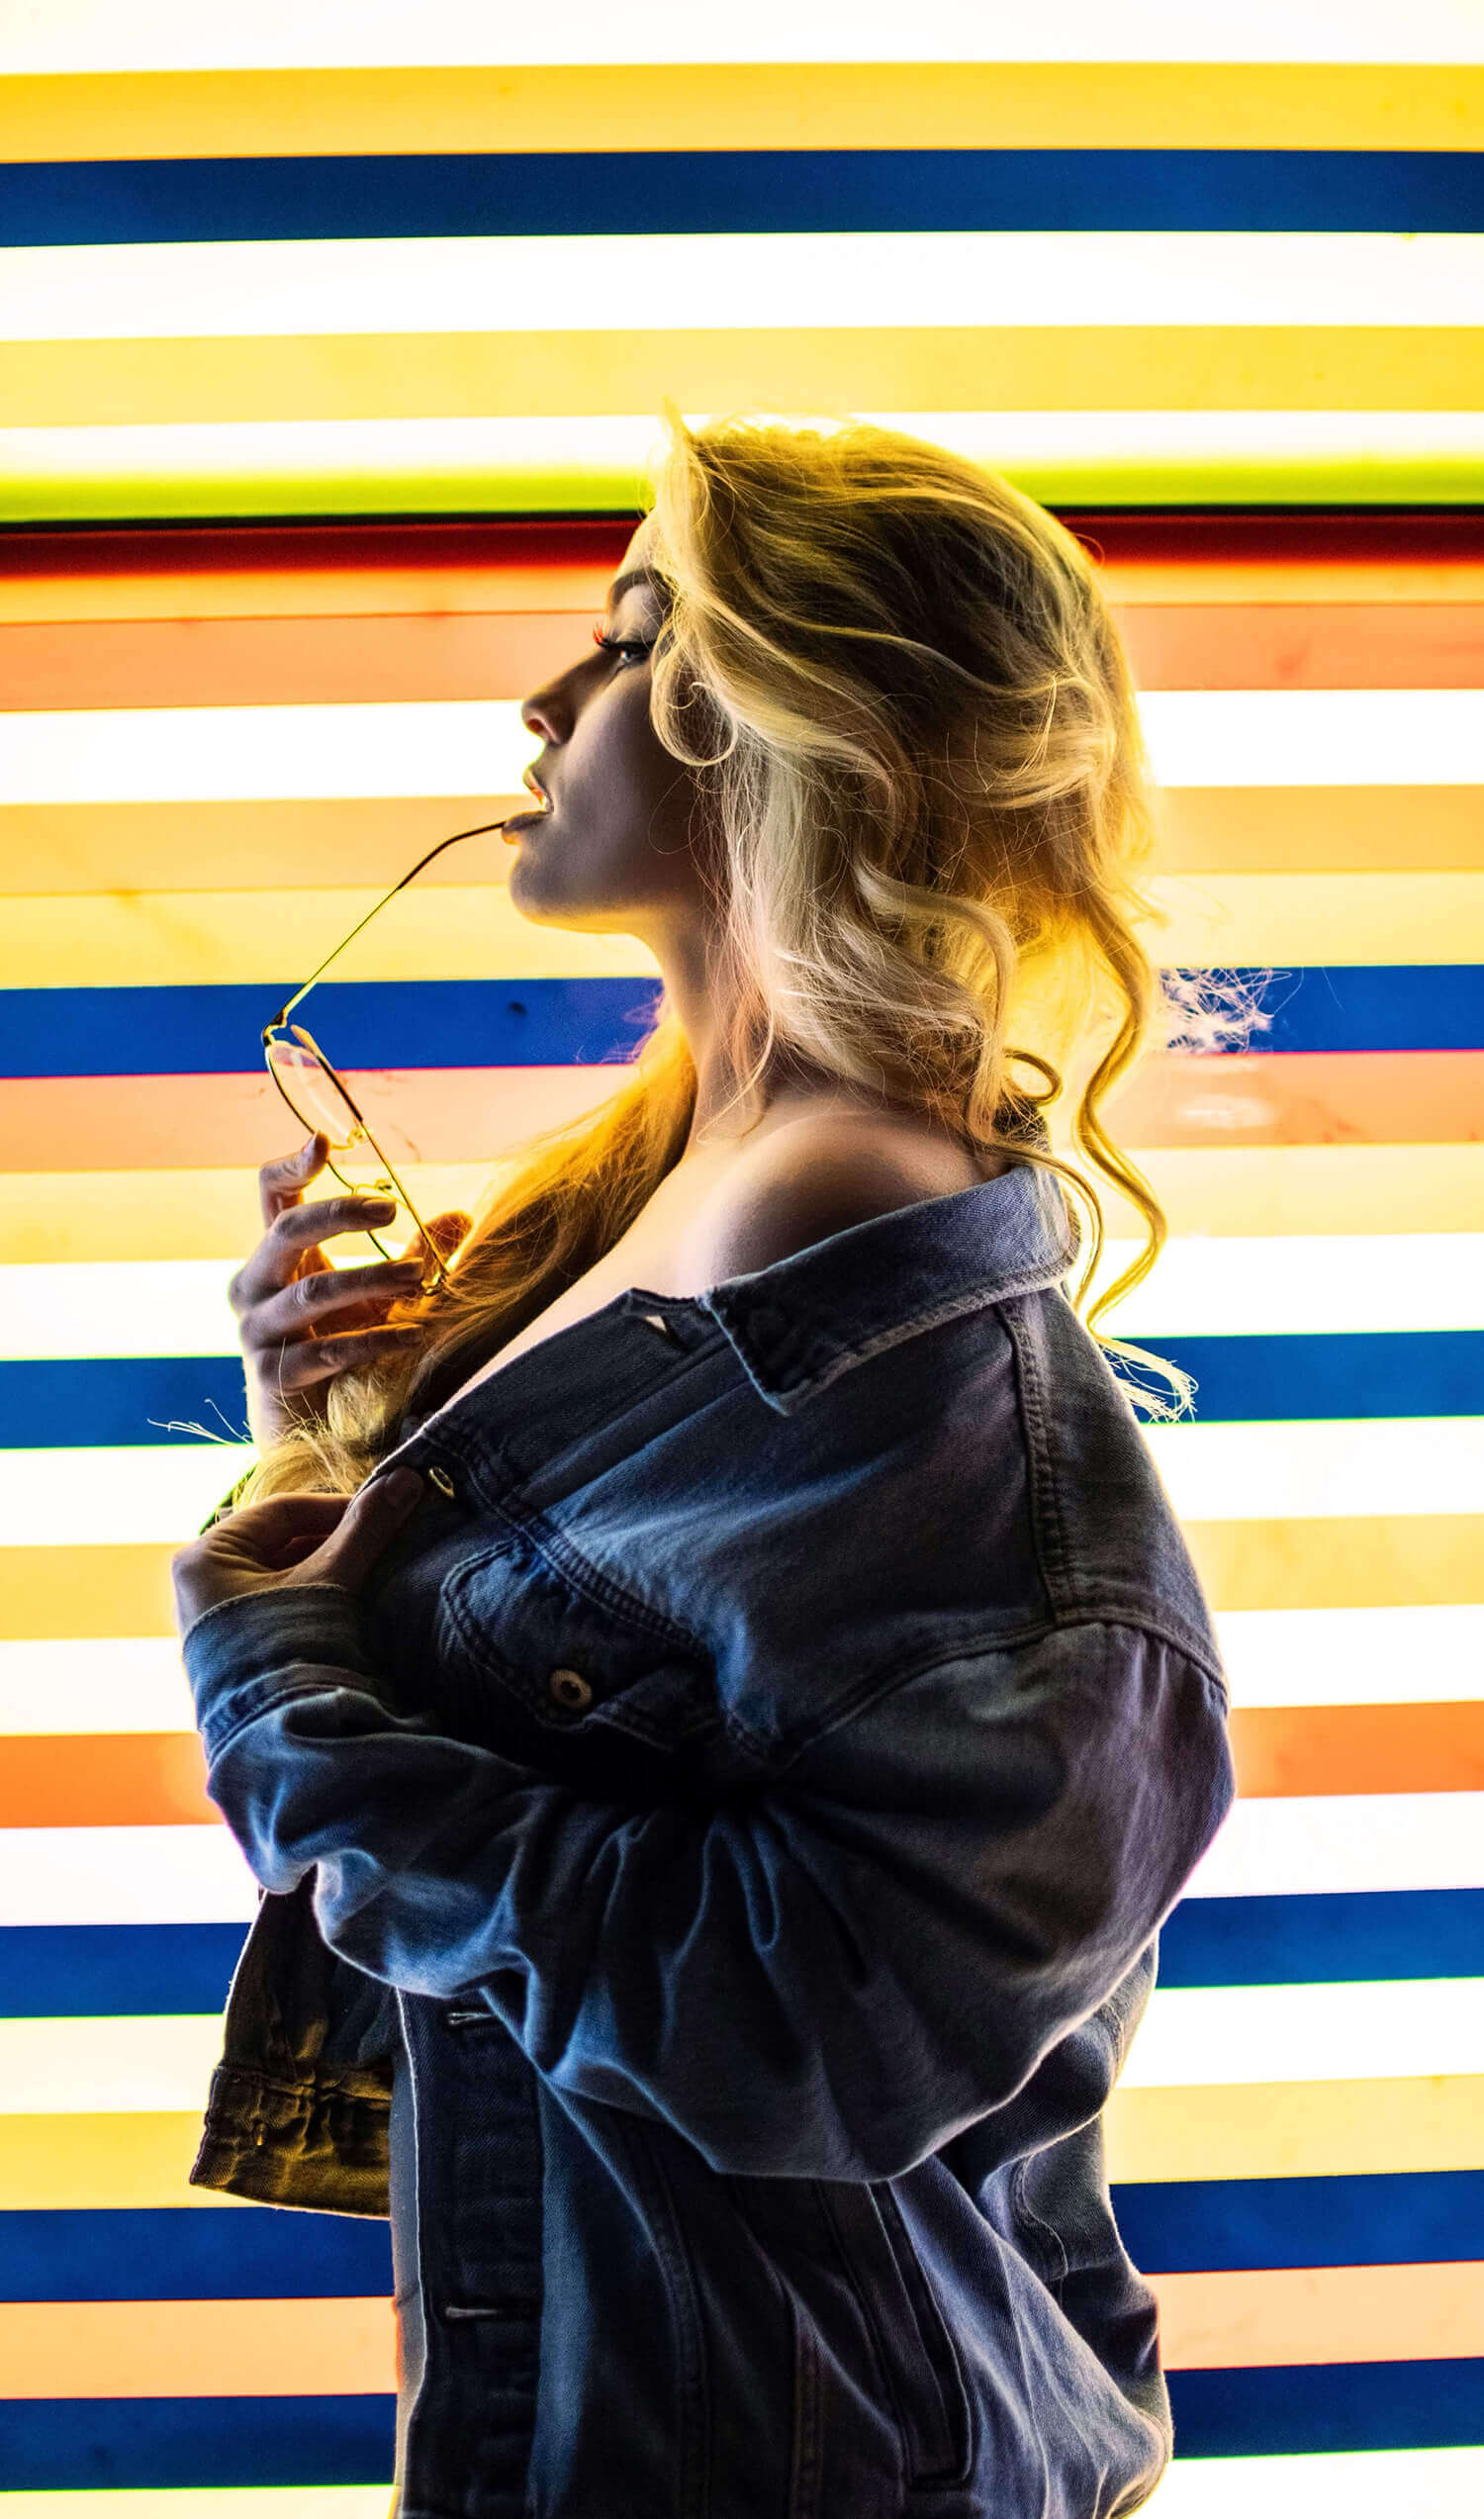
Final Image
Drag The Slider To See Before & After


Step 1
Launch Photoshop and open your image.
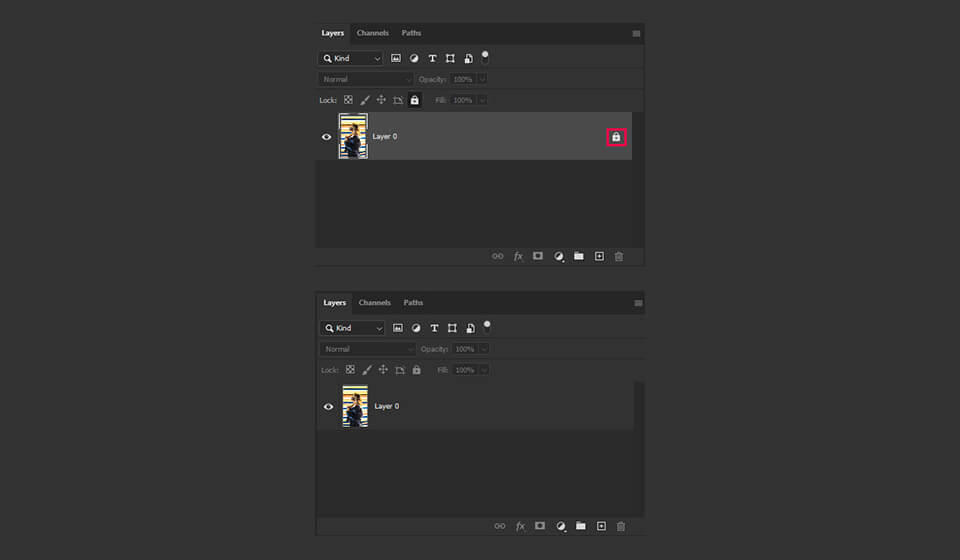
Step 2
To unlock the layer, click the padlock symbol in the Layers Panel.
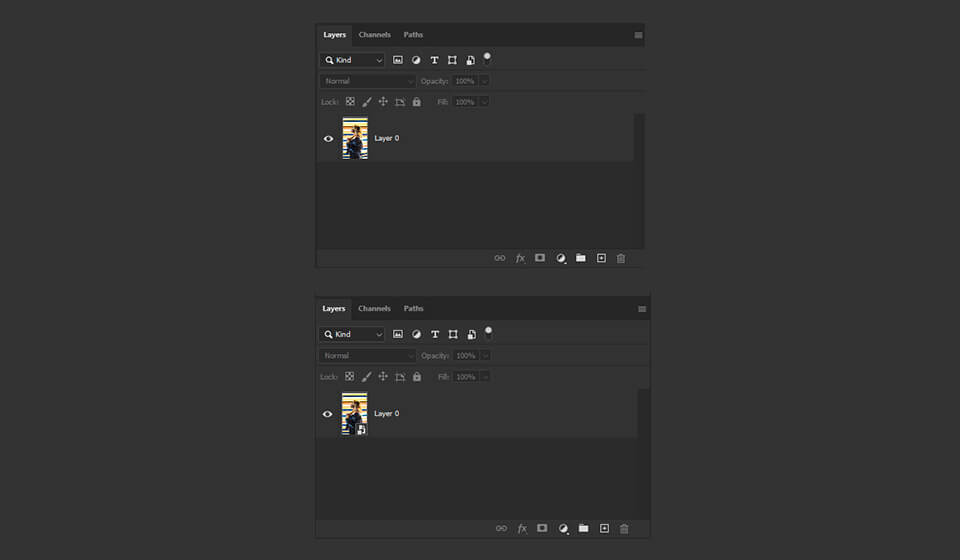
Step 3
Go to Layer > Smart Objects > Convert to Smart Object.
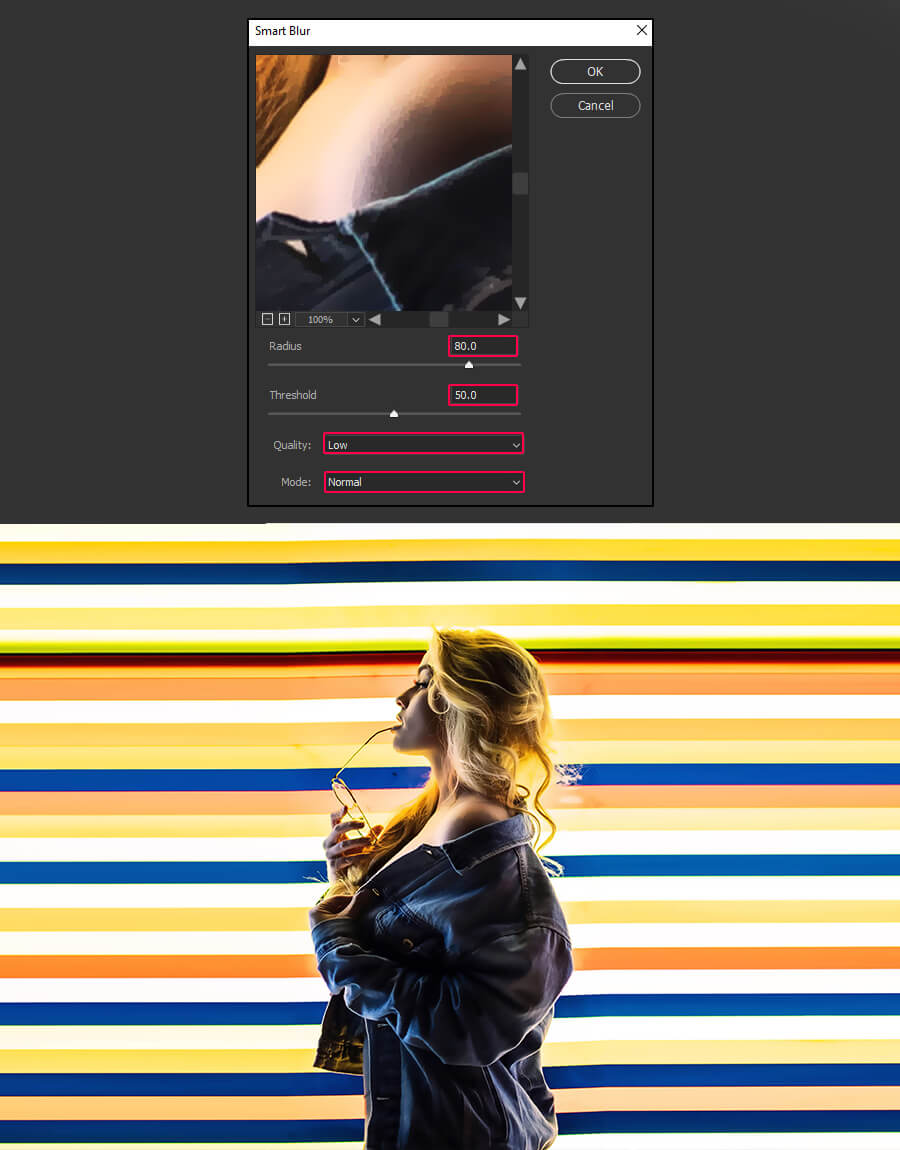
Step 4
Go to Filter > Blur > Smart Blur. Apply the settings shown below and then click OK.
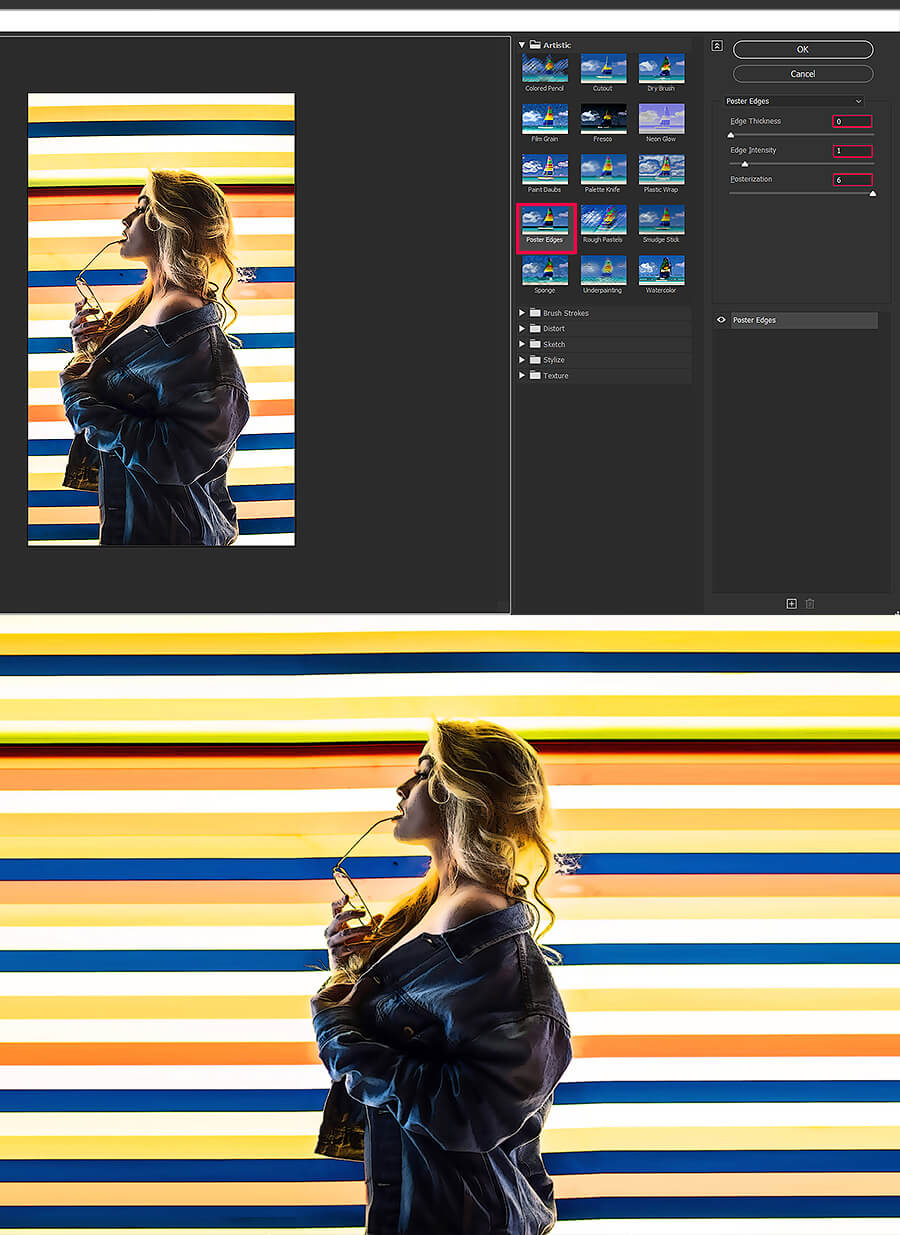
Step 5
Go to Filter > Filter Gallery. Under the Artistic tab, choose the “Poster Edges” effect and apply the following parameters before clicking OK.
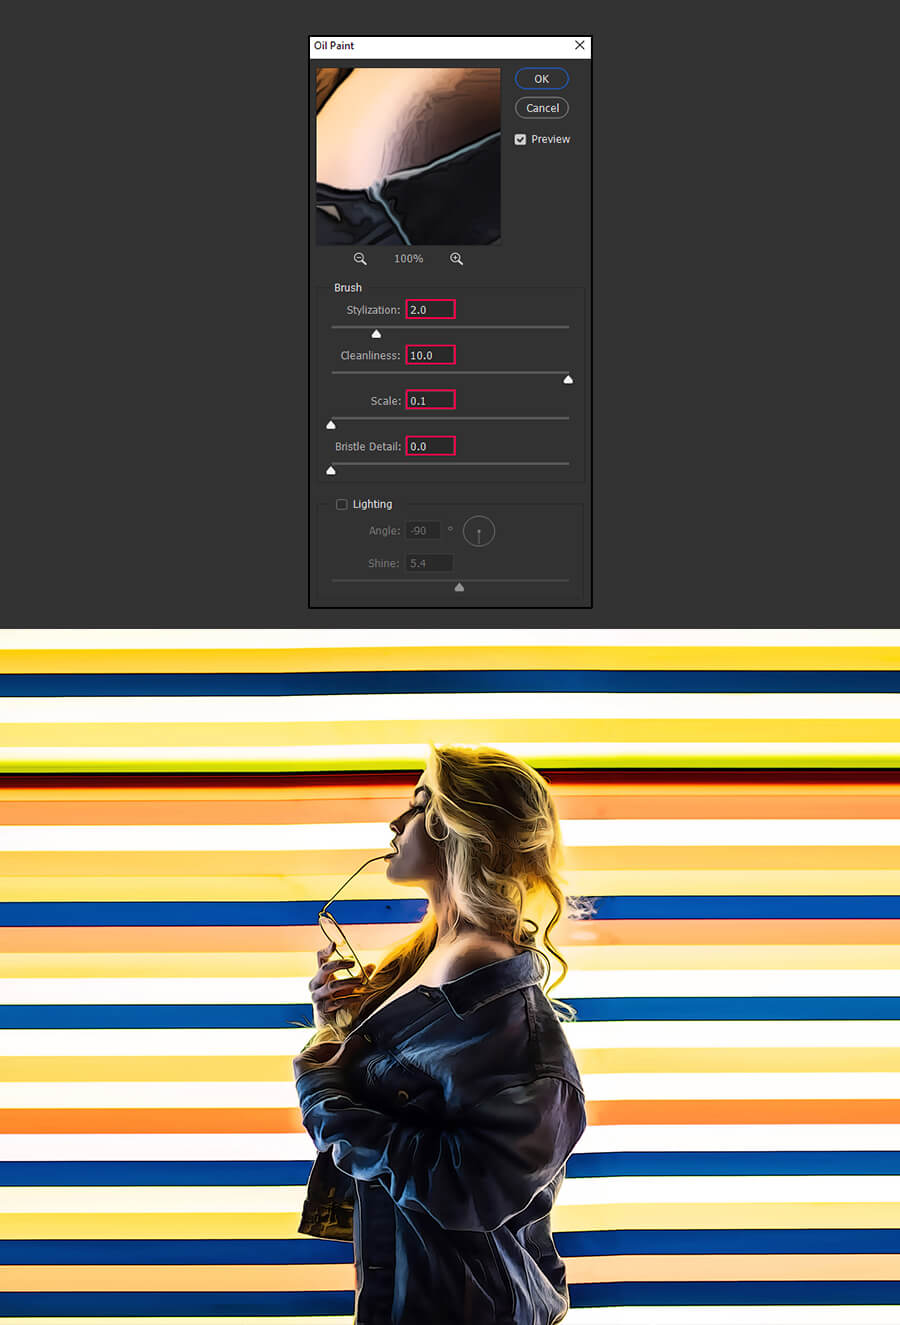
Step 6
Go to Filter > Stylize > Oil Paint. Click OK after applying the following settings.
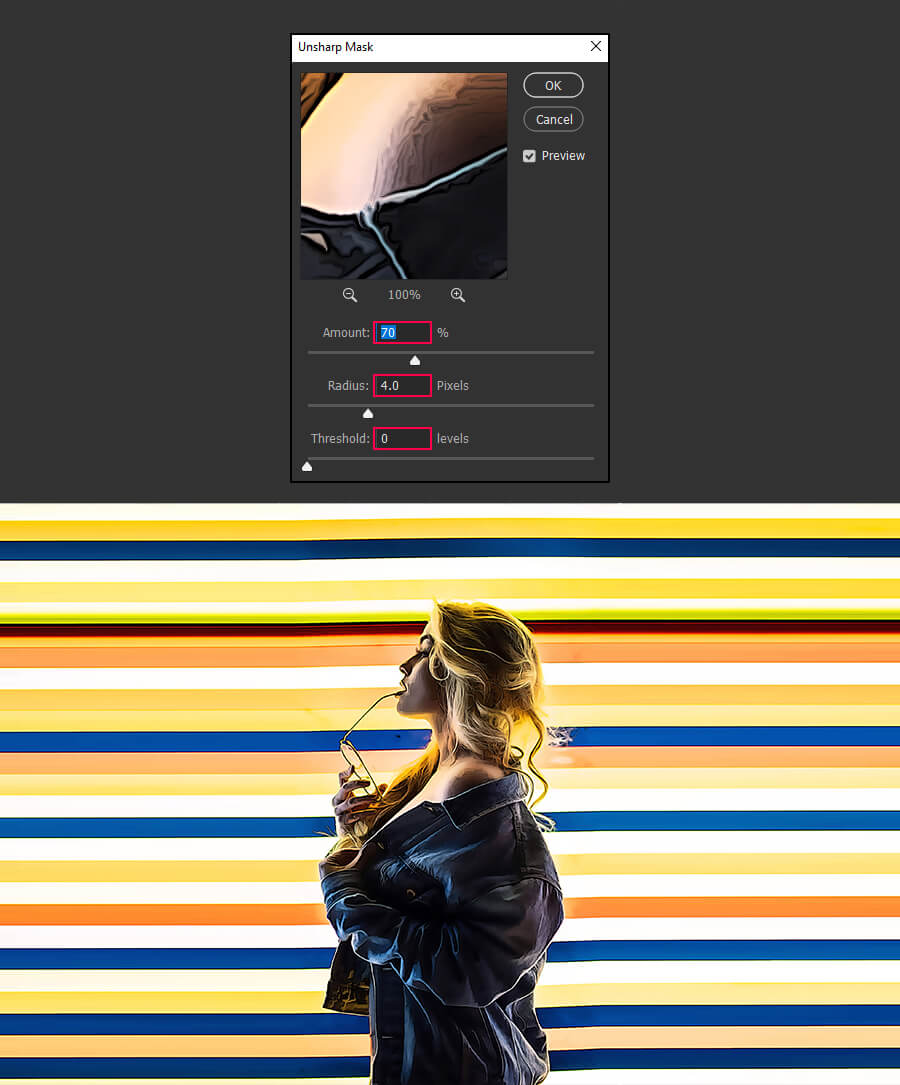
Step 7
Go to Filter > Sharpen > Unsharp Mask. Apply the settings shown below and then click OK.
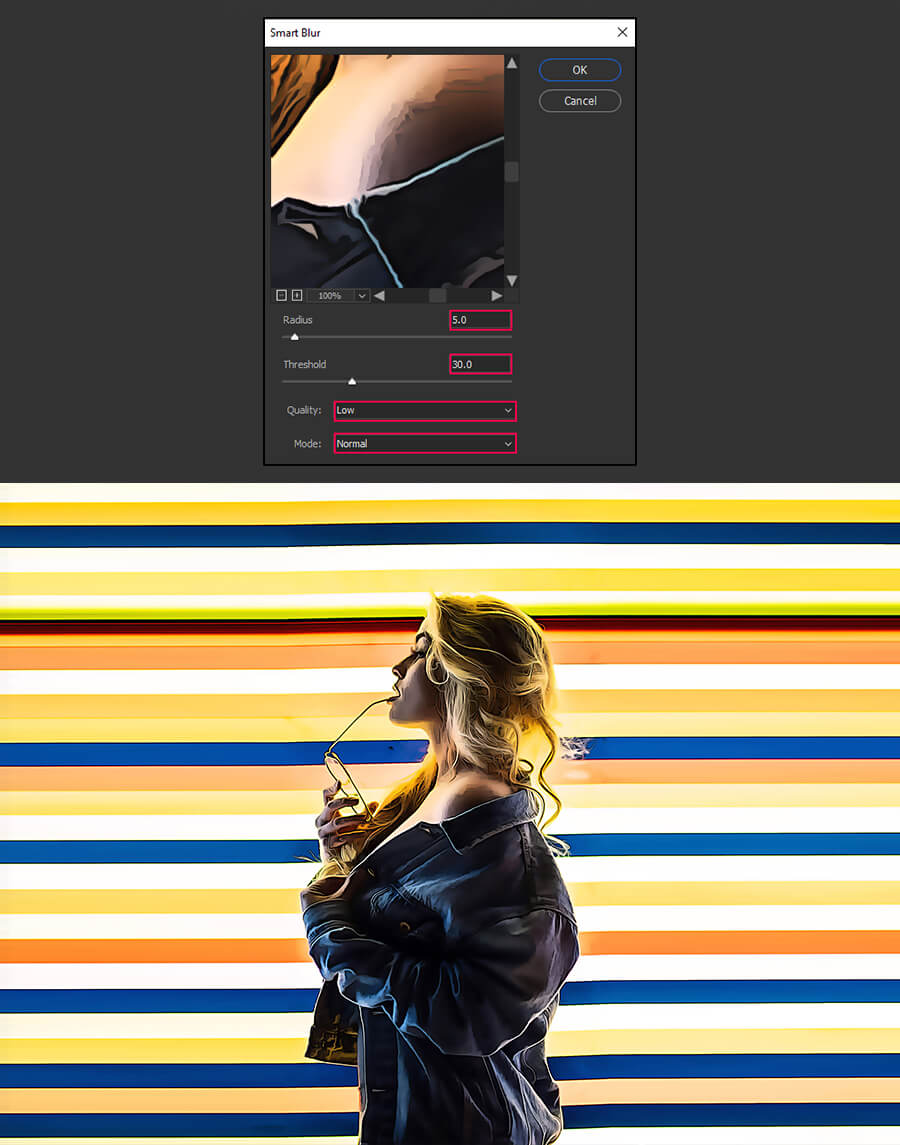
Step 8
Go to Filter > Blur > Smart Blur. Apply the settings shown below and then click OK.
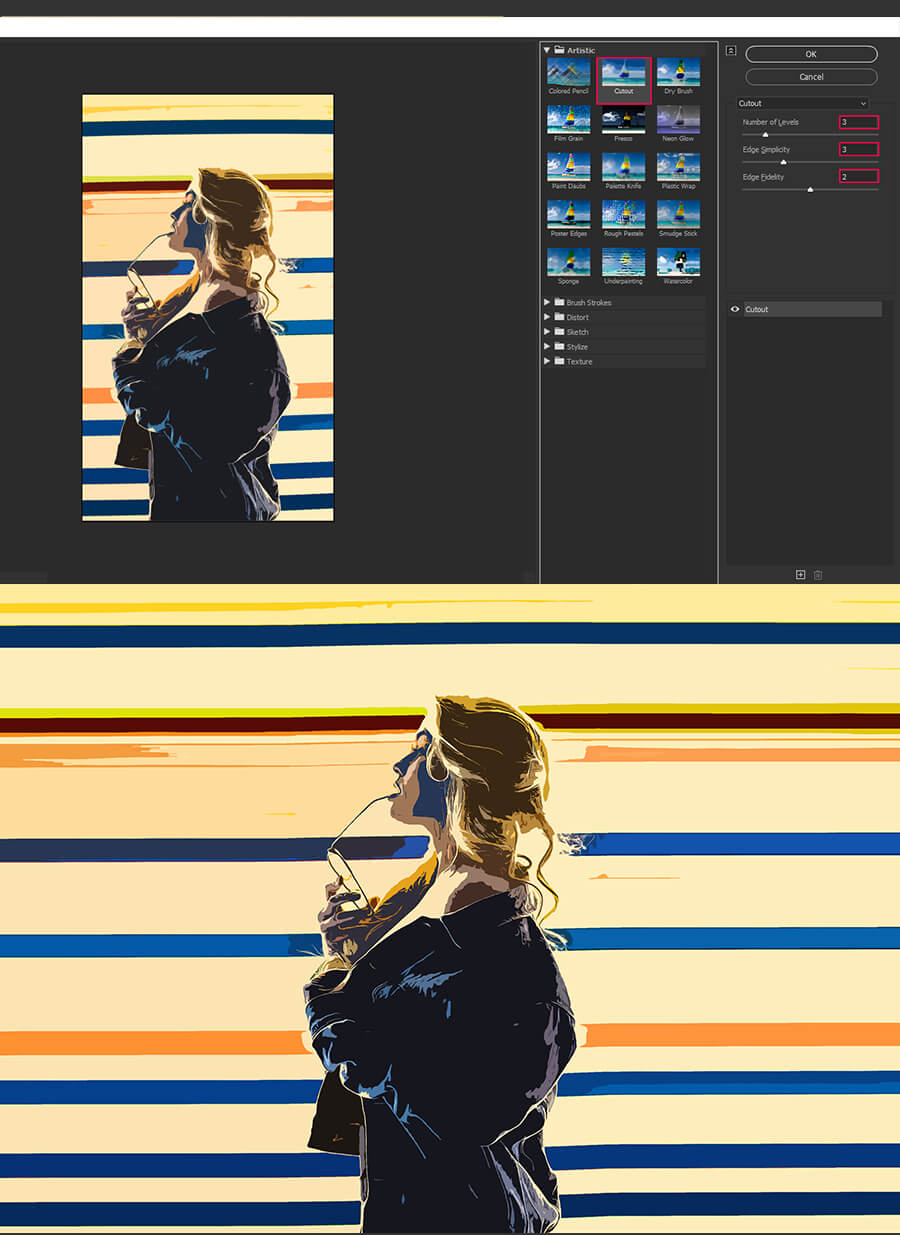
Step 9
Go to Filter > Filter Gallery. Under the Artistic tab, choose the “Cutout” effect and apply the following parameters before clicking OK.
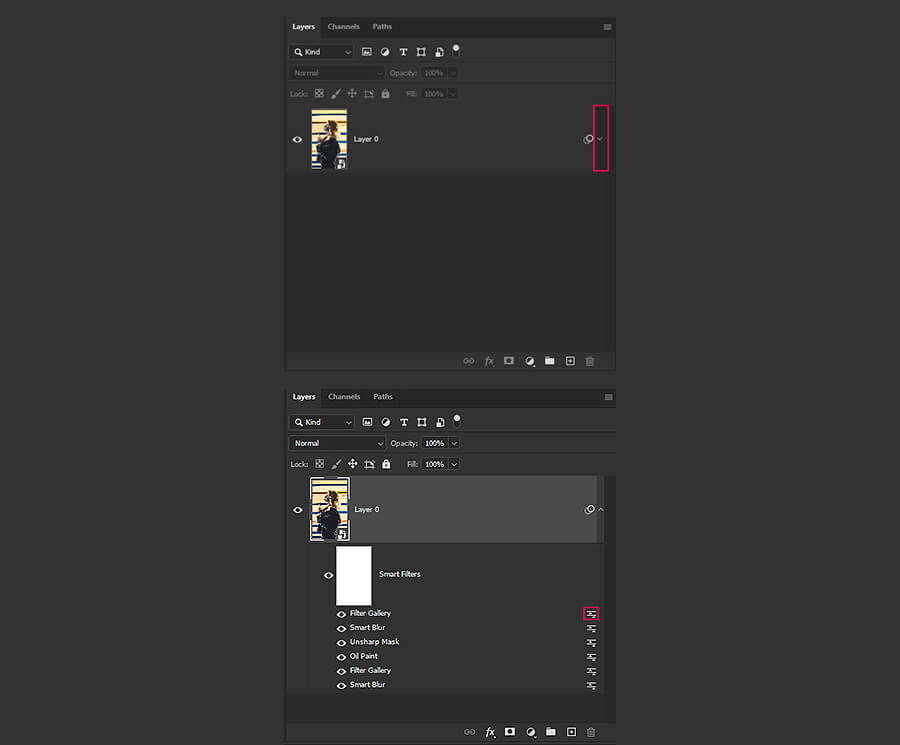
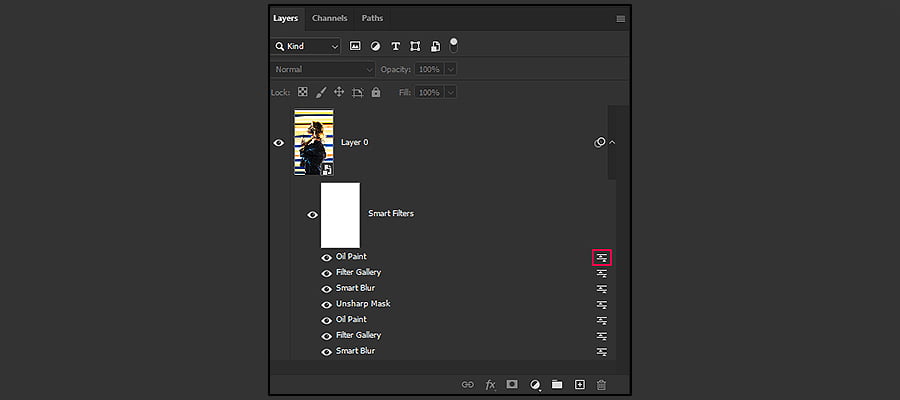
Step 10
To display the layer effects, click the arrow down in the Layers Panel and double-click the “Edit Filter Blending Options” button on the first effect in the list.
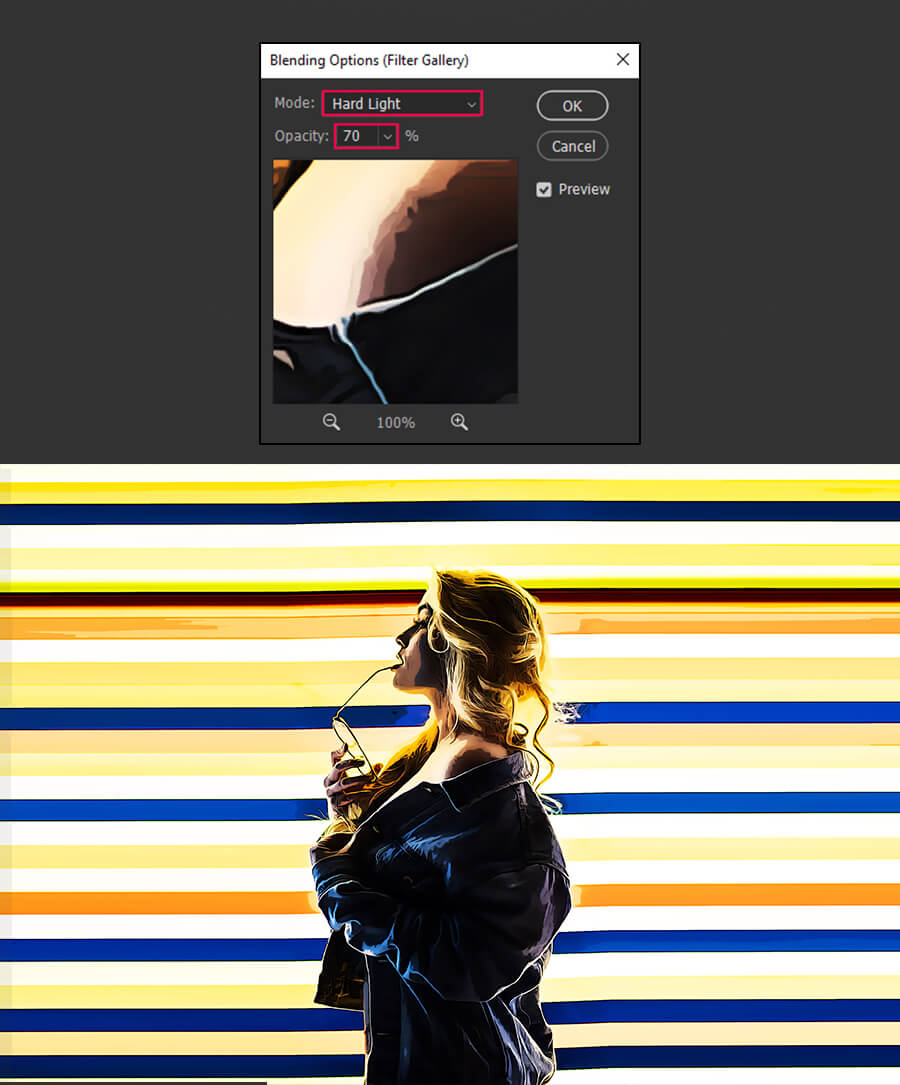
Step 11
Set the Mode to “Hard Light” in the Blending Options window, reduce the Opacity to roughly 70%, then click OK.
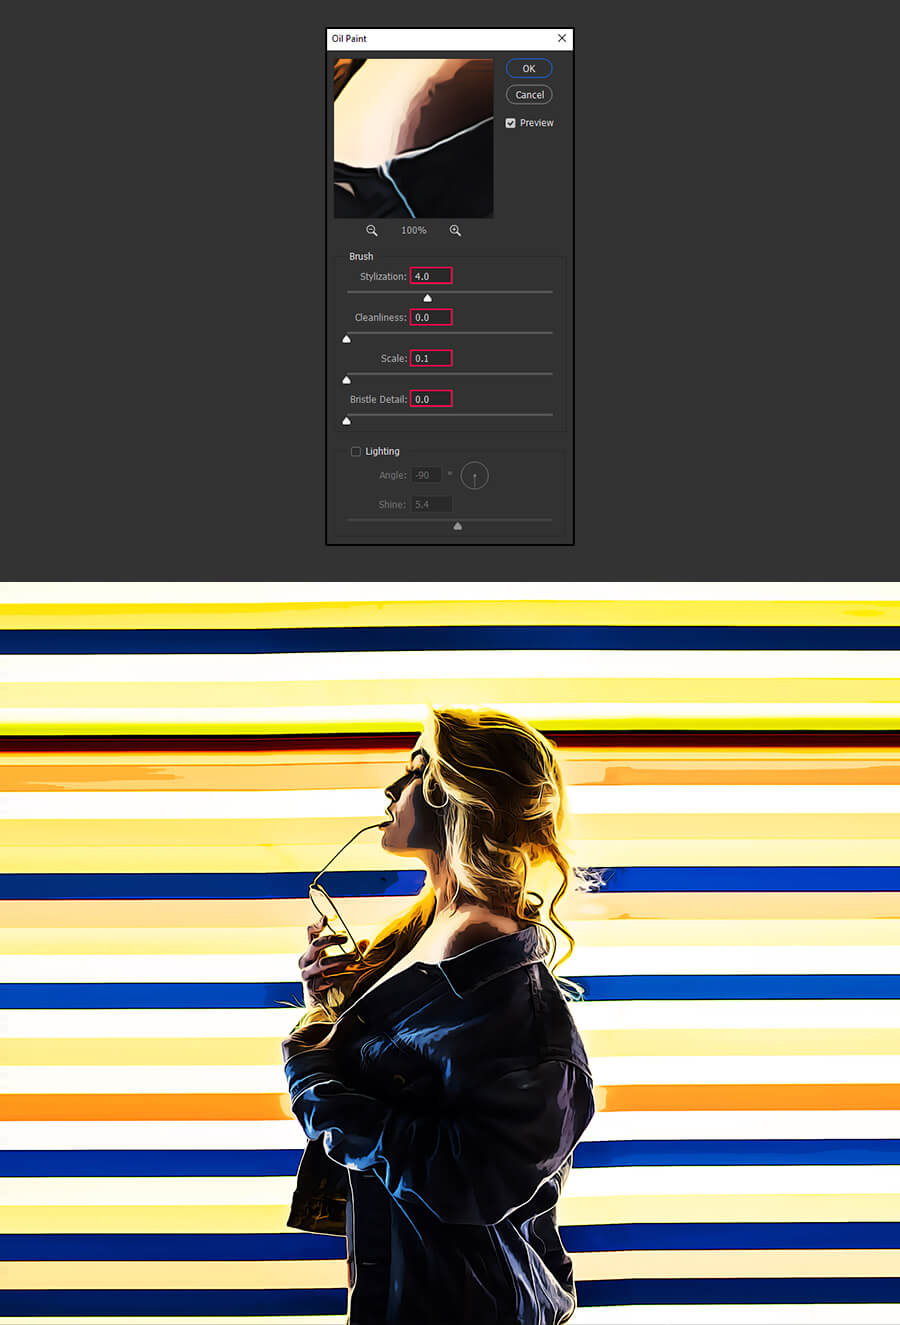
Step 12
Go to Filter > Stylize > Oil Paint. Apply the settings shown below and then click OK.
Step 13
On the first effect in the list, double-click the “Edit the Filter Blending Options” icon.
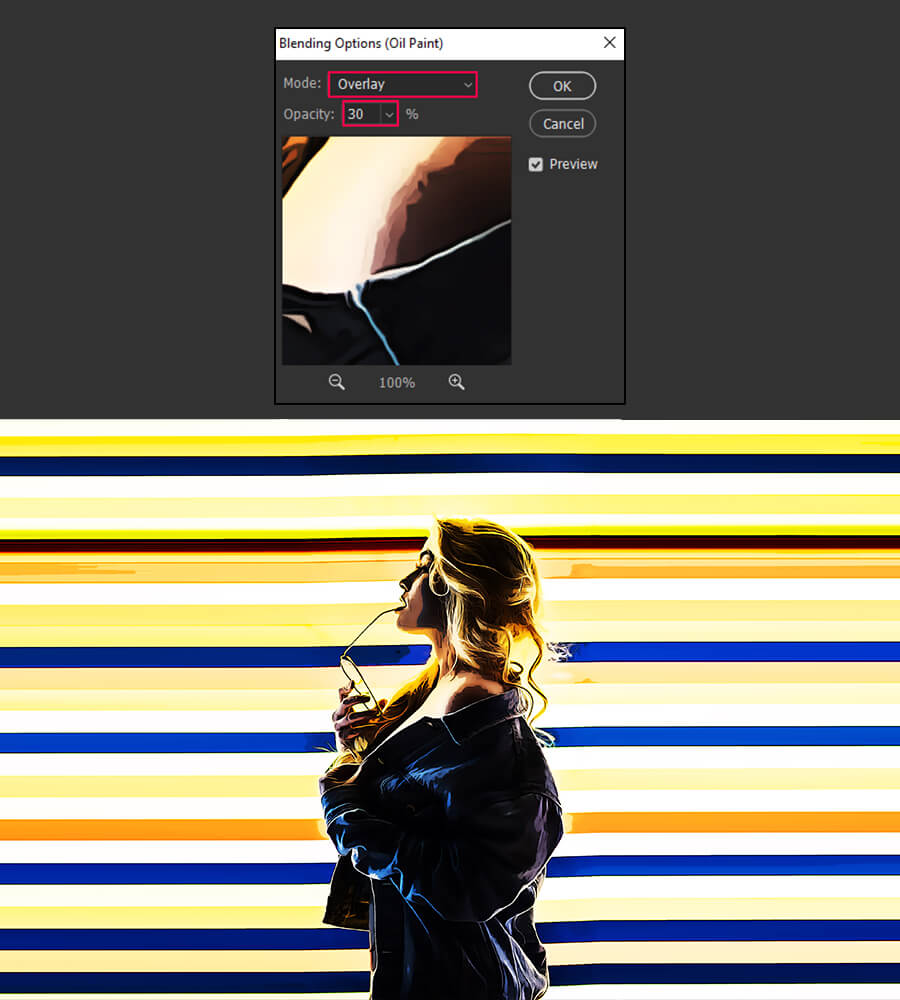
Step 14
Set the Mode to “Overlay” in the Blending Options window, reduce the Opacity to roughly 30%, then click OK.
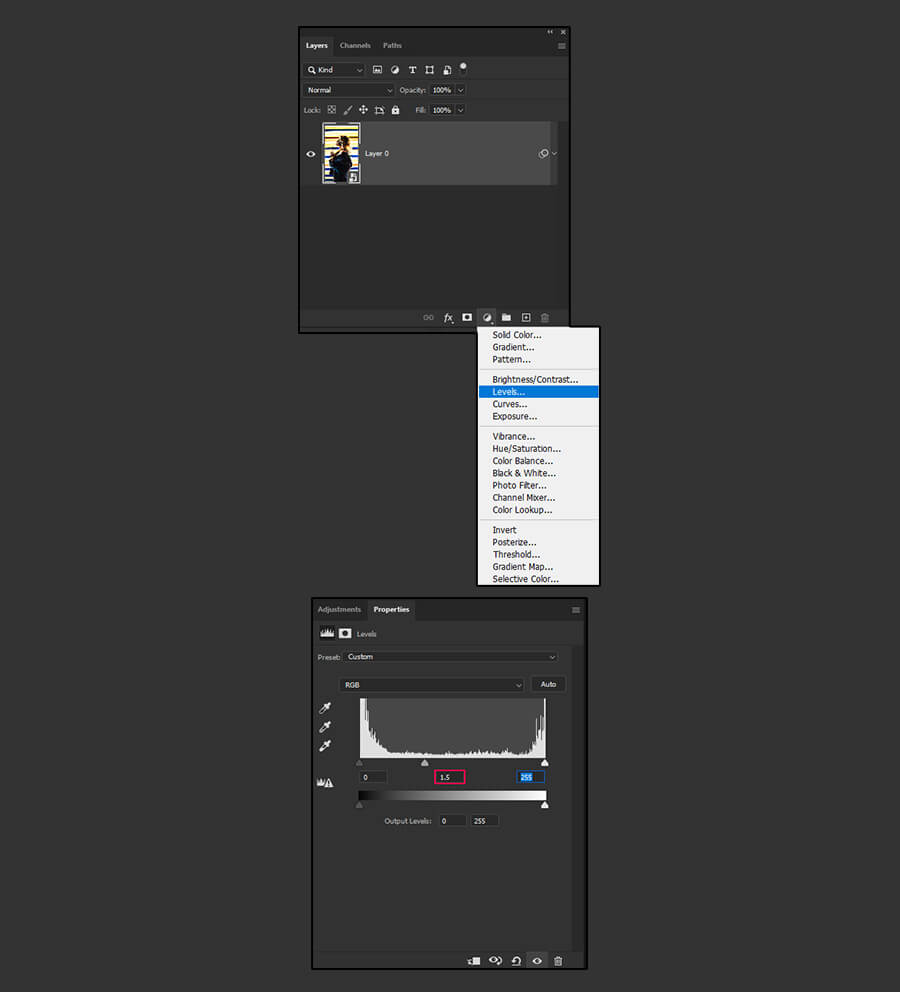
Step 15
Head over to your Layers Panel and add a Levels Adjustment Layer. Set the Midtones Input Level to 1.5.
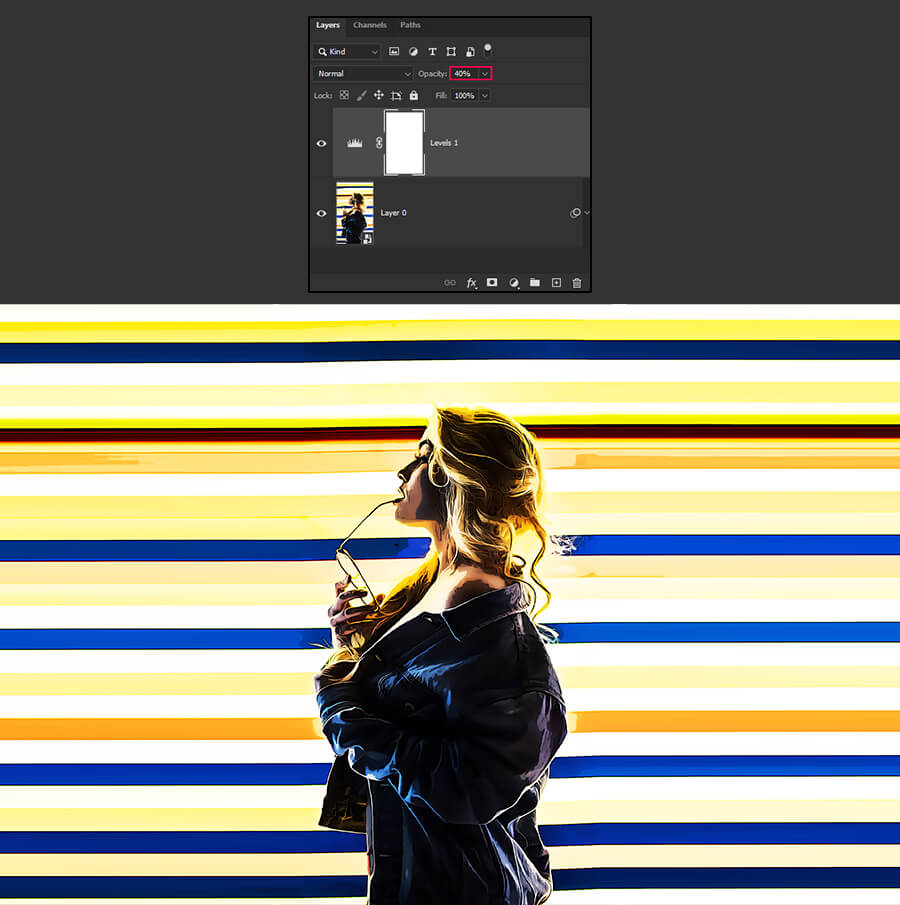
Step 16
To finish with our design, reduce the Levels Layer Opacity to 40%
Extra Tip
Because we previously converted the picture into a Smart Object, we can easily apply this effect to any other image. Simply double-click on the layer thumbnail, position your image in the newly opened document, save and shut the smart object, and you’ll have your new image with a cartoon effect in no time.