In this tutorial, you will learn how to match fonts in Photoshop so that you can use them in your designs.
Photoshop‘s Match Fonts feature was first introduced in the CC 2015.5 edition.
Match Font removes the guesswork from identifying typefaces by allowing Photoshop CC to handle all of the work for you.
Photoshop employs clever image analysis to detect a typeface that is utilized in a shot, thanks to the magic of Adobe Sensei (Adobe’s Artificial Intelligence).
You will receive a set of matching or comparable fonts from your computer once Photoshop analyzes the image using machine learning technology.
In this tutorial, I will be using Photoshop 2022.
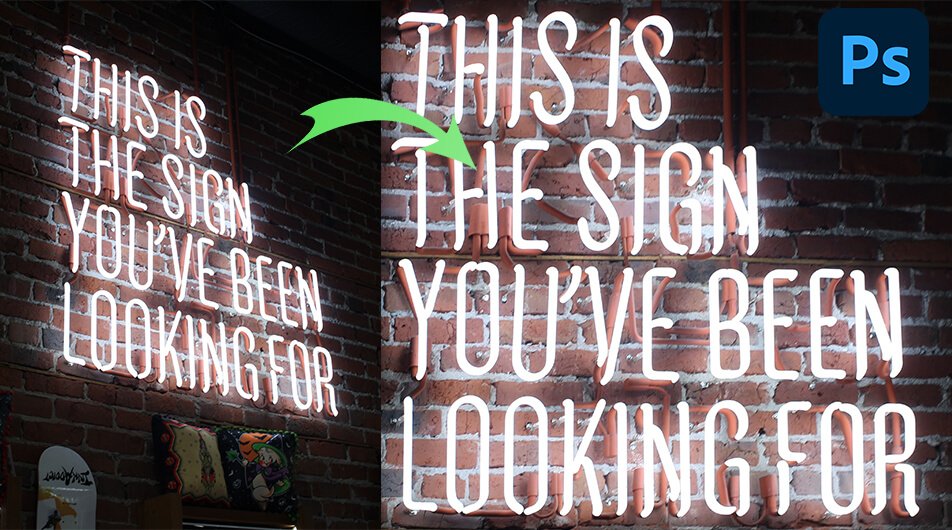
For this short tutorial, I will be using this image:

Click here to download the image to follow along.
How To Match Fonts In Photoshop From An Image
Step1: Correct The Fonts Perspective
Sometimes, the image you are using is too distorted or the perspective angle is too extreme and it makes it complicated for Photoshop to identify the font.
Simply use the Perspective Crop Tool which is nested under the Crop Tool to correct the perspective.
Simply click and drag the corner handles to align the text with the angle of the surface where the text lays.
Then press enter.

This is how it looks once the perspective is corrected.

Step 2: Open The Match Font Window
Go to Type > Match Font. This will open the Match Font window and you will see the selection box over the image.

Step 3: Select Your Text with The Match Font Selection Box
Adjust the text selection box so that it includes a single line of text. Select a single line of typeface and style. Don’t mix typefaces and styles inside the Match Font selection.
Also, ensure that the Selection Box is cropped to the text’s left and right boundaries.

Step 4 – Select The Font From The Match Font Window
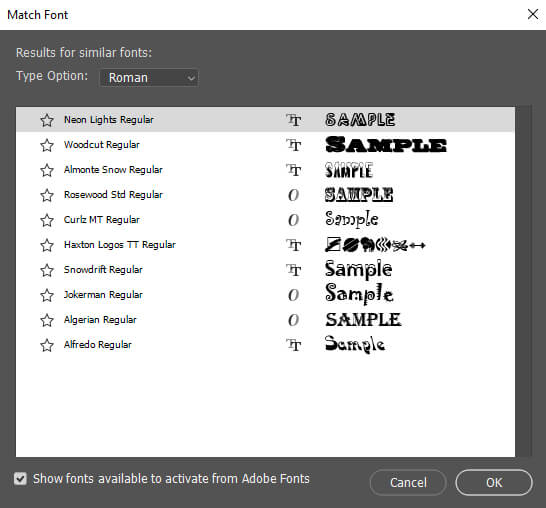
After you place the Match Font Selection Box closely around the text, Photoshop generates a list of fonts that are similar to the font in the image, including fonts from Adobe Fonts.
Fonts from Adobe Fonts will need to sync to your Creative Cloud account.
To only view fonts installed on your computer uncheck Show Fonts Available To Activate from Adobe Fonts.
In the results, click on the font that looks the most like the font in the image.
After you press OK Photoshop will select the font automatically.
And we are done!
After following this tutorial, you should be able to Match Fonts in Photoshop. I hope you found this guide useful and easy to follow. If you have any questions or suggestions please let me know in the comments down below and I will get back to you as soon as possible.