In this super quick and easy tutorial, I’ll teach you how you can mask all objects with one click in Photoshop.
This technic is very simple and at the same time very useful.
If you’re in a rush and your client or boss is waiting for you to send a project, this short trick might come in handy.
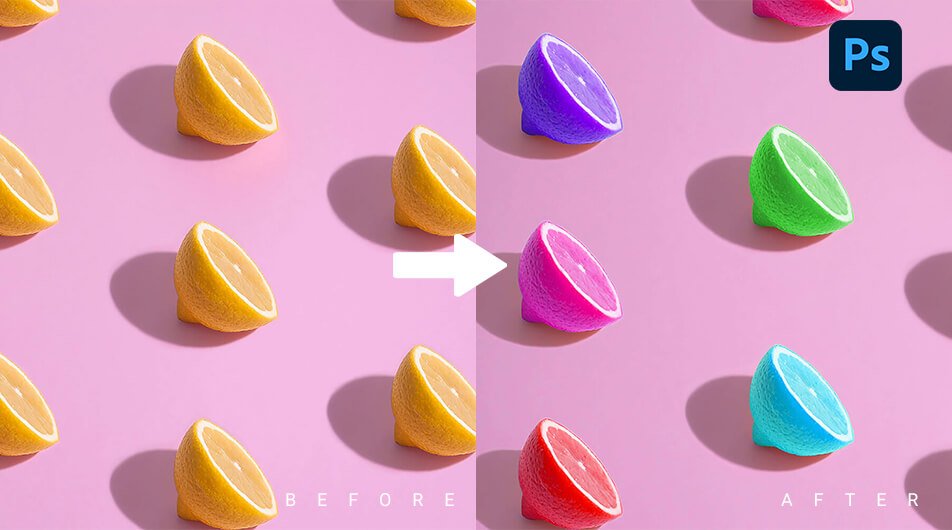
In this lesson, I’ll show you how Photoshop auto-generates mask layer groups from objects. Then I’ll change the color of each of these items.
For this process, I’ll use Photoshop 2022.
Click here to download the image I’m using to follow along.
Final Image
Drag The Slider To See Before & After
How to Mask all Objects in Photoshop in One Click
Step 1: Mask All Objects
There are 2 ways you can achieve that. Either go to Layer > Mask All Objects or simply right-click on the background layer located in the layer panel and select Mask All Objects.
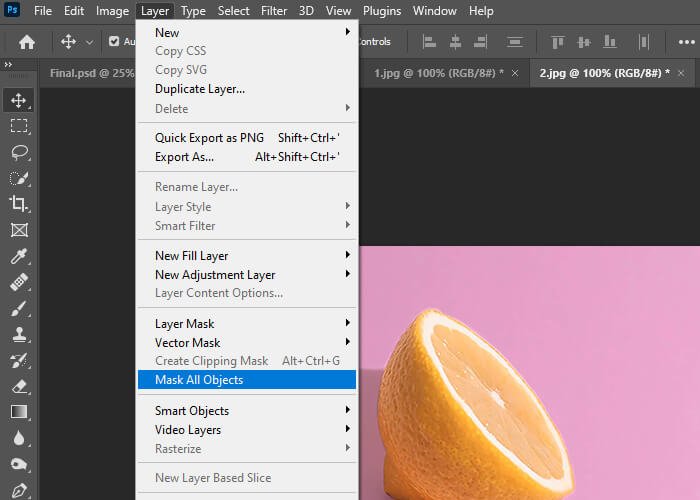
or
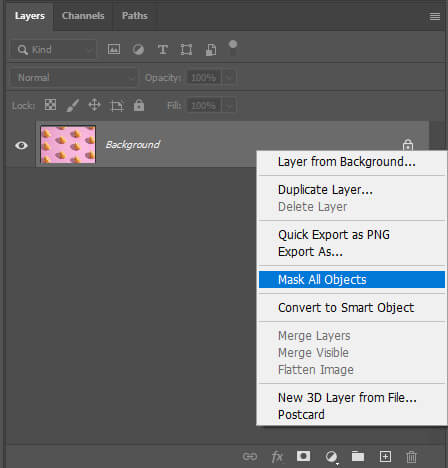
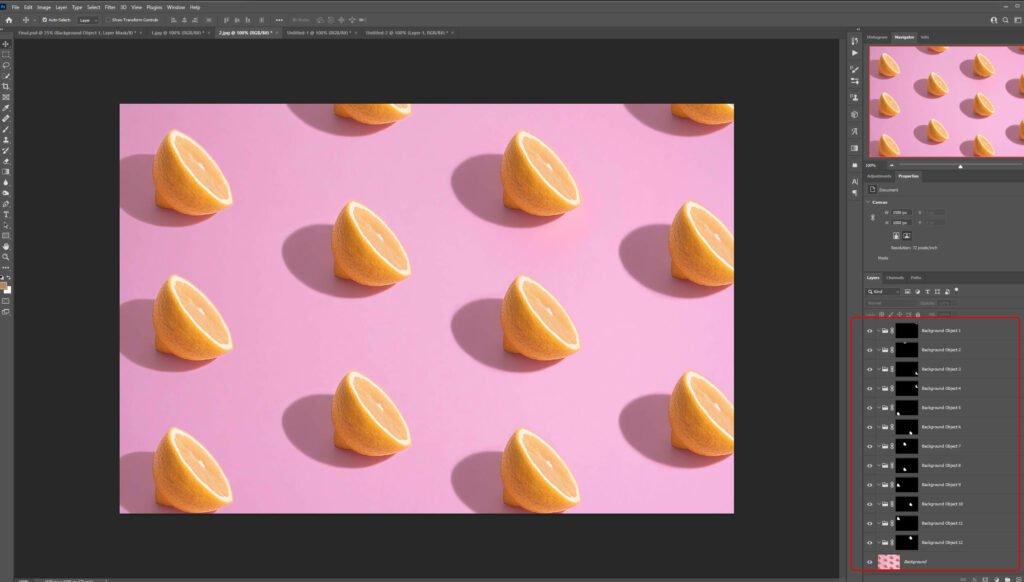
You’ll now notice that Photoshop has auto-generated mask layer groups from objects.
You now have full control and can edit each one of these items.
Steps 2: Add a Hue/Saturation Adjustment Layer
You can now basically add any modification you want to the masked objects.
In this tutorial, I have decided to modify the color of each lemon.
First, hold CTRL + Left Click on any of the masks to identify which object is selected.
Once you have identified your object press CTRL + D to deselect.
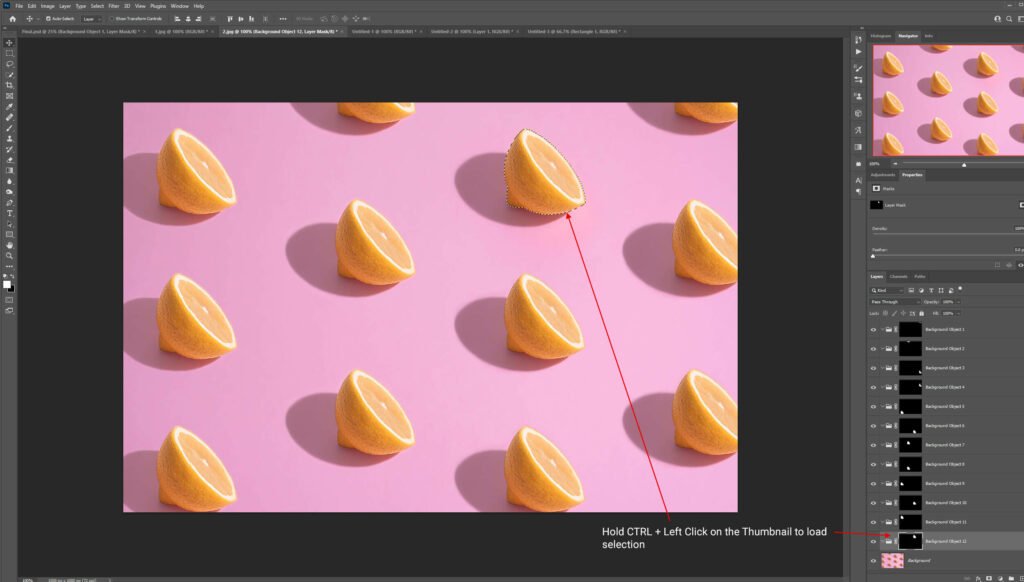
Now you can easily edit each object.
Add a Hue/Saturation Adjustment Layer and change the color of the lemons. Repeat that step for each lemon.
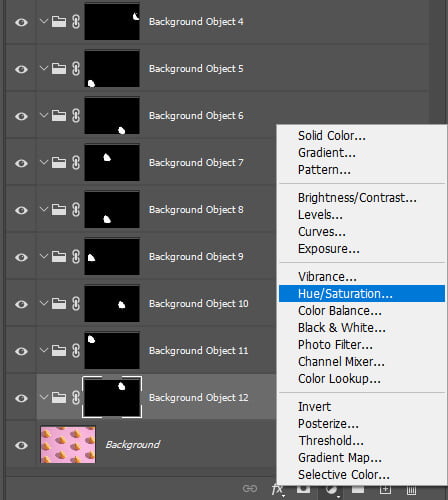
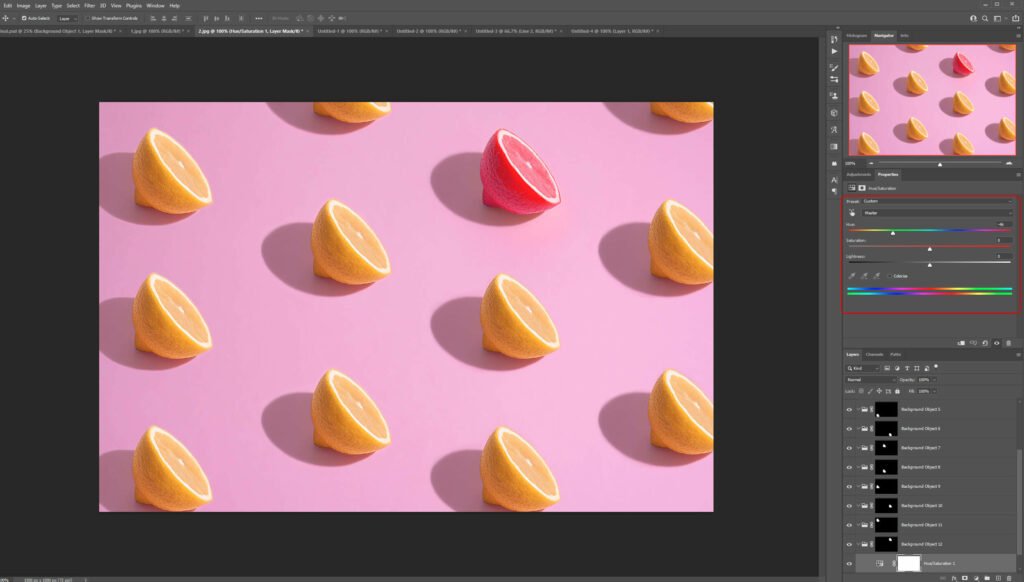
Here’s the final result after I edited every lemon on the image.

And We Are Done!
After following this tutorial, you should be able to Mask All Objects in One Click! in Photoshop. I hope you found this guide useful and easy to follow. If you have any questions or suggestions please let me know in the comments down below and I’ll get back to you as soon as possible.

