Adding gradient swirl effects to your digital art is a popular design trend right now. This tutorial will teach you how to make stunning gradient swirl using a basic approach that can be utilized in a variety of ways to bring movement and brightness to your designs.
In this tutorial, I will be using Photoshop 2022 but any version of Photoshop will work.
Video Tutorial
This is what we will be creating. Note that you will also be able to edit the color of the swirl as you wish.

How To Create A Gradient Swirl In Photoshop
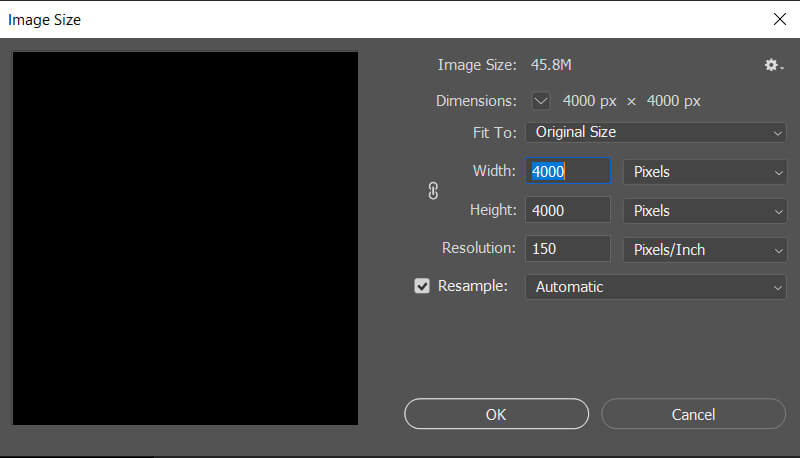
First, create a background for our effect. Open a new Photoshop file, and fill the background with black.
Step 1: Create A Motif
To create our motif, we will draw 5 ellipses and 1 square.
Select the Ellipse Tool from the Tools panel, or press the letter U on your keyboard to quickly select it with the shortcut.

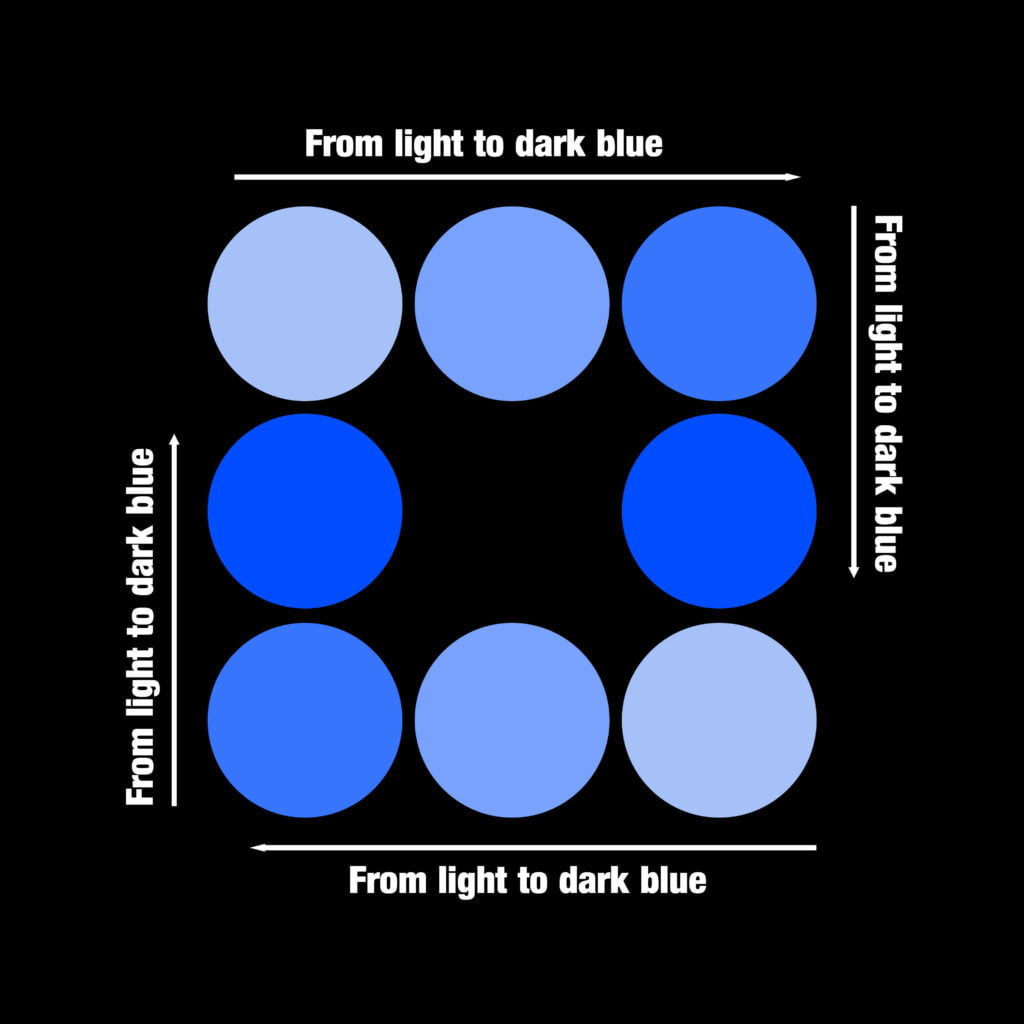
To draw a perfect ellipse hold down shift while using the Ellipse tool. Create 5 ellipses as shown in the image below. Make sure the ellipses have no strokes.


We will now color these ellipses with the color of your choice. In this tutorial, I will be using a blue color. I used 4 tints of blue as shown in the image below.
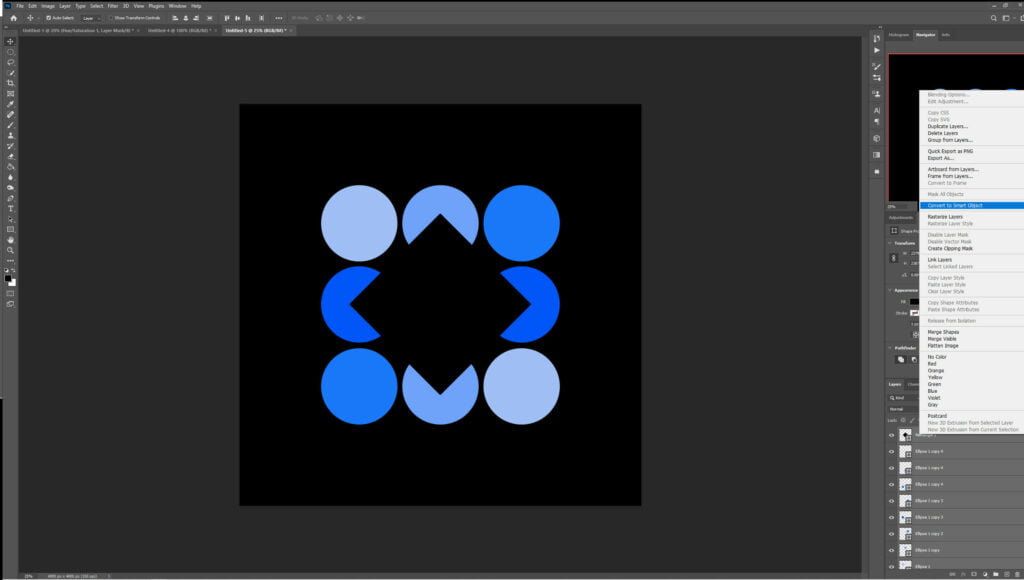
Let’s add the square to our pattern. Select the Rectangle Tool from the Tools panel, or press the letter U on your keyboard to quickly select it with the shortcut. We will then rotate the square using Free Transform by pressing Ctrl +T. To draw a perfect square hold down shift while using the Rectangle tool.

Select all the layers in the “Layer Panel” right click and convert these layers into a smart object. You will now notice that all the shapes are on the same layer.
We will now duplicate this layer and shrink it down. To do so, press “Ctrl J”. Select this new layer in the Layer Panel and resize it using the Transform Tool by pressing “Ctrl T”.

Next, rotate this layer by using the Free Transform Tool by pressing “Ctrl +T”, right-click, and rotate it by 90 degrees clockwise.
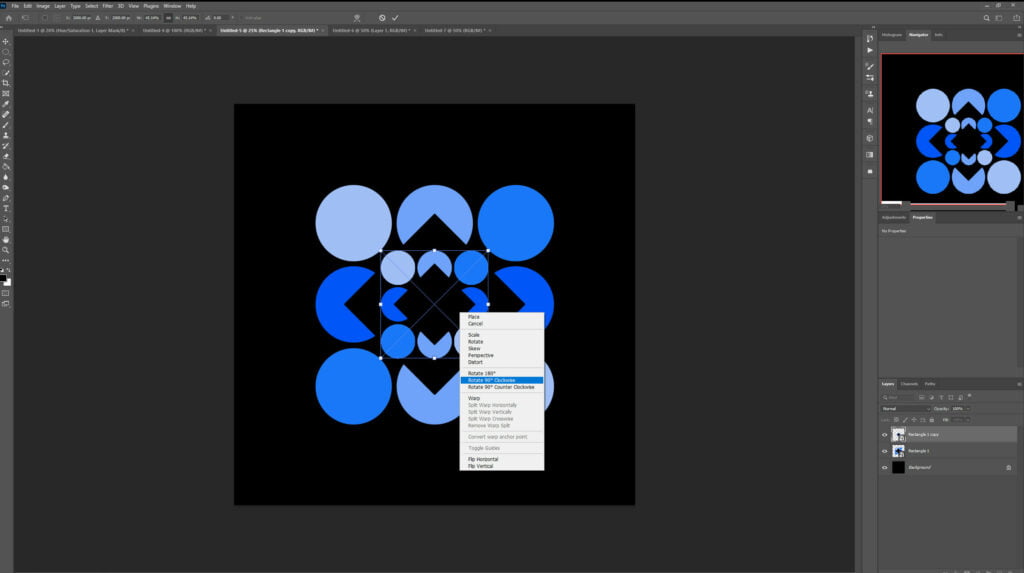
To finish with our motif, merge the layers together once again so that we can start applying effects for our gradient swirl. Select all your layers but the background, right-click > merge layer.
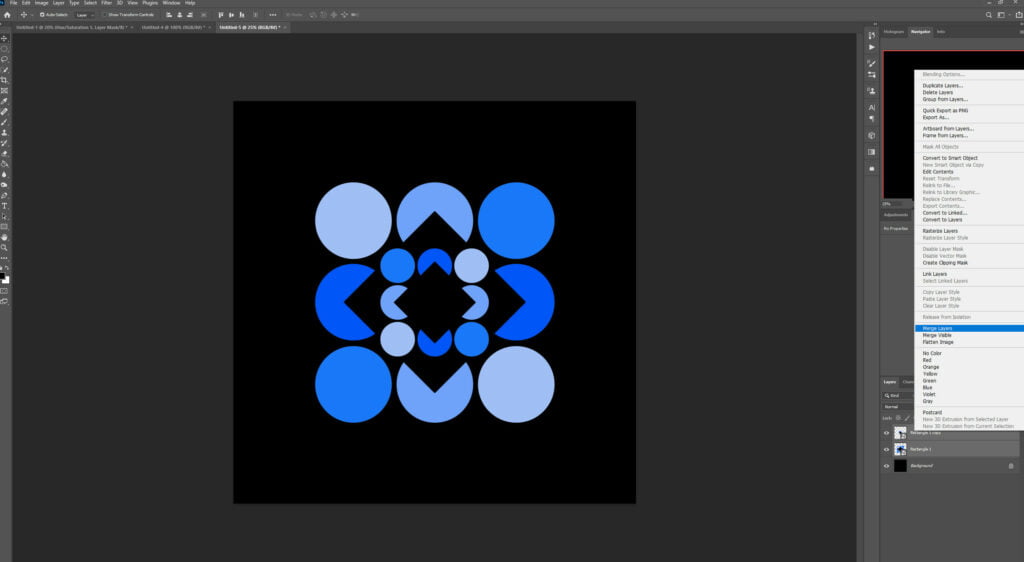
Step 2: Add Effects
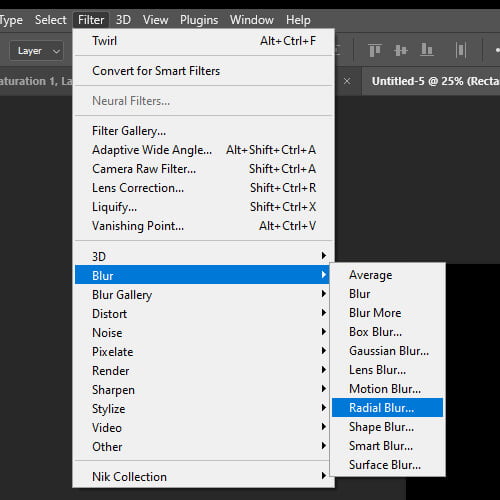
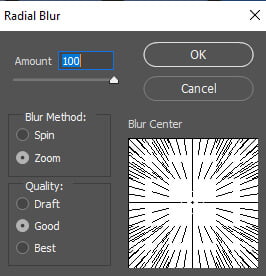
We will now add a radial blur effect. Go to Filter > Blur > Radial Blur. Copy the settings from the right image below.

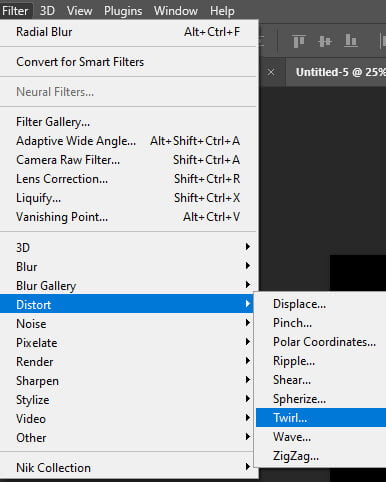
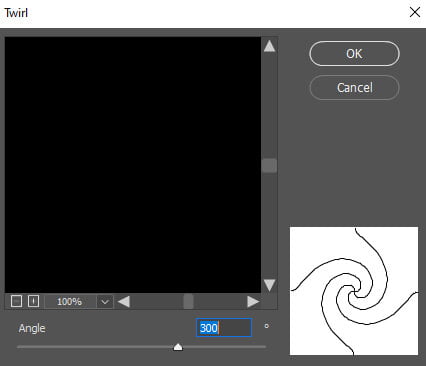
We are almost done. We just need to add a Twirl Filter. Go to Filter > Distort > Twirl. Copy the settings from the right image below.

We are pretty much done here but let’s say you want to change the color of your swirl. I will show you how to do that by adding a Hue/Saturation Adjustment Layer. To do so click on Adjustment Layer Icon in the bottom right corner and adjust the hue to the color that you want.
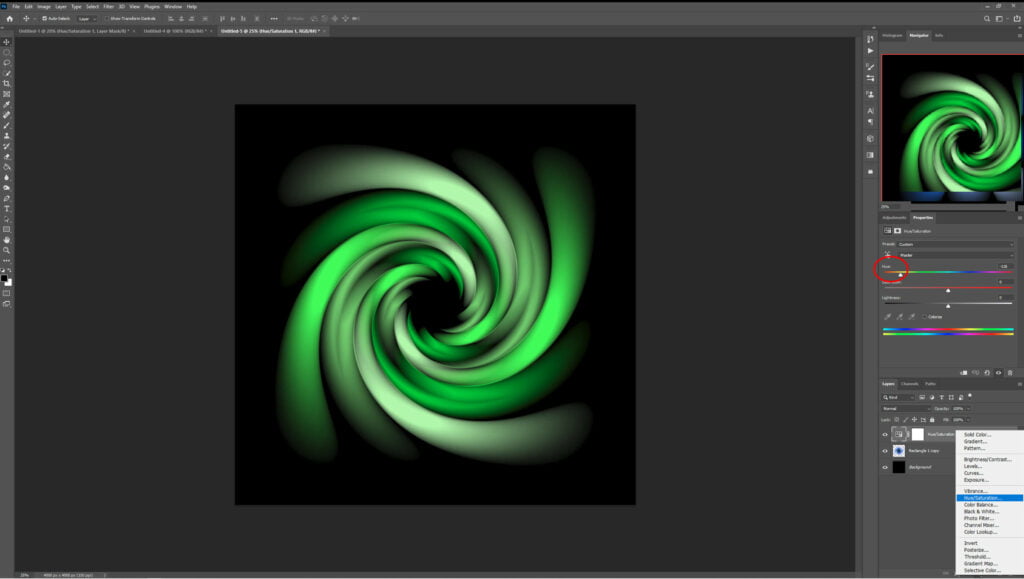
And we are done! After following this tutorial, you should be able to create a Gradient Swirl In Photoshop. I hope you found this guide useful and easy to follow. If you have any questions or suggestions please let me know in the comments down below and I will get back to you as soon as possible.


