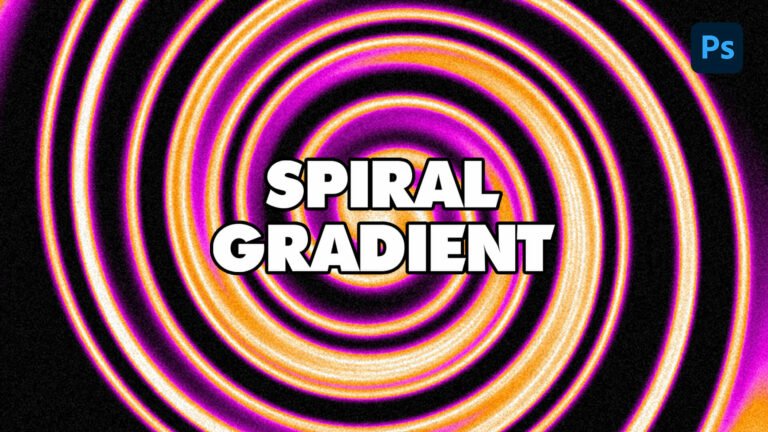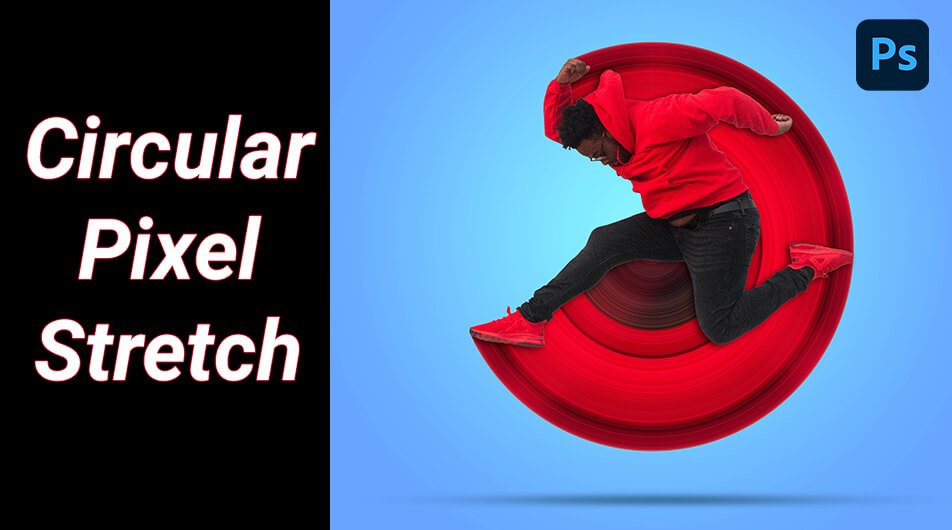
Do you want to know how to create a circular pixel stretch in Photoshop? In today’s tutorial, I’ll be showing you how to achieve that in a few steps.
This technic is eye-catching and can really make your design pop.
In this process, I’ll be using Photoshop 2022.

Click here to download the image and follow along.
How to Create a Circular Pixel Stretch In Photoshop
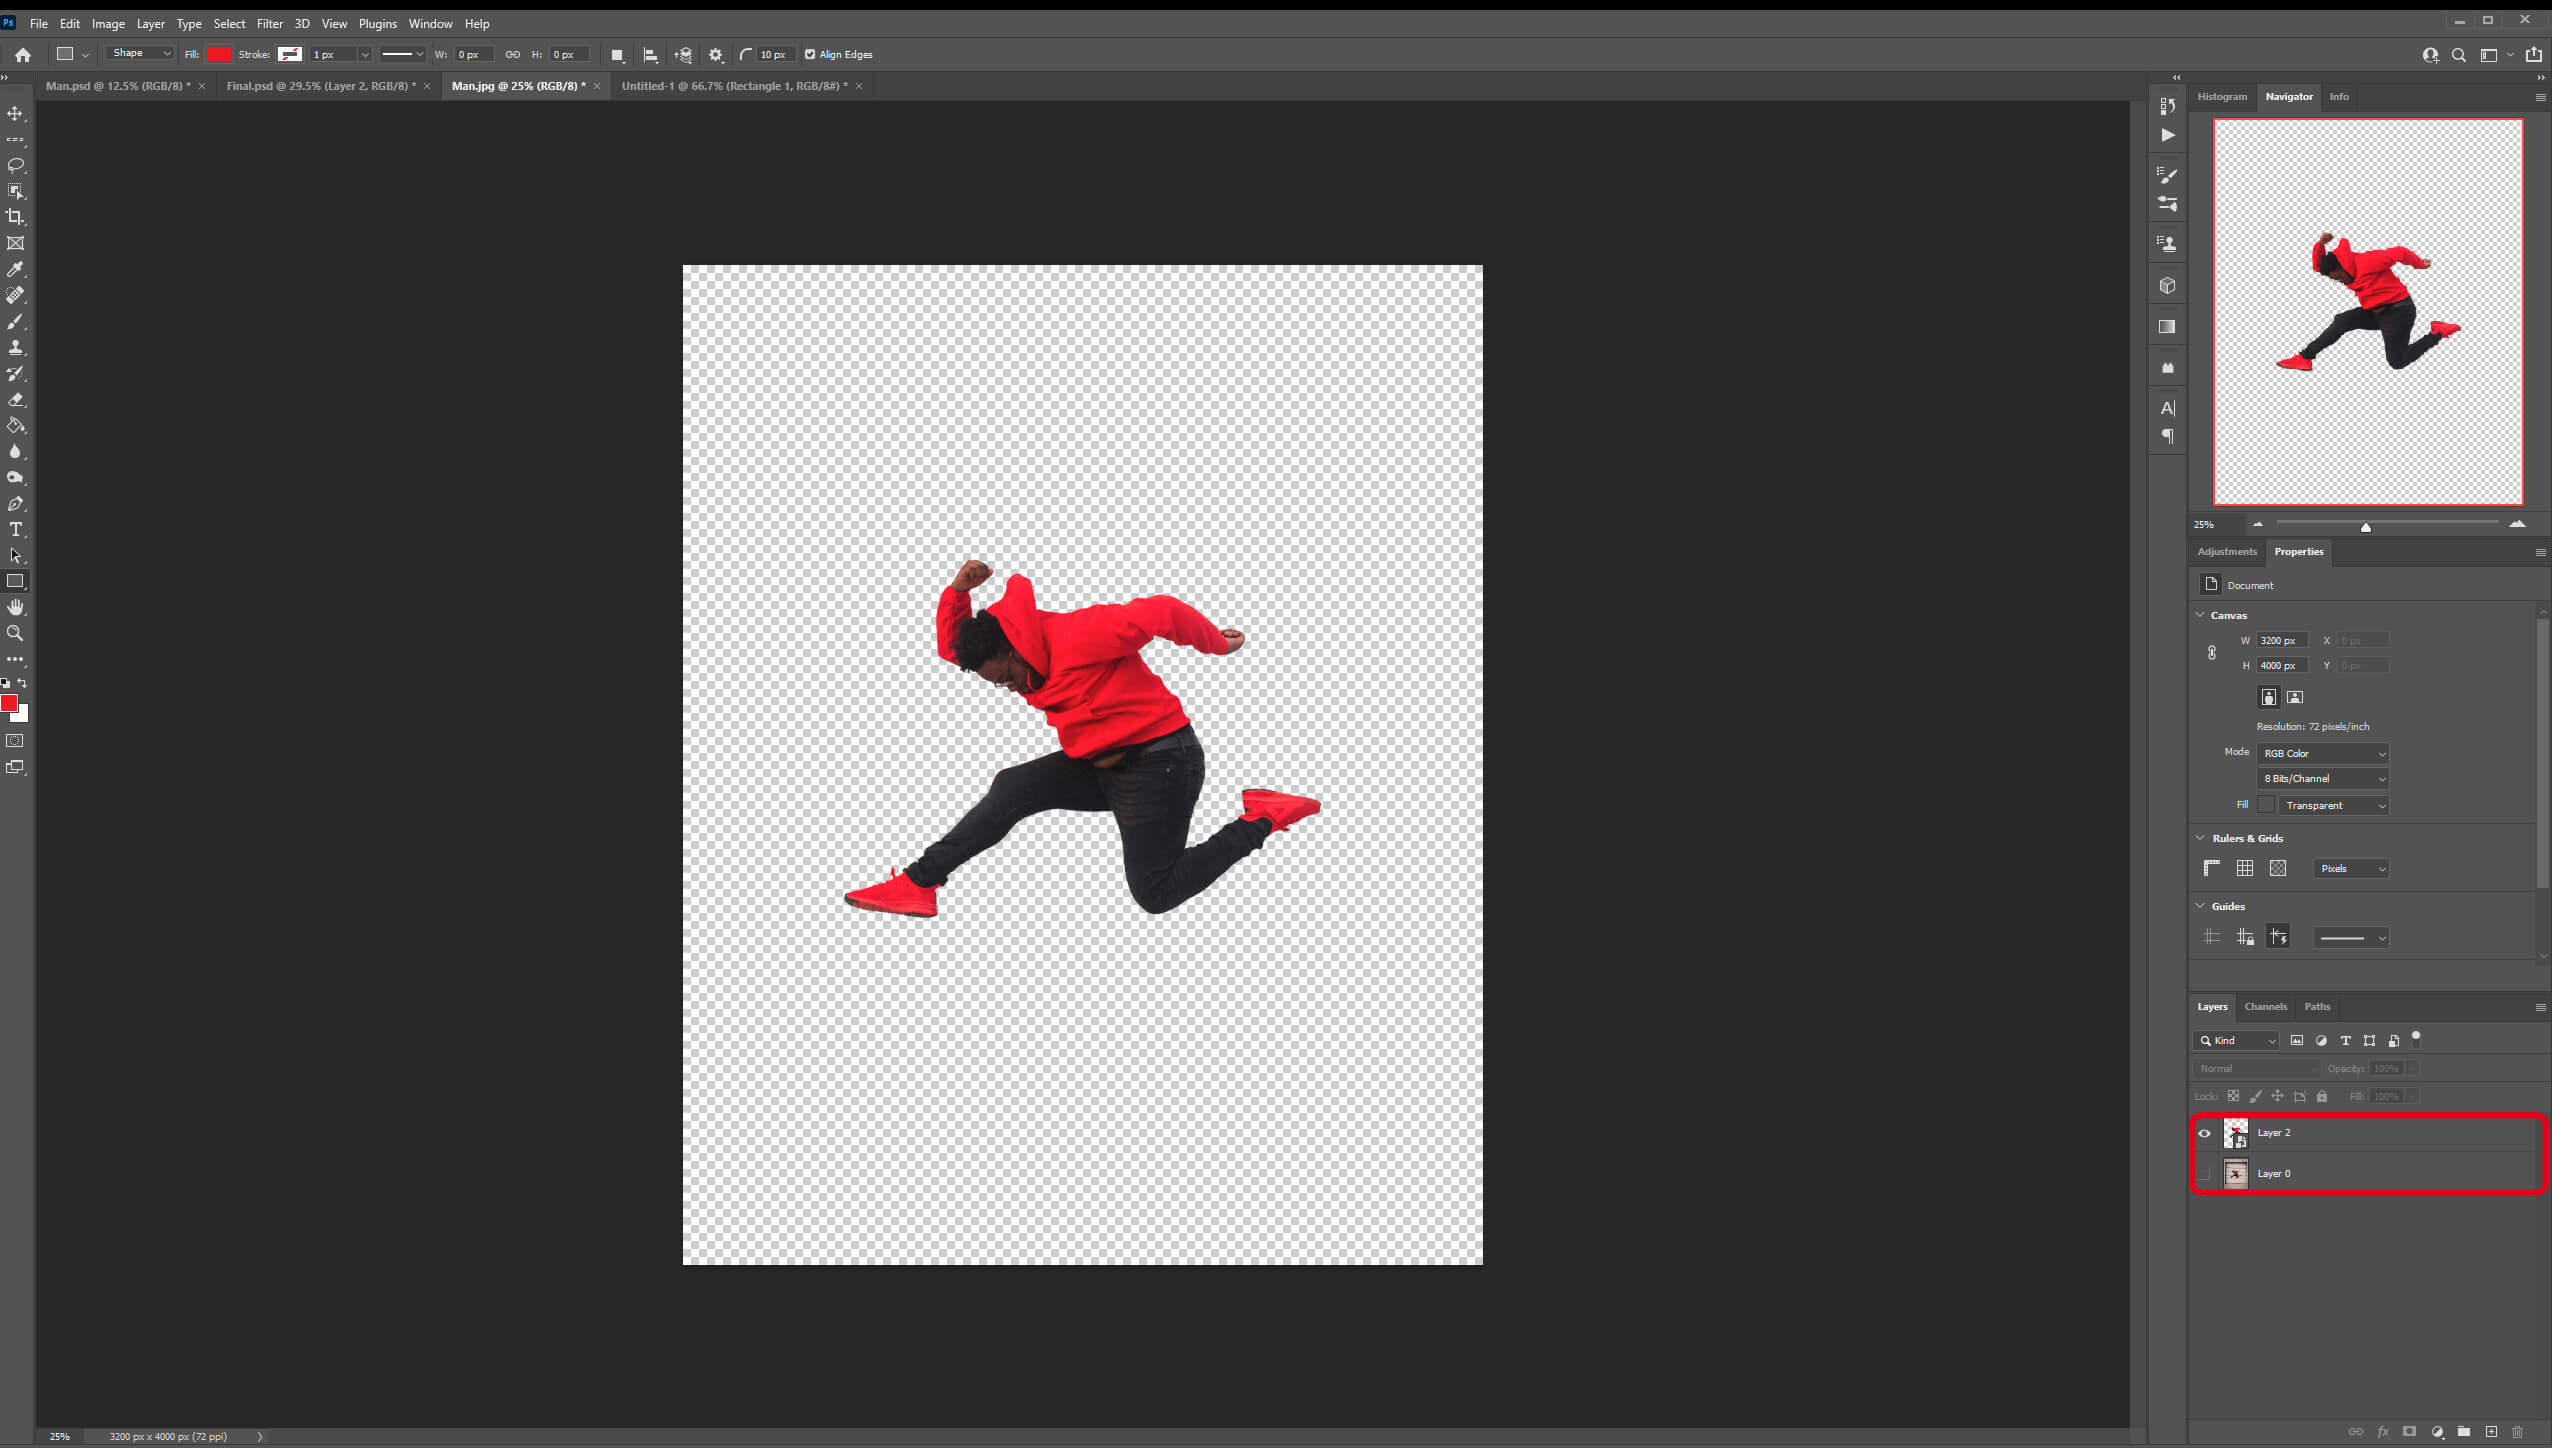
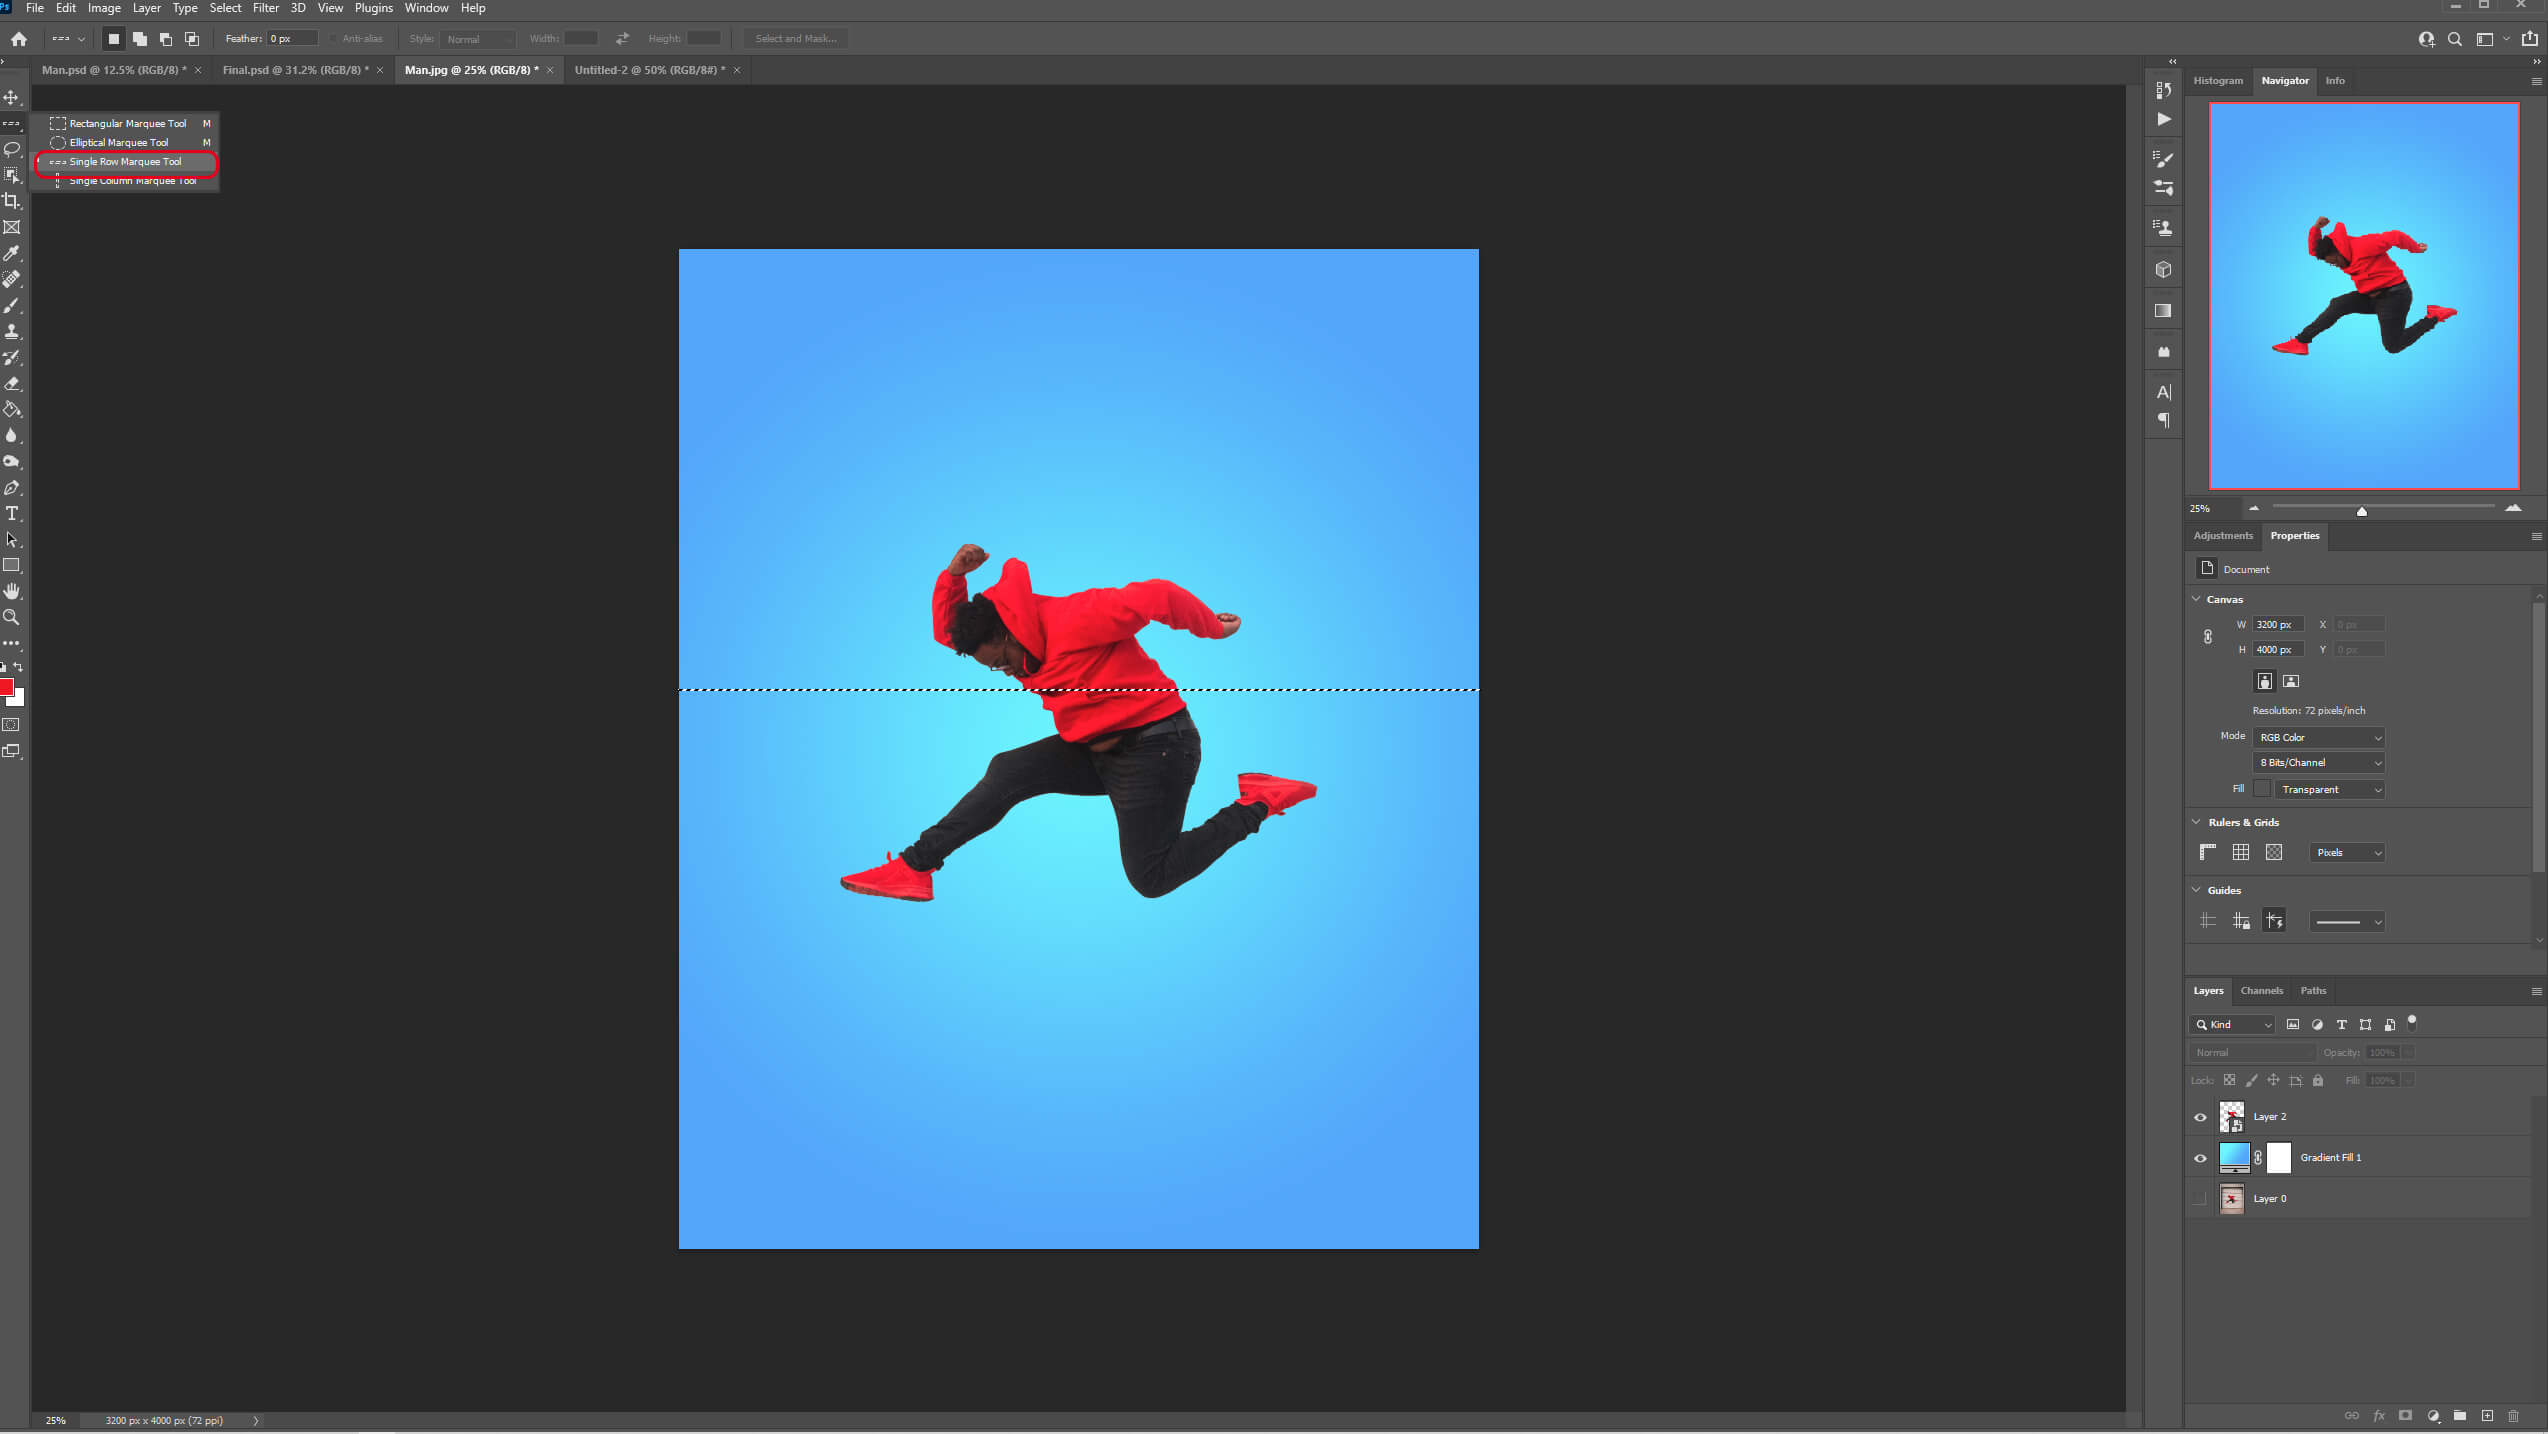
Step 1: Select the subject from the image
Open your image in Photoshop and select the subject with any Selection Tool. In my case, the quick action select object did a great job.
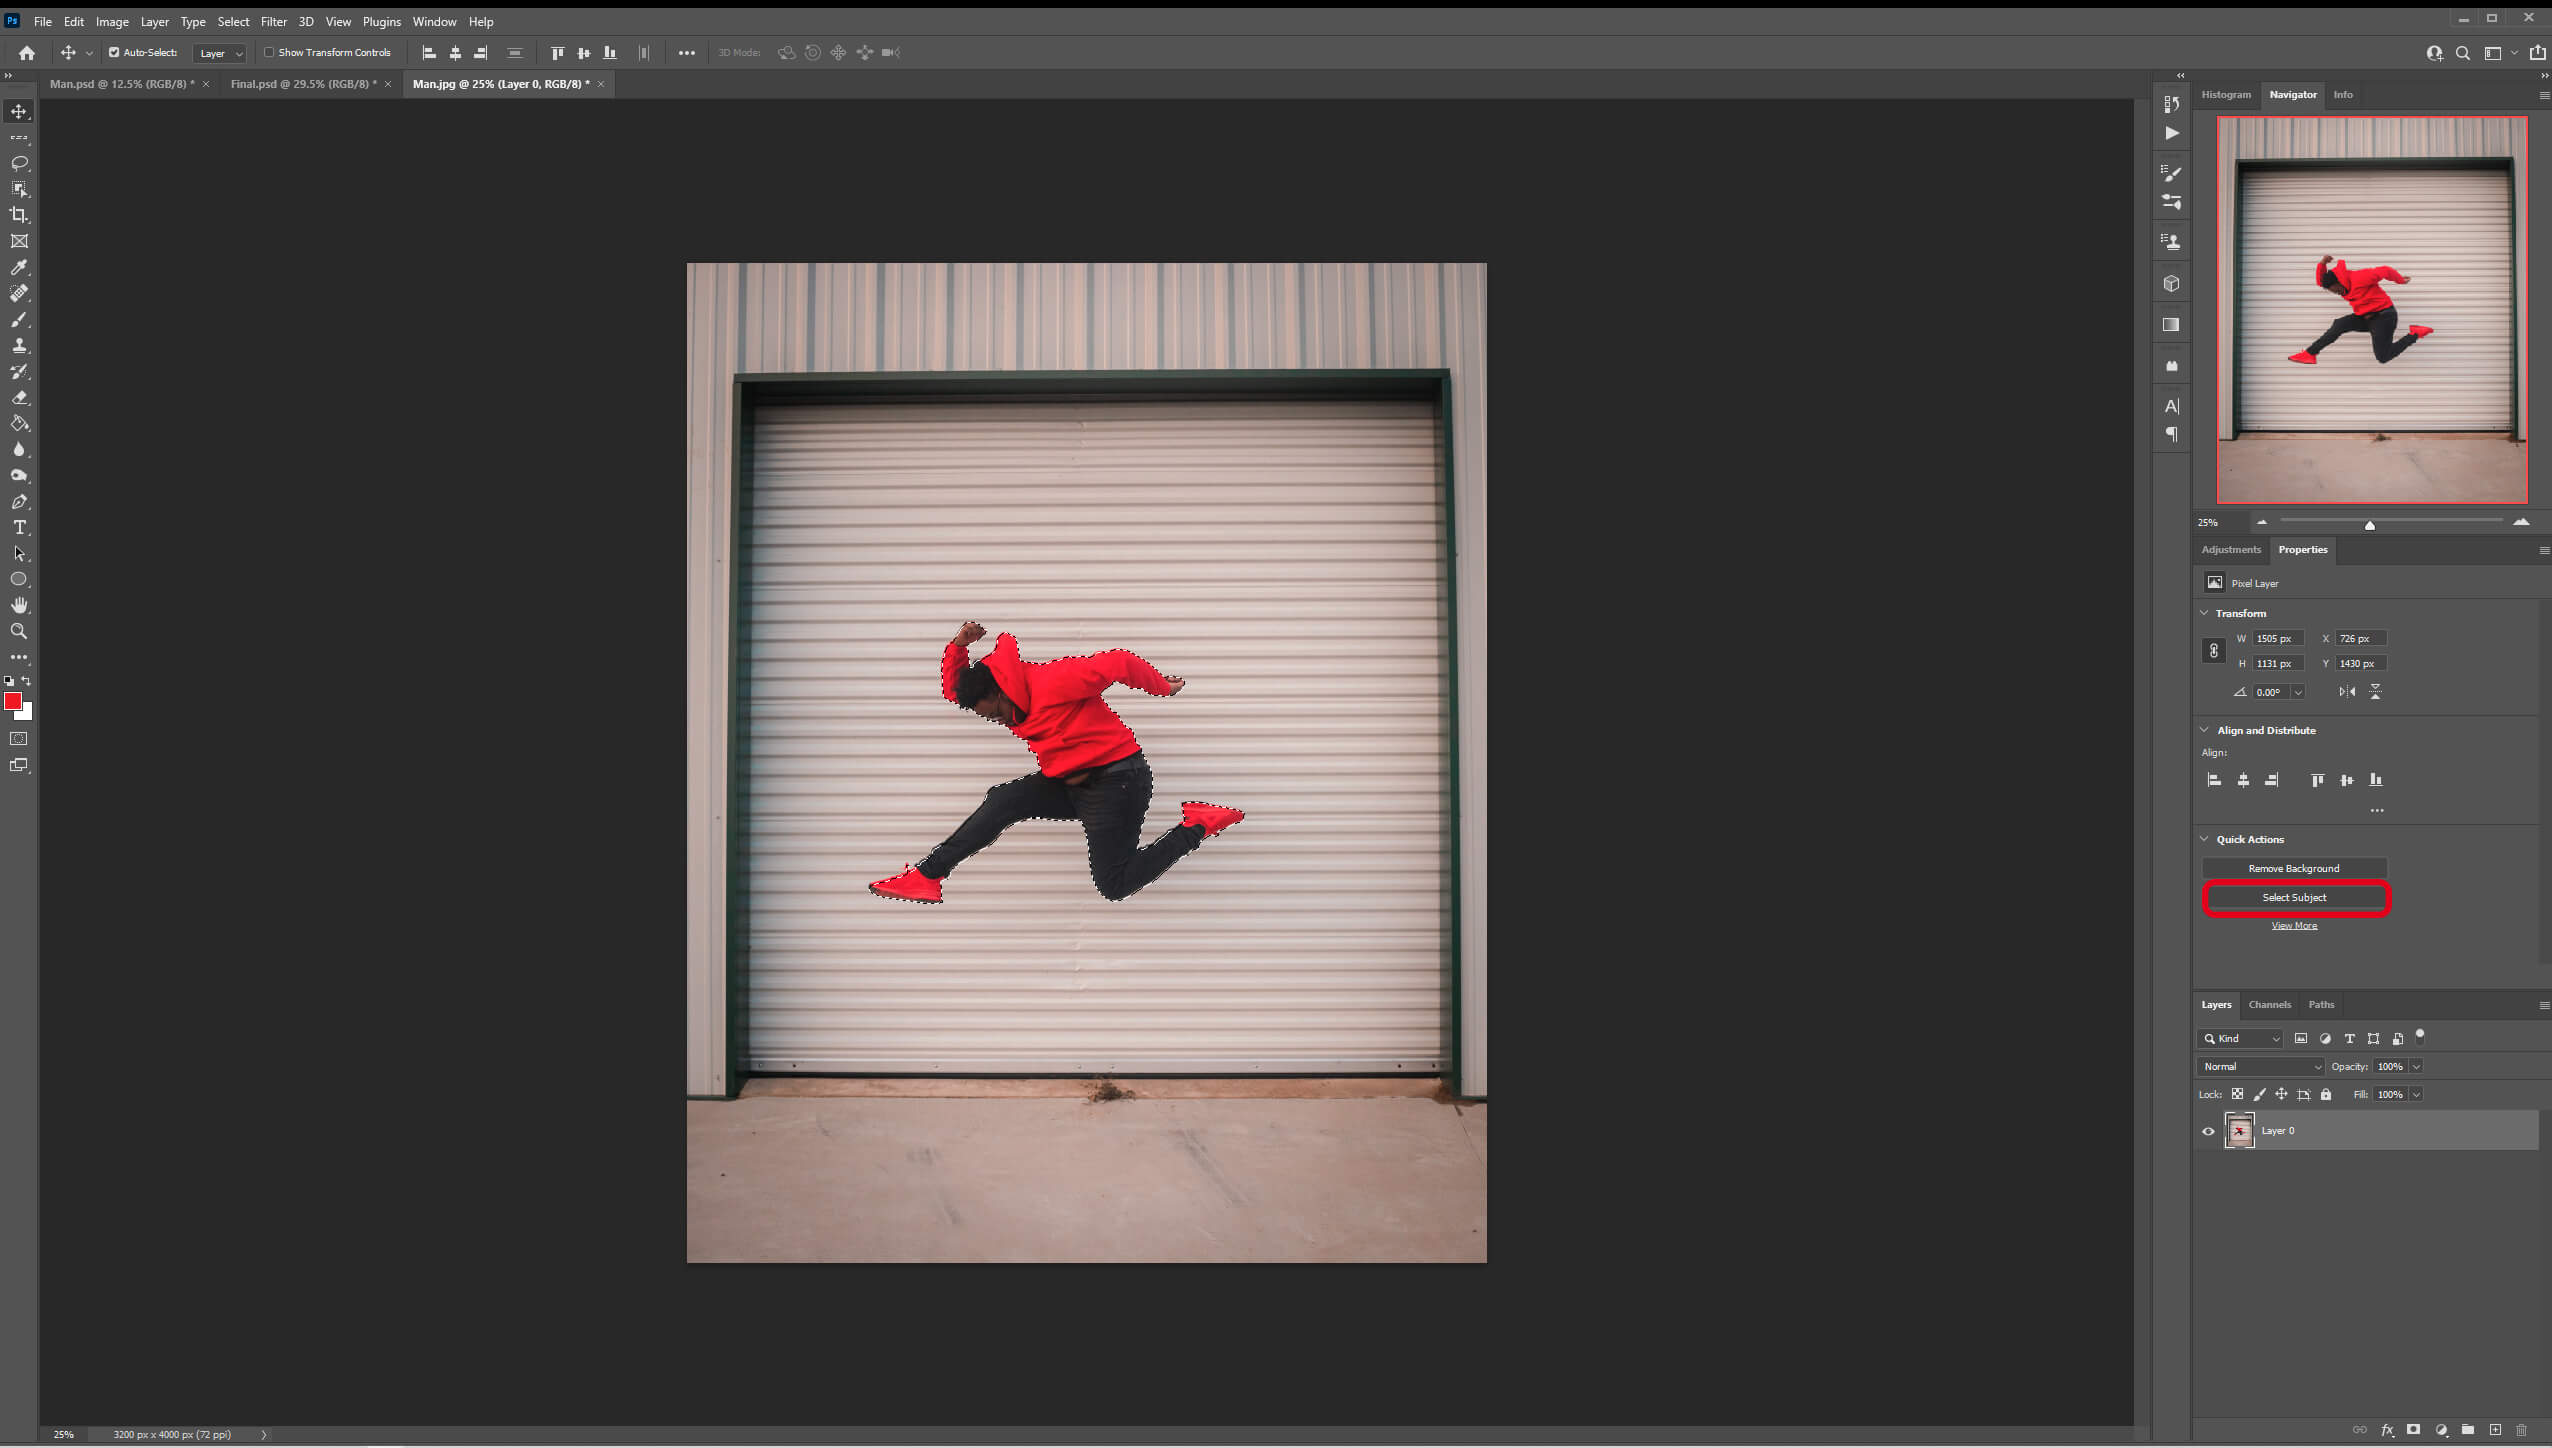
Next, press Ctrl + J to copy the selection in a new layer and turn off your background layer.
Step 2: Add a Radial Gradient
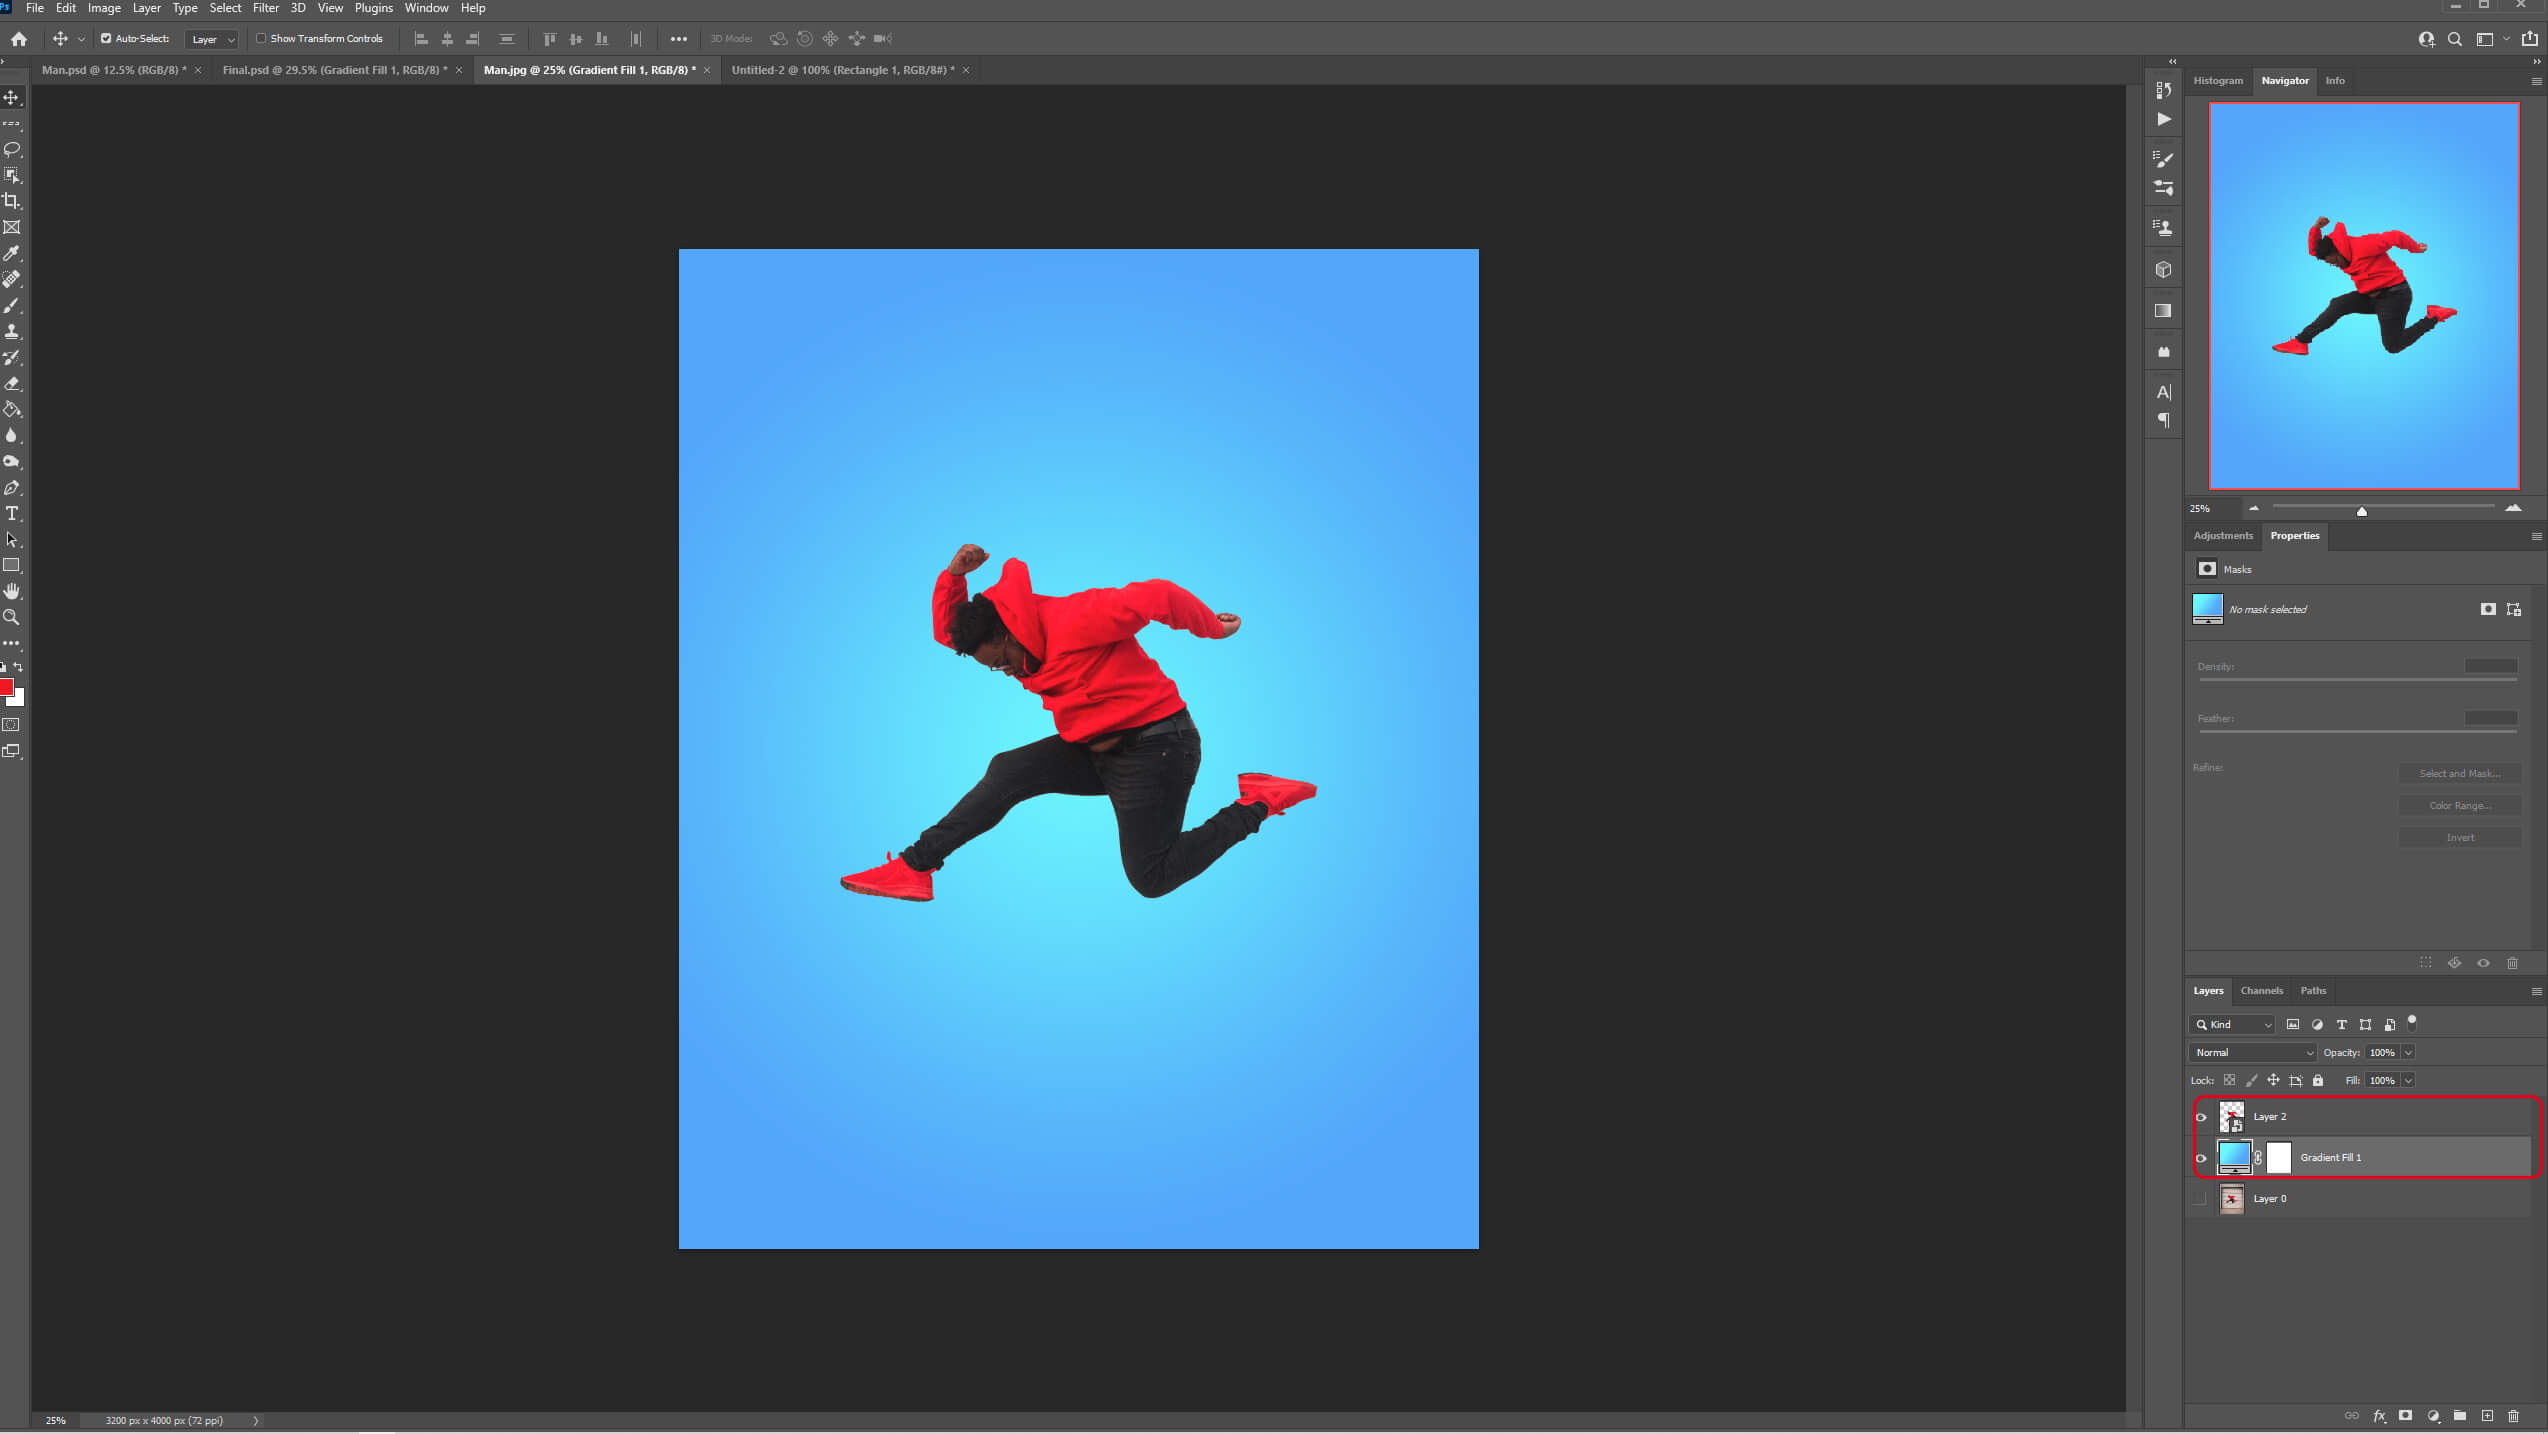
Once the background is removed, we’ll replace it with a Radial Gradient. Go to Adjustment Layer > Gradient.
Pick a gradient that you like and that goes well with your image. I chose a blue one. In the Dialogue Box in the “Style Section” choose Radial.
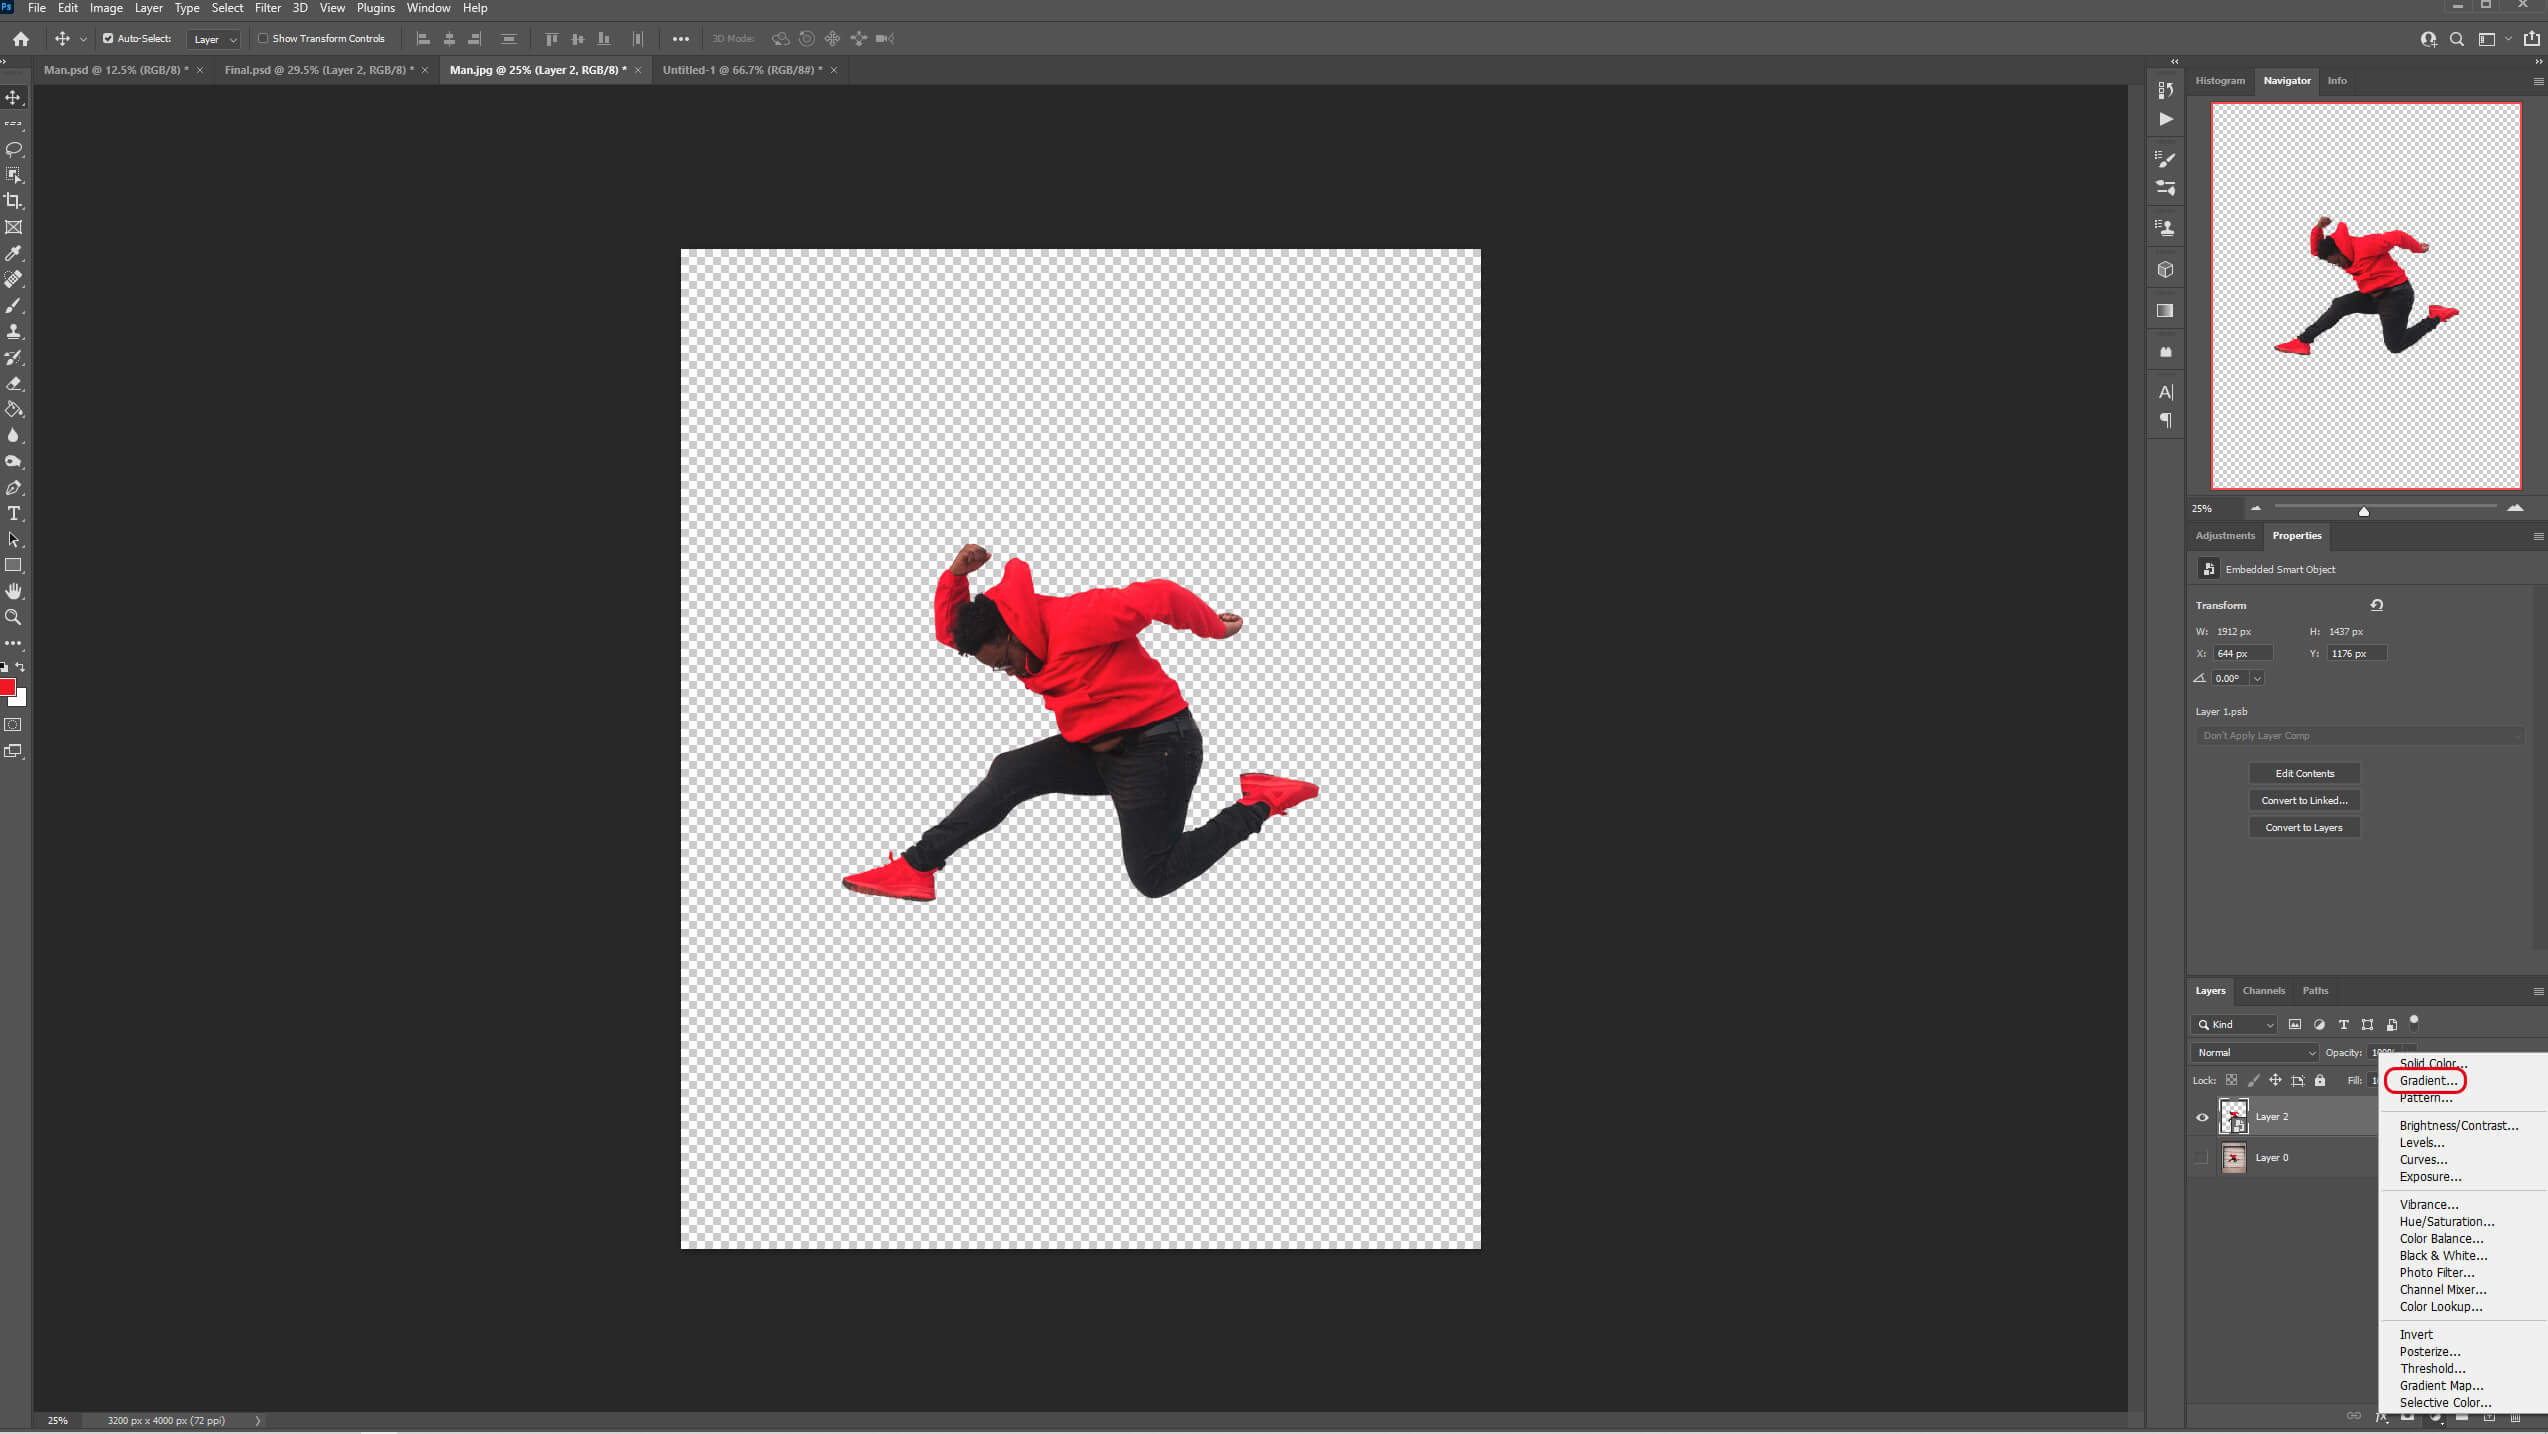
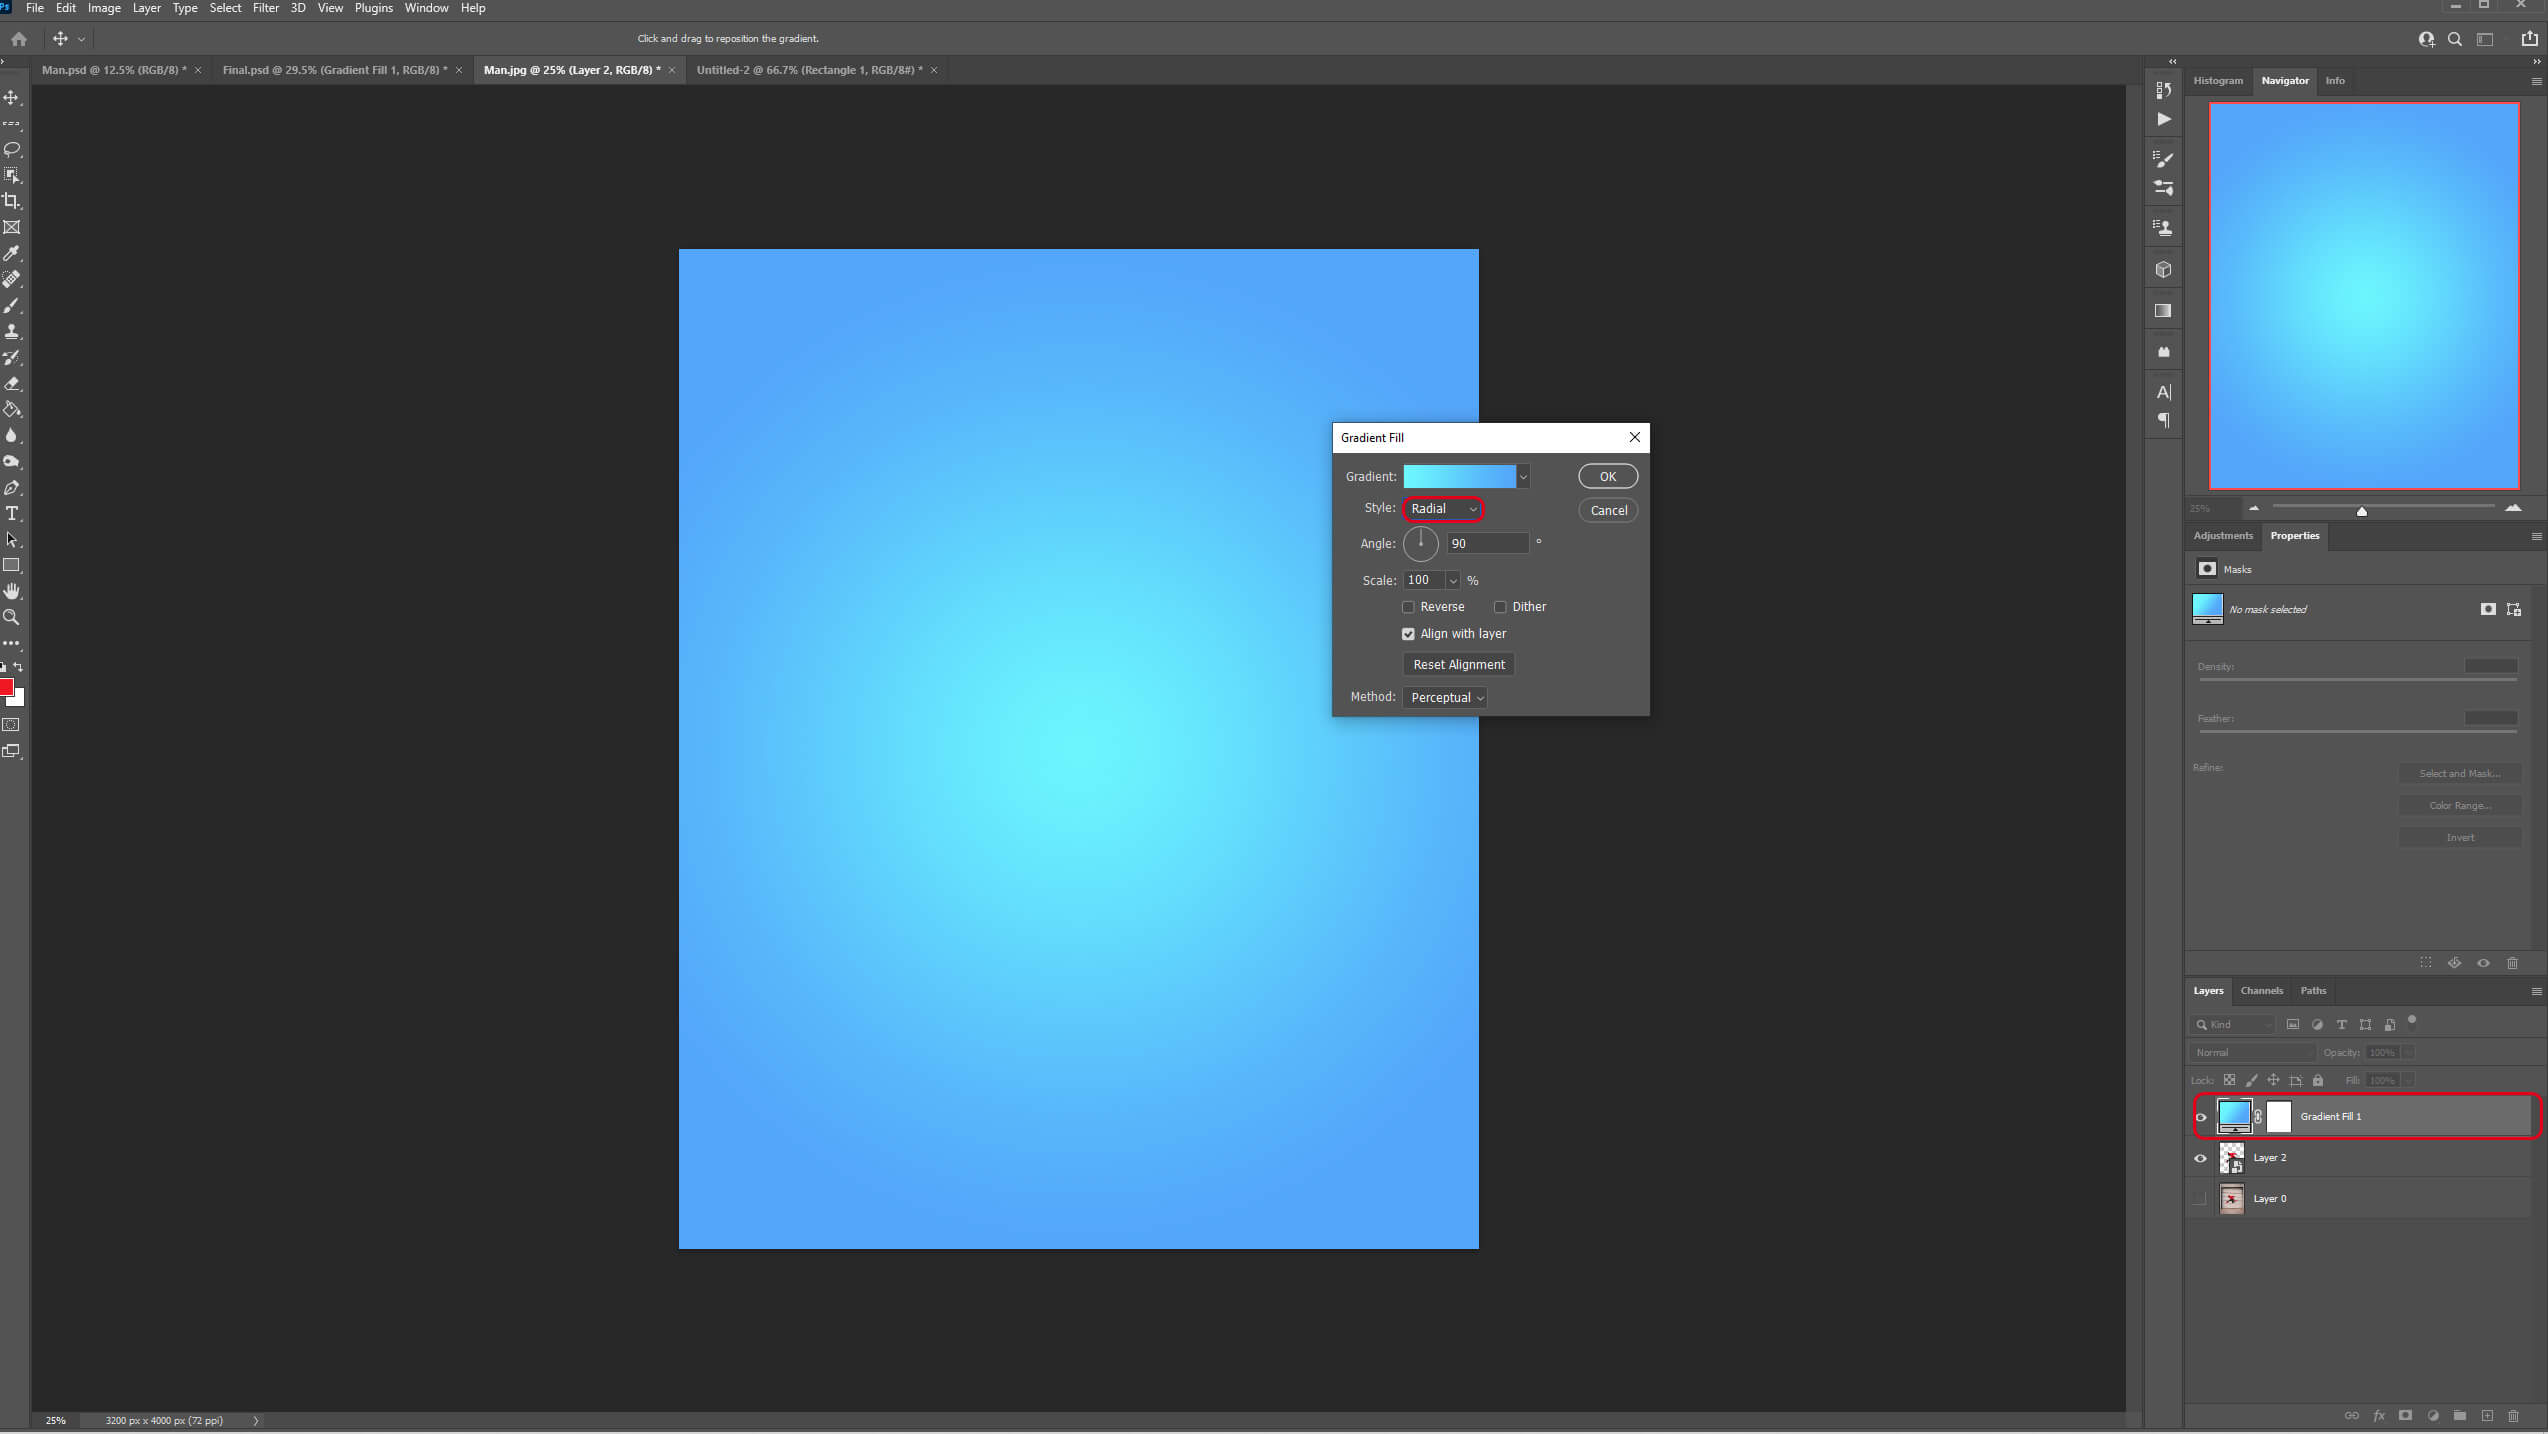
Select the Gradient Fill layer and move it underneath the subject layer.
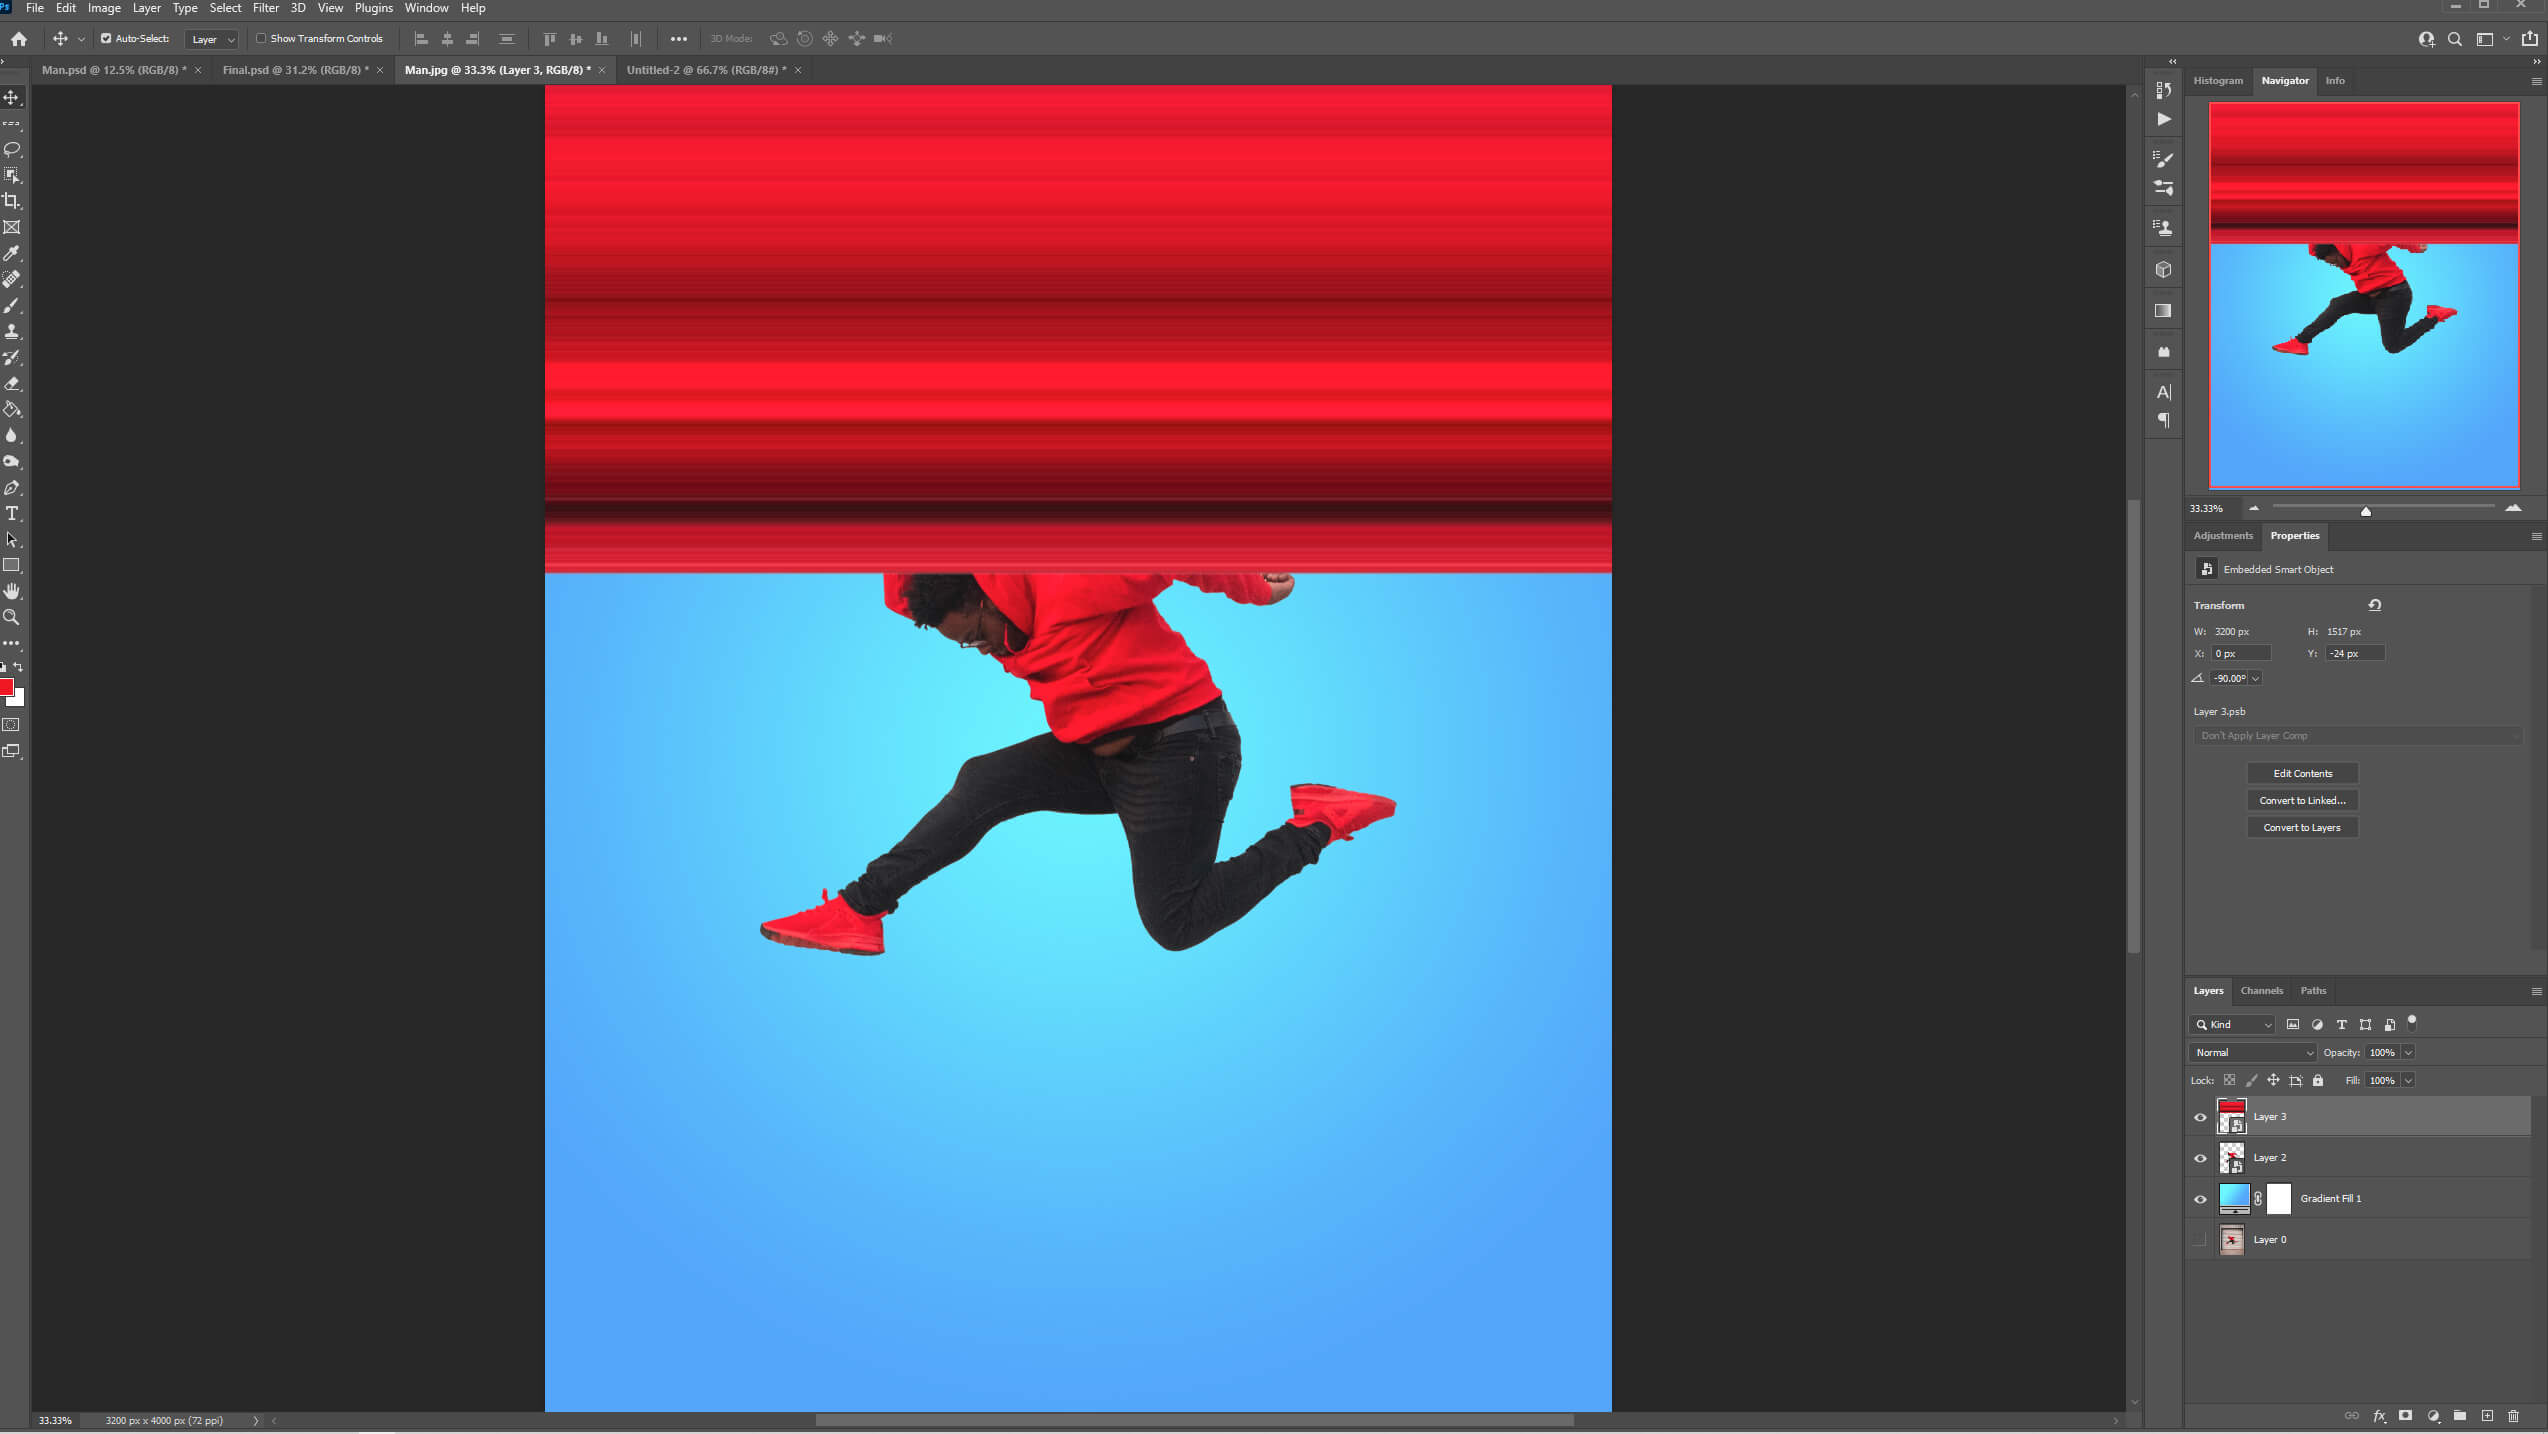
Step 3: Stretch It Out
Use the Single Row Marquee Tool, click on an interesting spot in the image, copy the selection on a new layer (Ctrl+J) and convert it into a smart object.
Next, use the transform tool by pressing Ctrl+ T, rotate the selection by 90 degrees, and stretch it.
Once it’s done move the stretch to the top of the canvas.
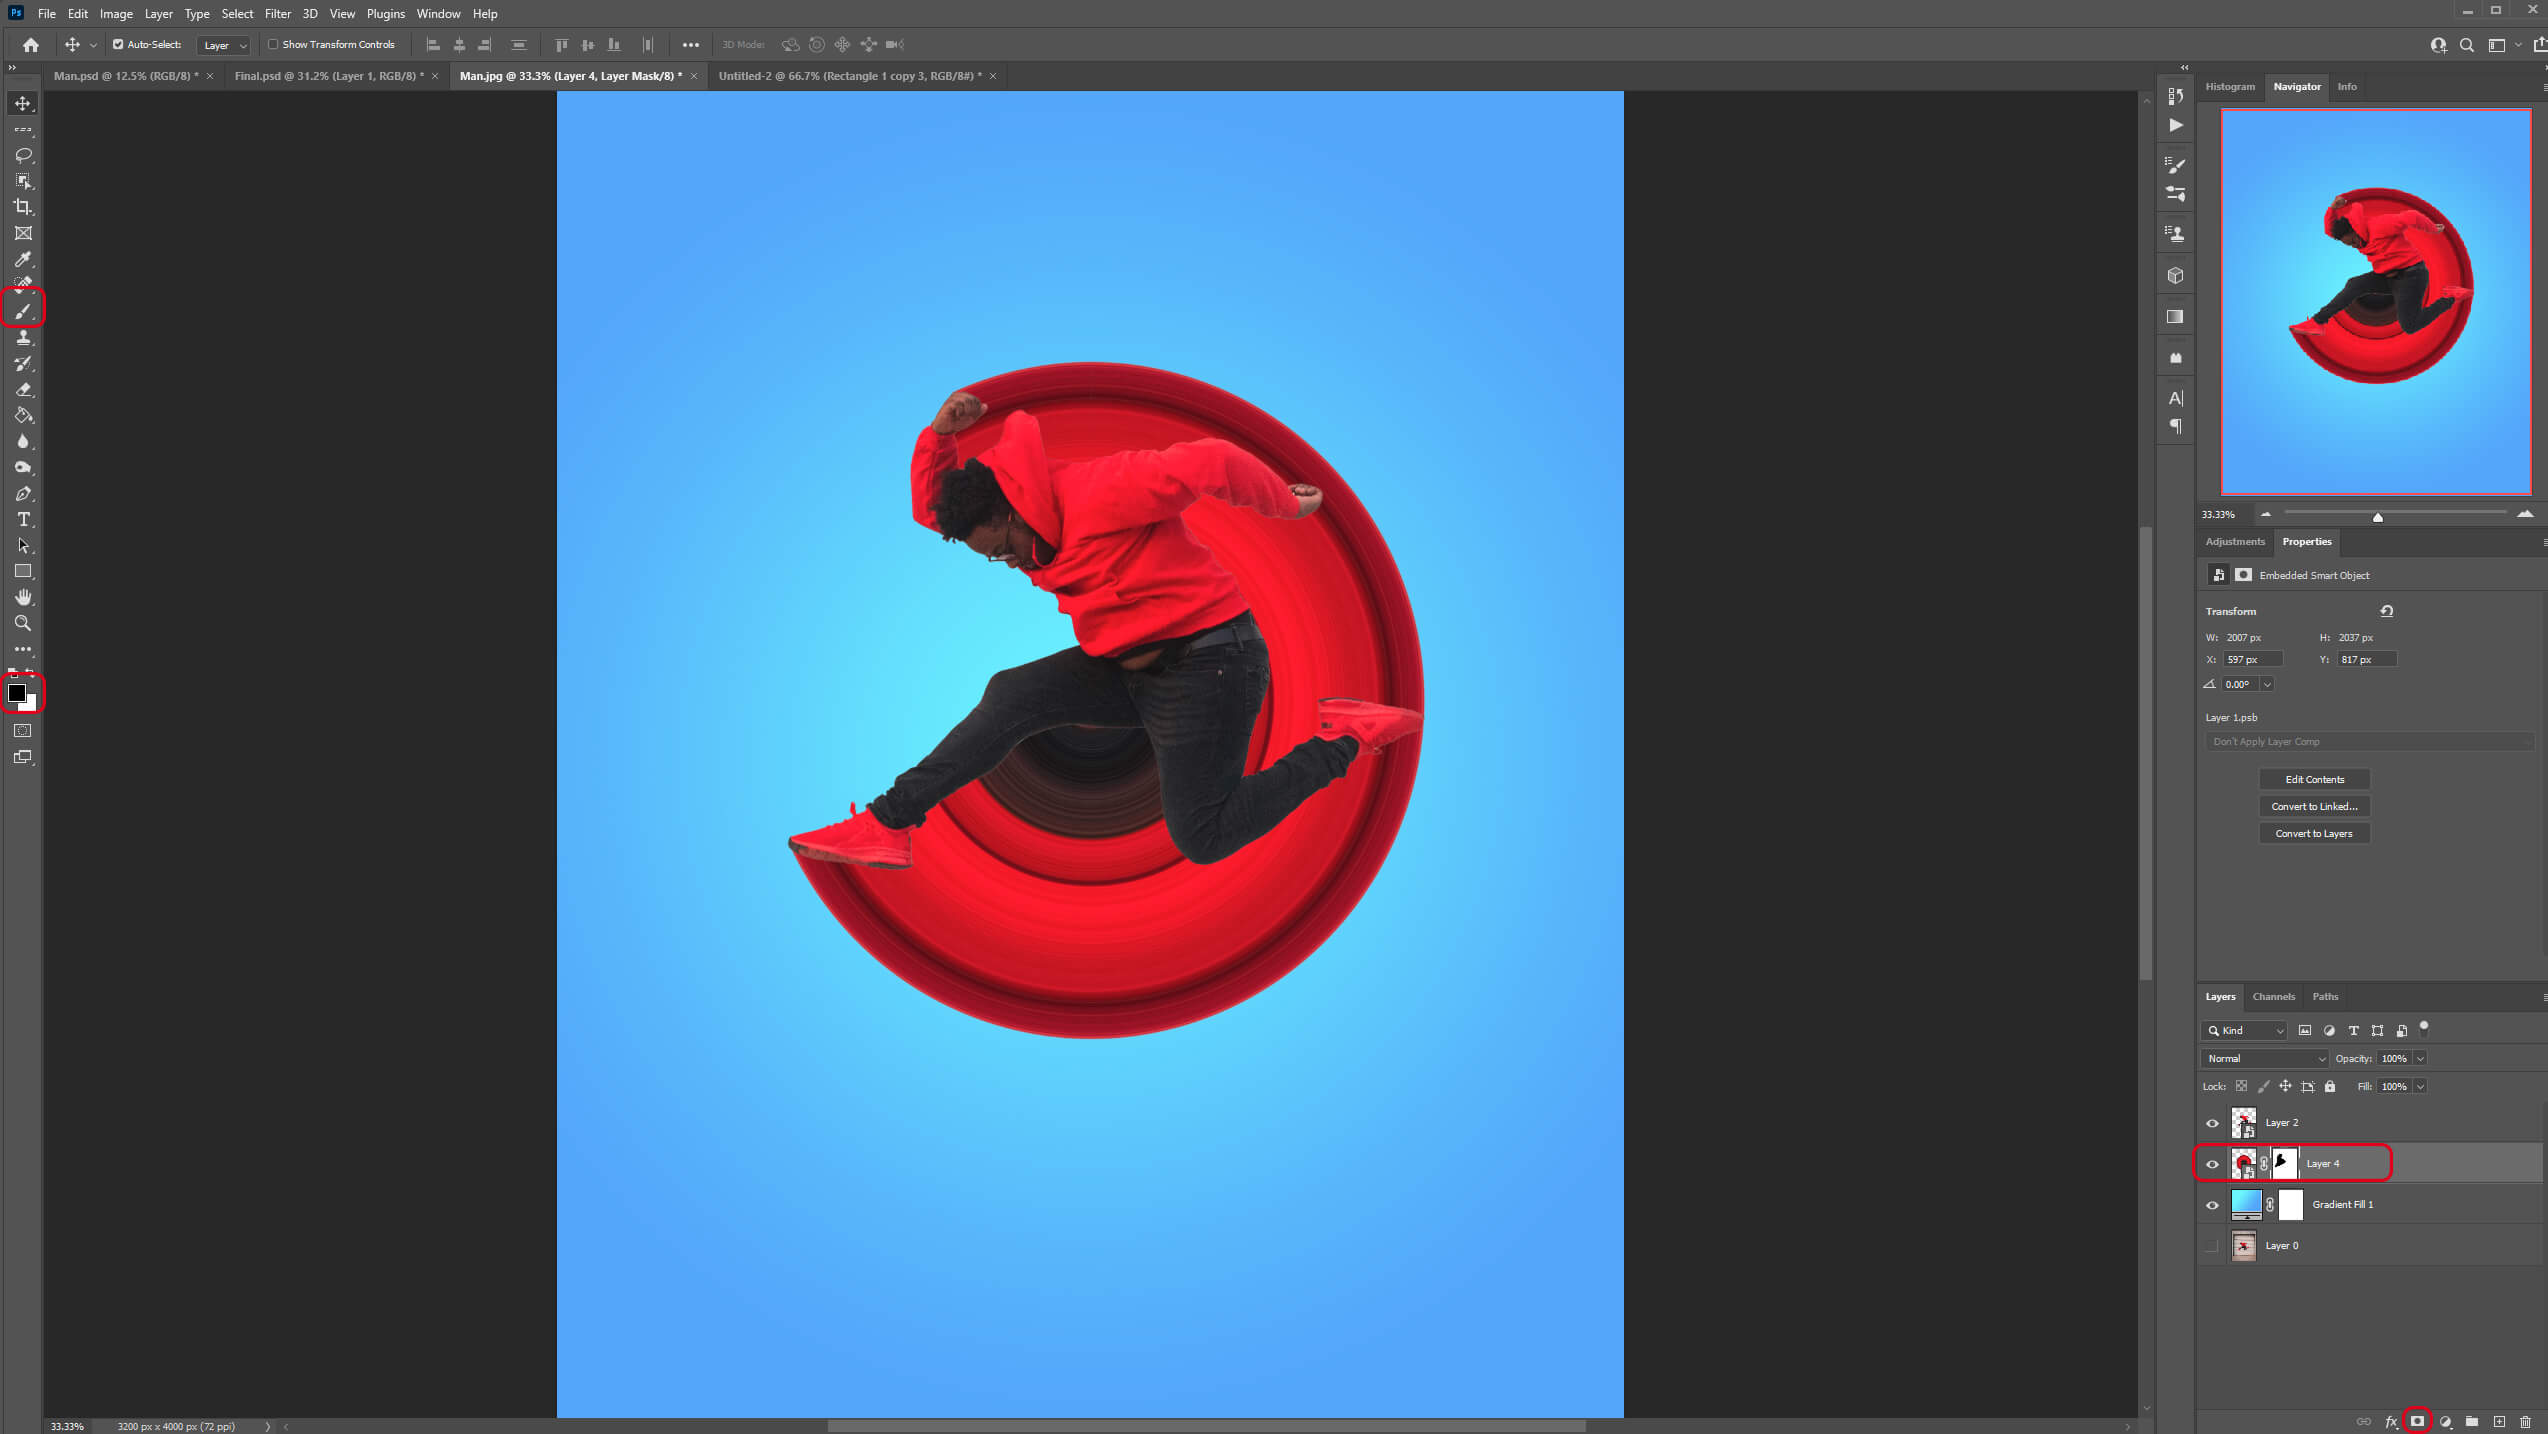
Step 4: Polar Coordinates
Select the stretched pixel layer go to Filter > Distort > Polar Coordinates. In the Polar Coordinates dialogue box, select Rectangular to Polar and click OK. You can now position our circle behind the model.


Step 5: Mask the Unwanted Part
Select the circle layer and click on the Layer Mask icon in the Layer Panel. Next, select the Brush Tool from the Tool Panel. Make sure that the foreground color is set to black and erase the part you want to hide.
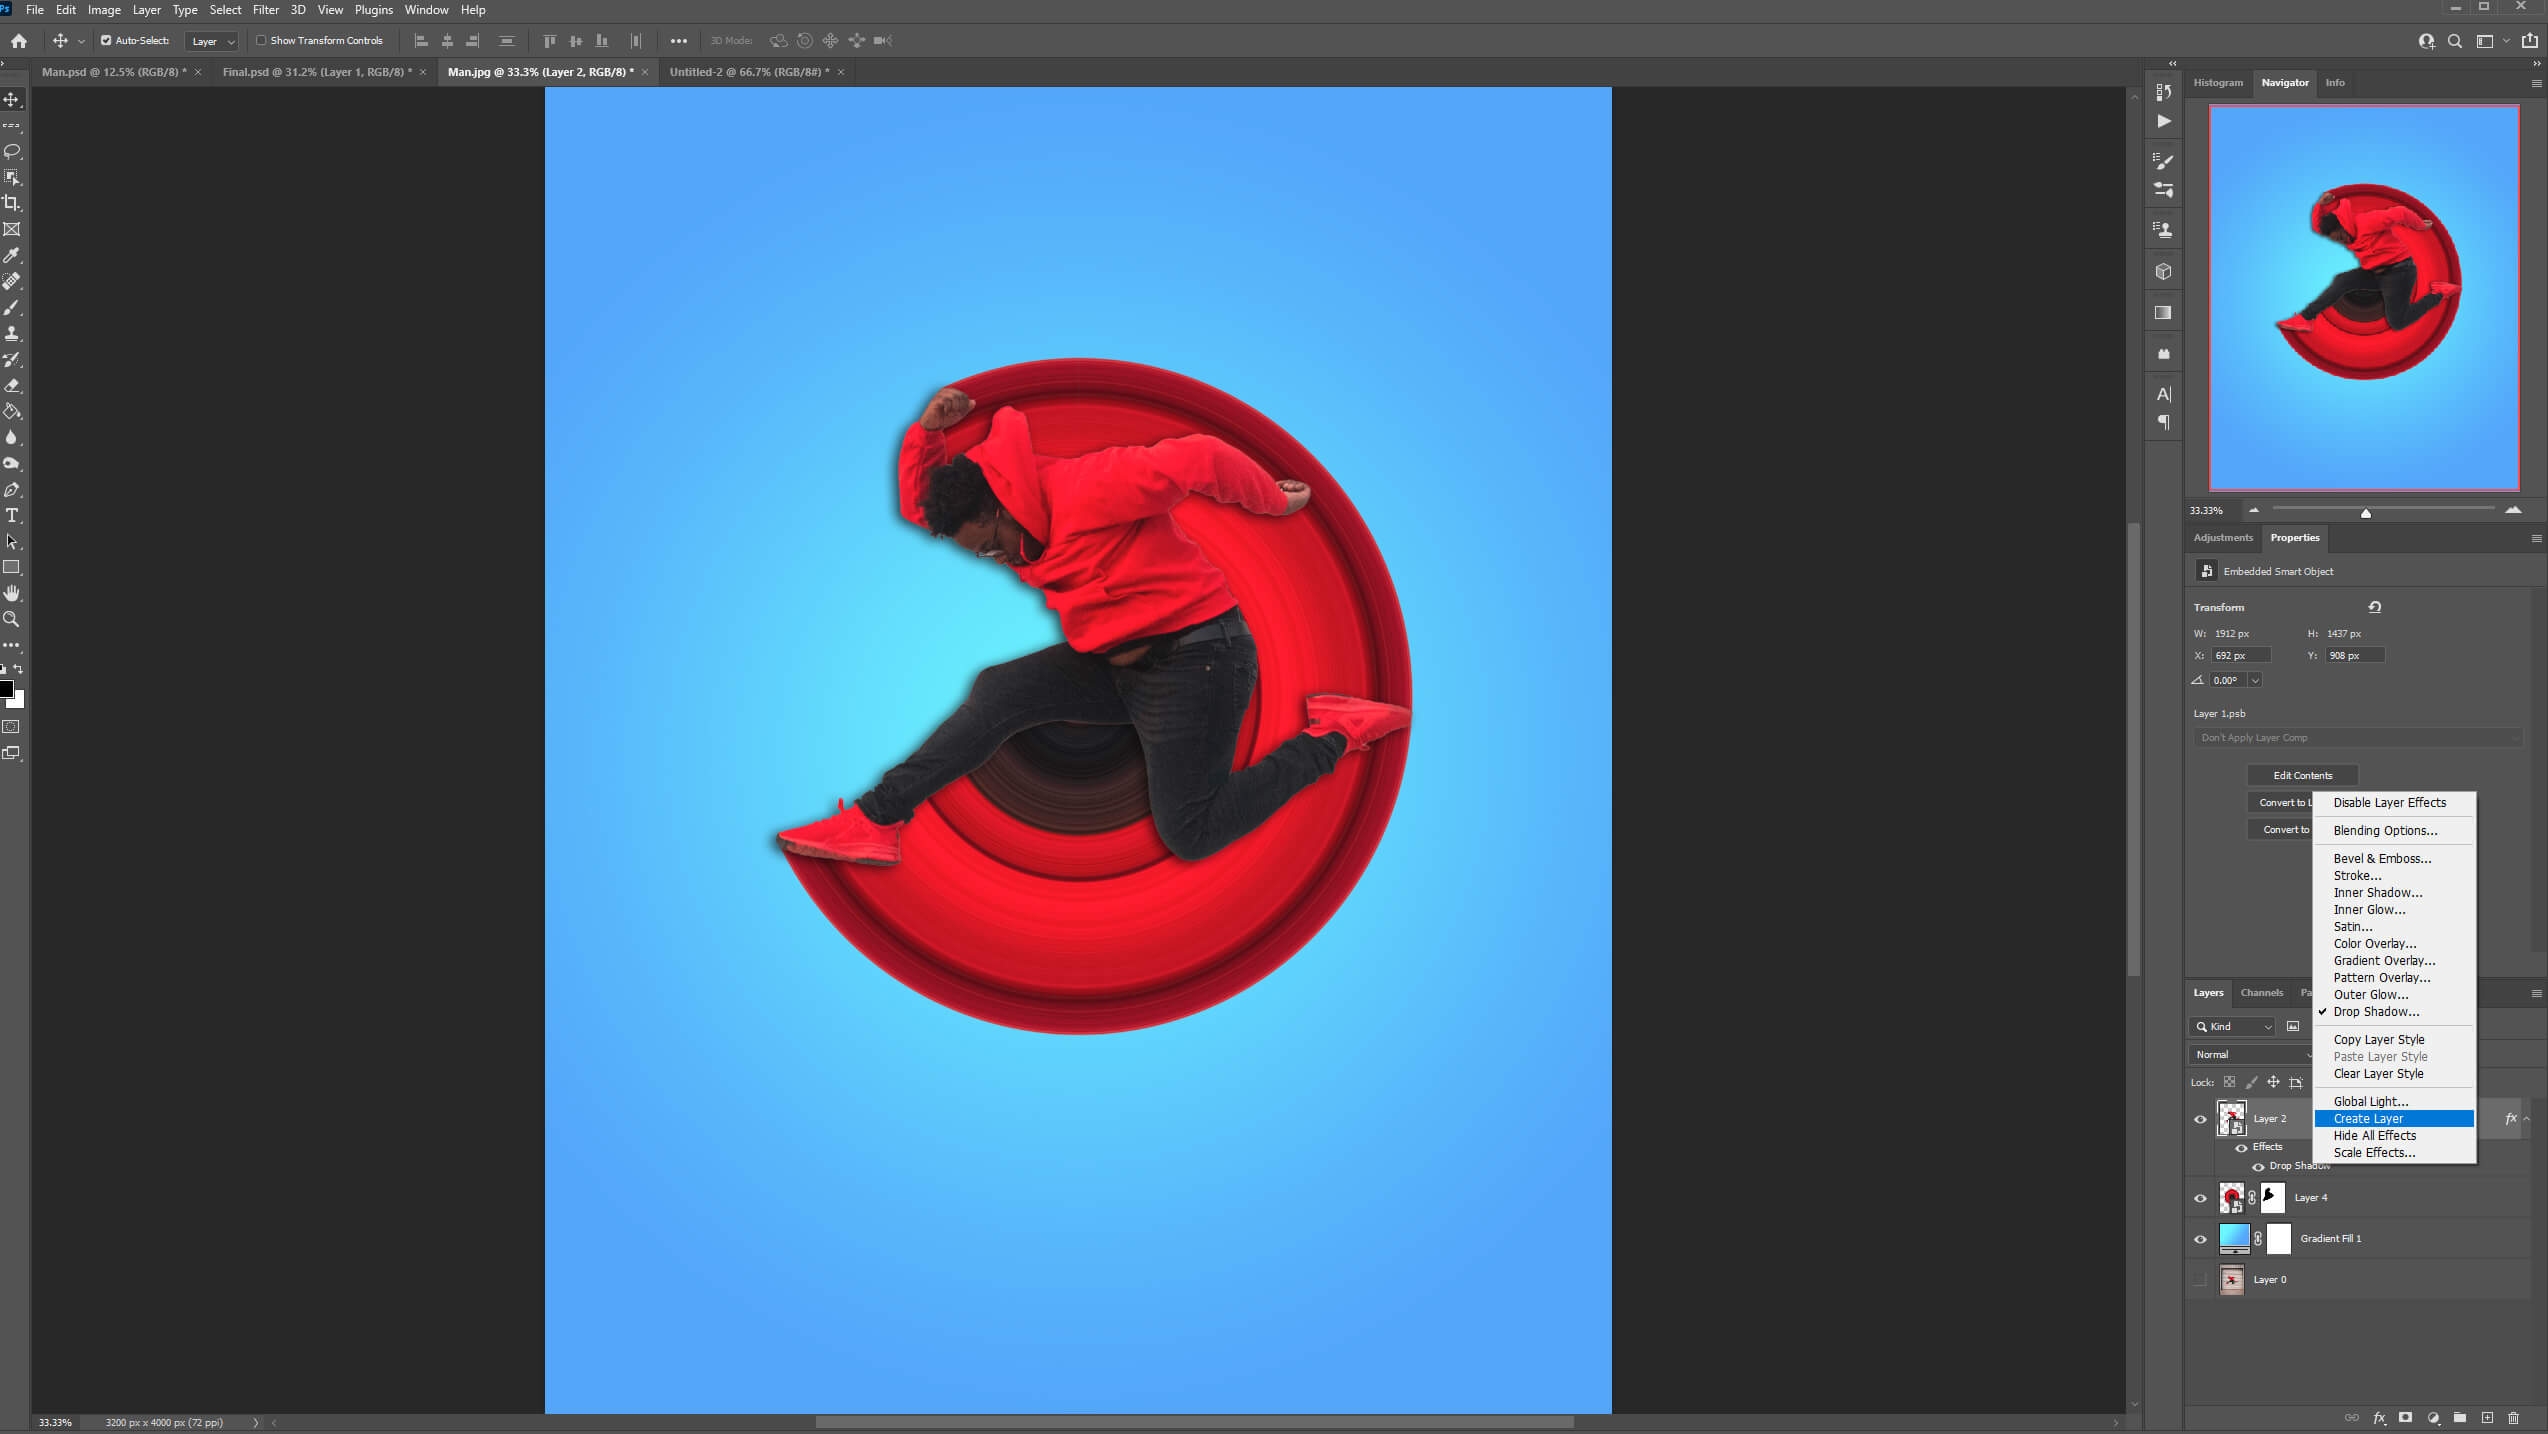
Step 6: Add some Details
Let’s finish the artwork by adding some details to make it more realistic.
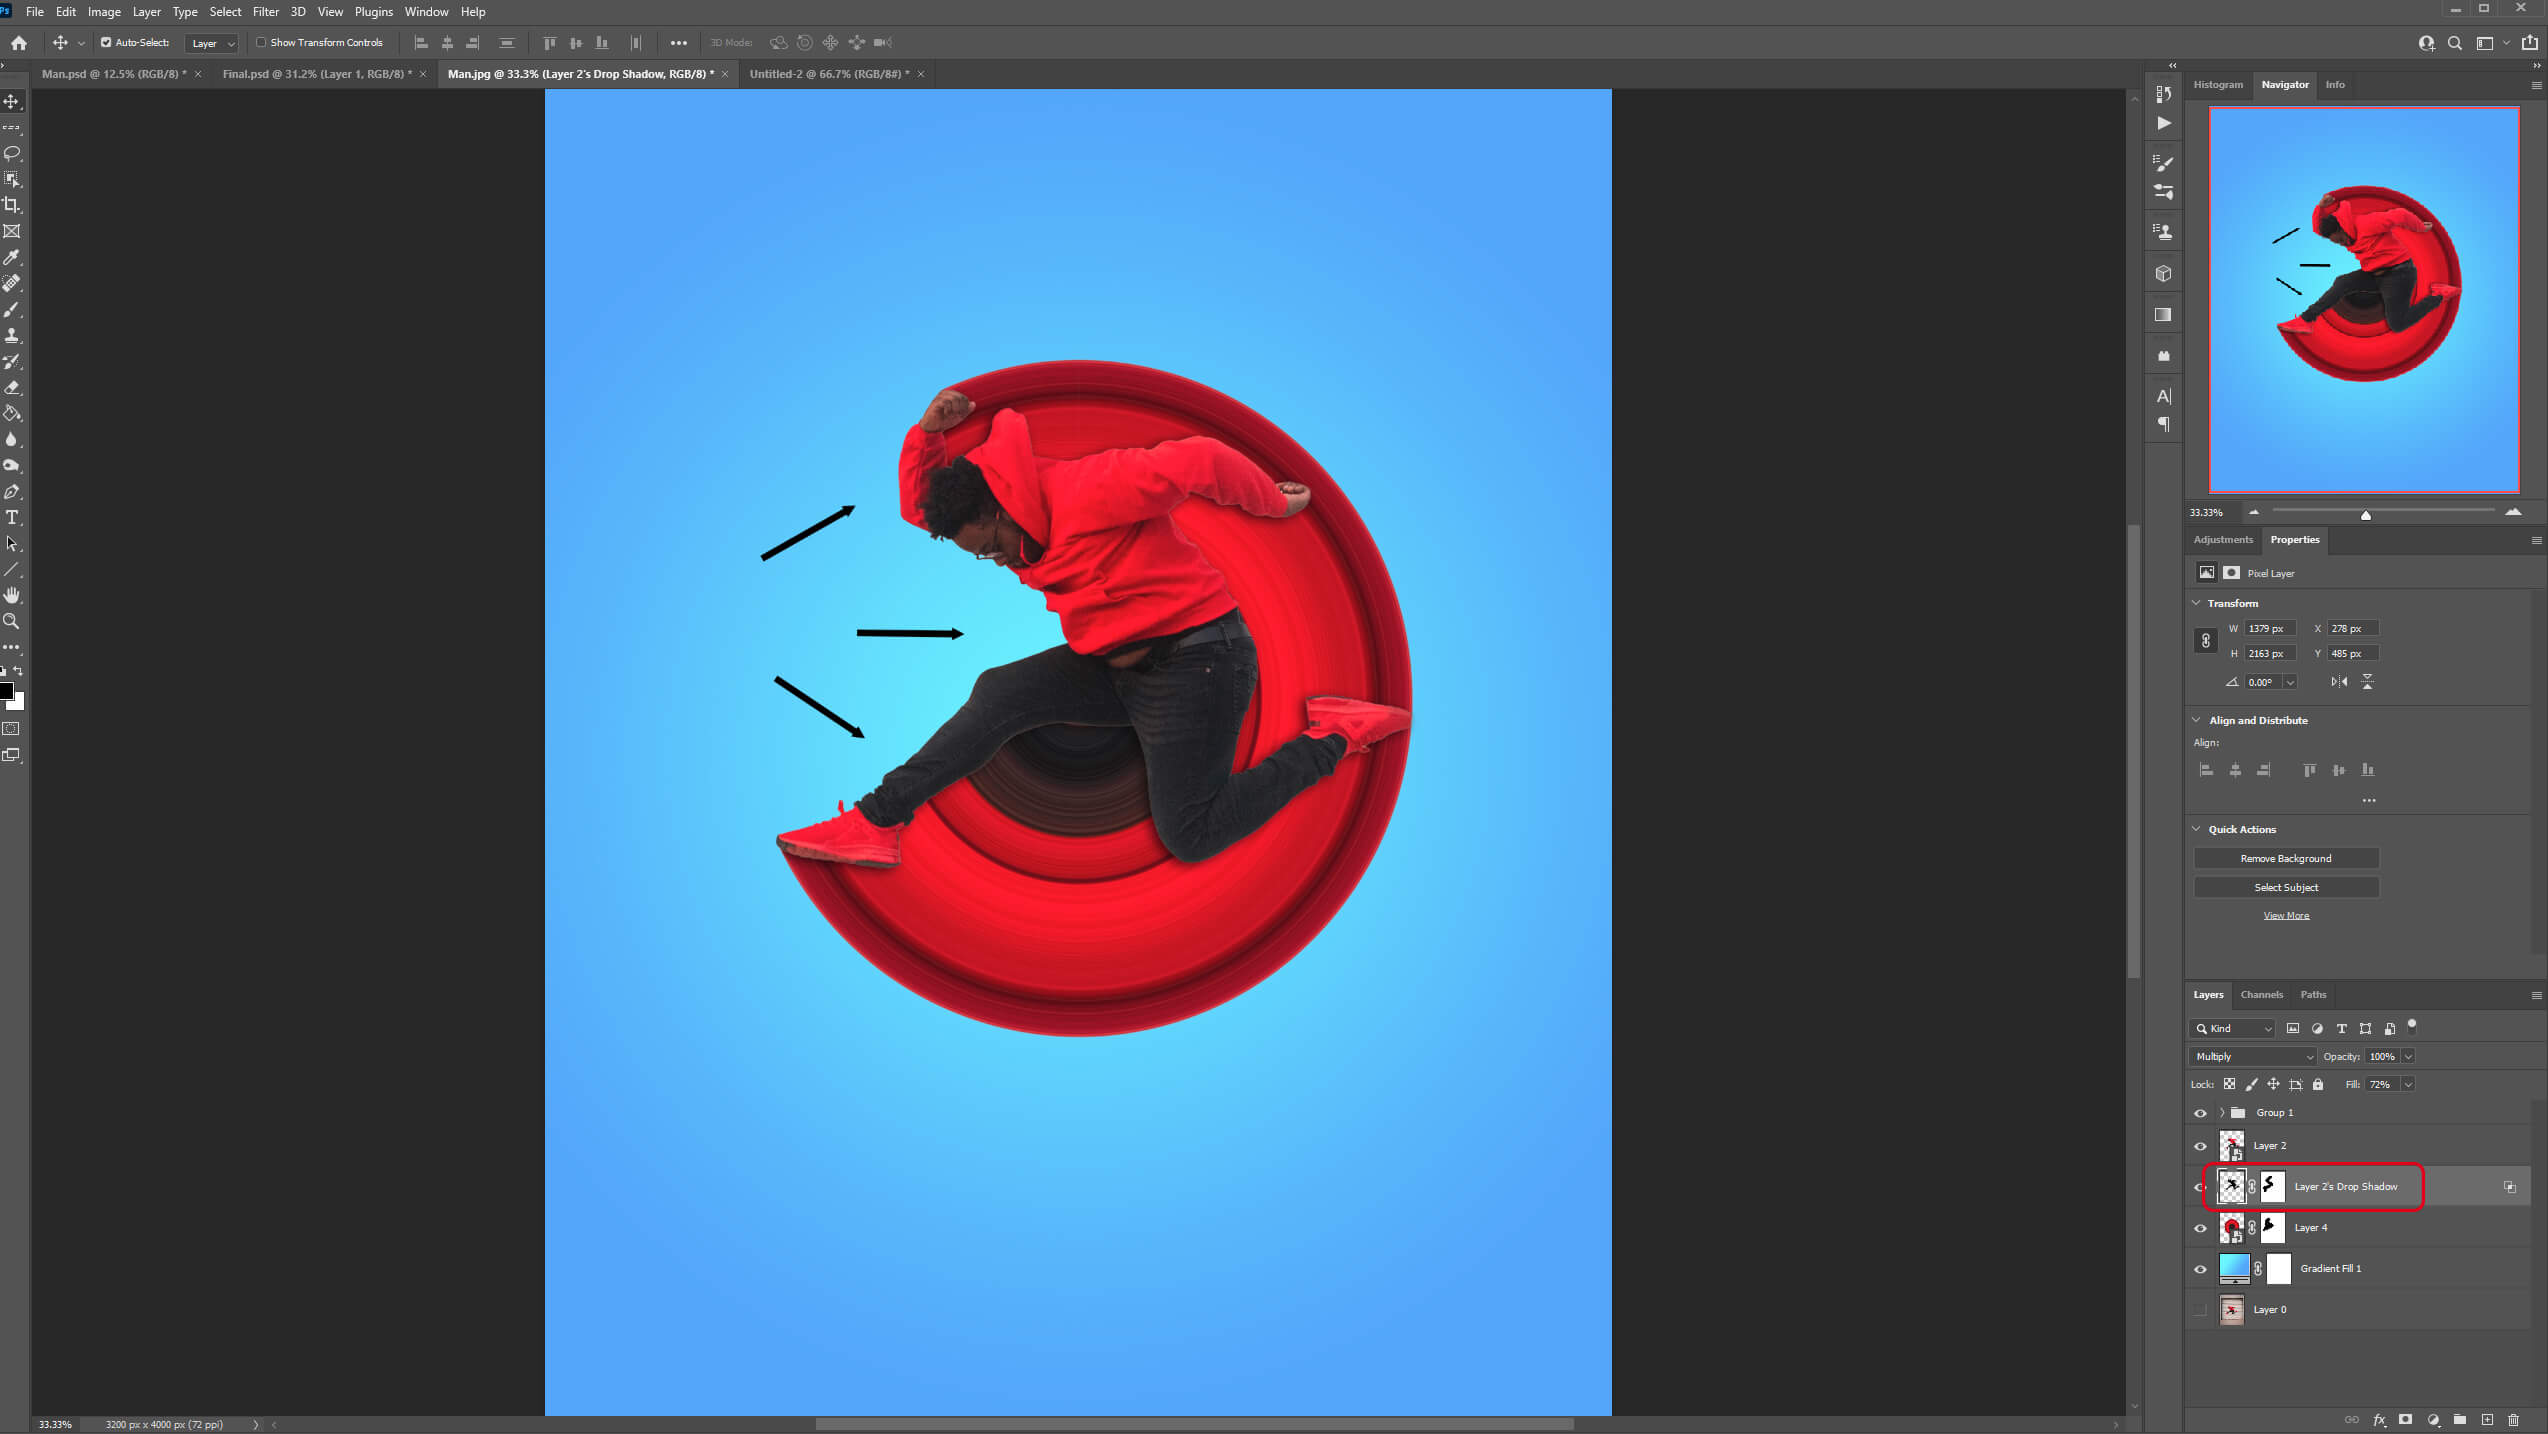
We’ll add a drop shadow to our model. Double click on the model layer and select Drop Shadow.

Next, we’ll separate the drop shadow from the model and put it on its own layer. Just right-click on the drop shadow effect > create a layer.
Once the drop shadow is on its own layer add a Layer Mask and brush out the unwanted shadow. In this case, I’ll erase the shadow located in front of the model.
To finish with, add a shadow underneath the model to create the illusion that the model is jumping. I also added some light reflections on the Circular Pixel Stretch.
And we are done!

After following this tutorial, you should be able to recreate a Circular Pixel Stretch in Photoshop. I hope you found this guide useful and easy to follow. If you have any questions or suggestions please let me know in the comments down below and I will get back to you as soon as possible.