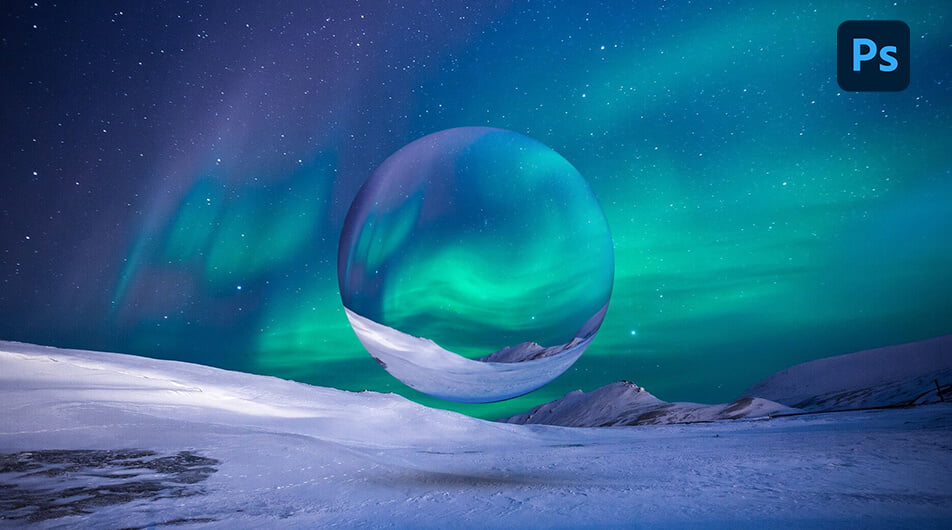
Today I’m going to show you a few simple steps to create a stunning floating glass sphere within a photograph.
This effect is ideal for making unique album covers or simply turning landscape photographs into abstract works of art.
A few easy Photoshop tools, a couple of filters, and a little shading are all that’s required.
This easy effect can be created in minutes.
For this tutorial, I’ll be using Photoshop 2022 but any version will work.
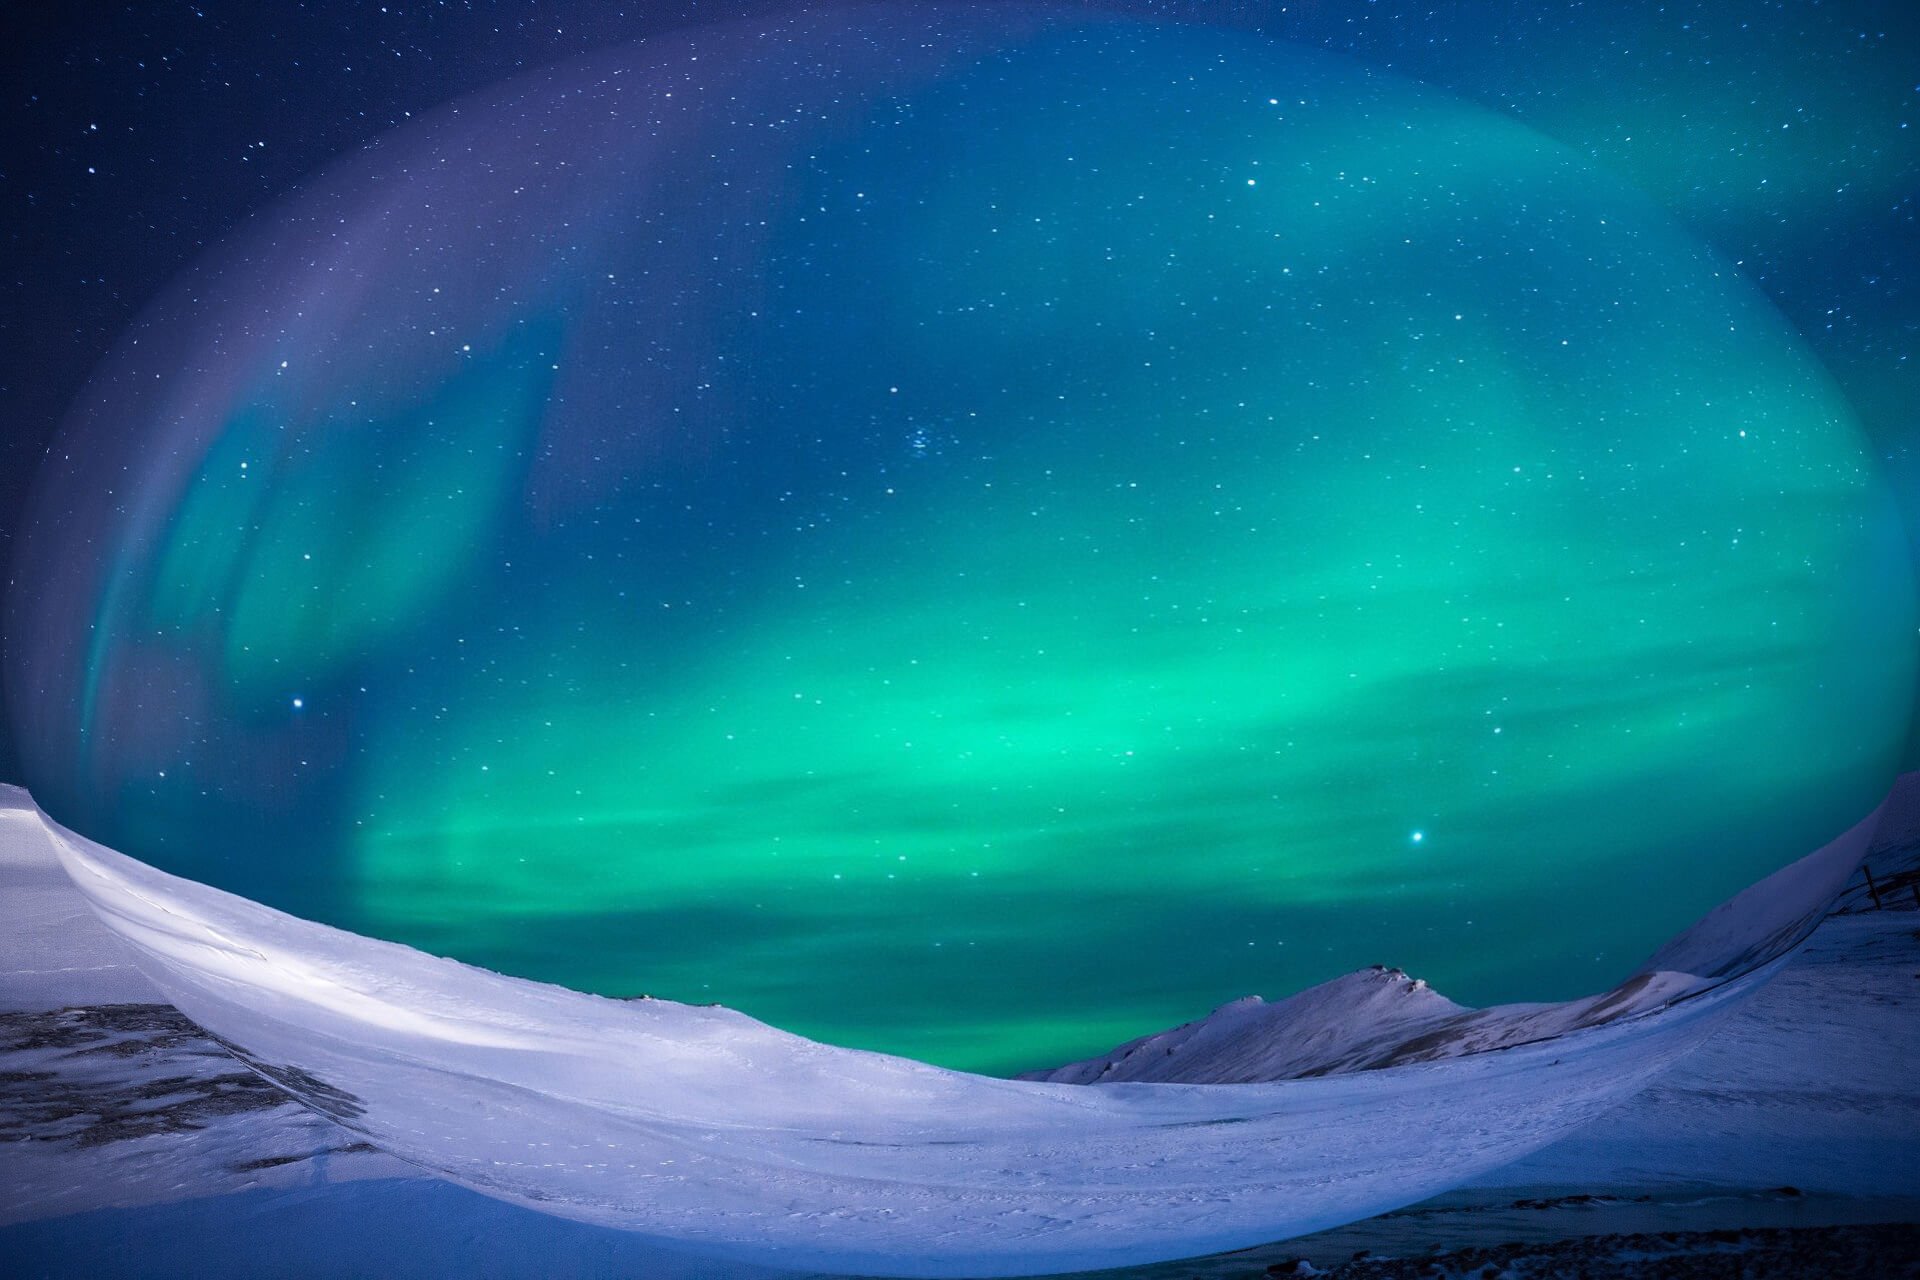
Click here to download the image and follow along.

How to Make a Floating Glass Sphere in Photoshop
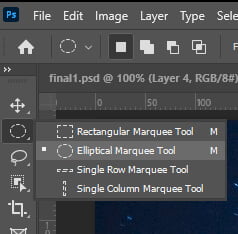
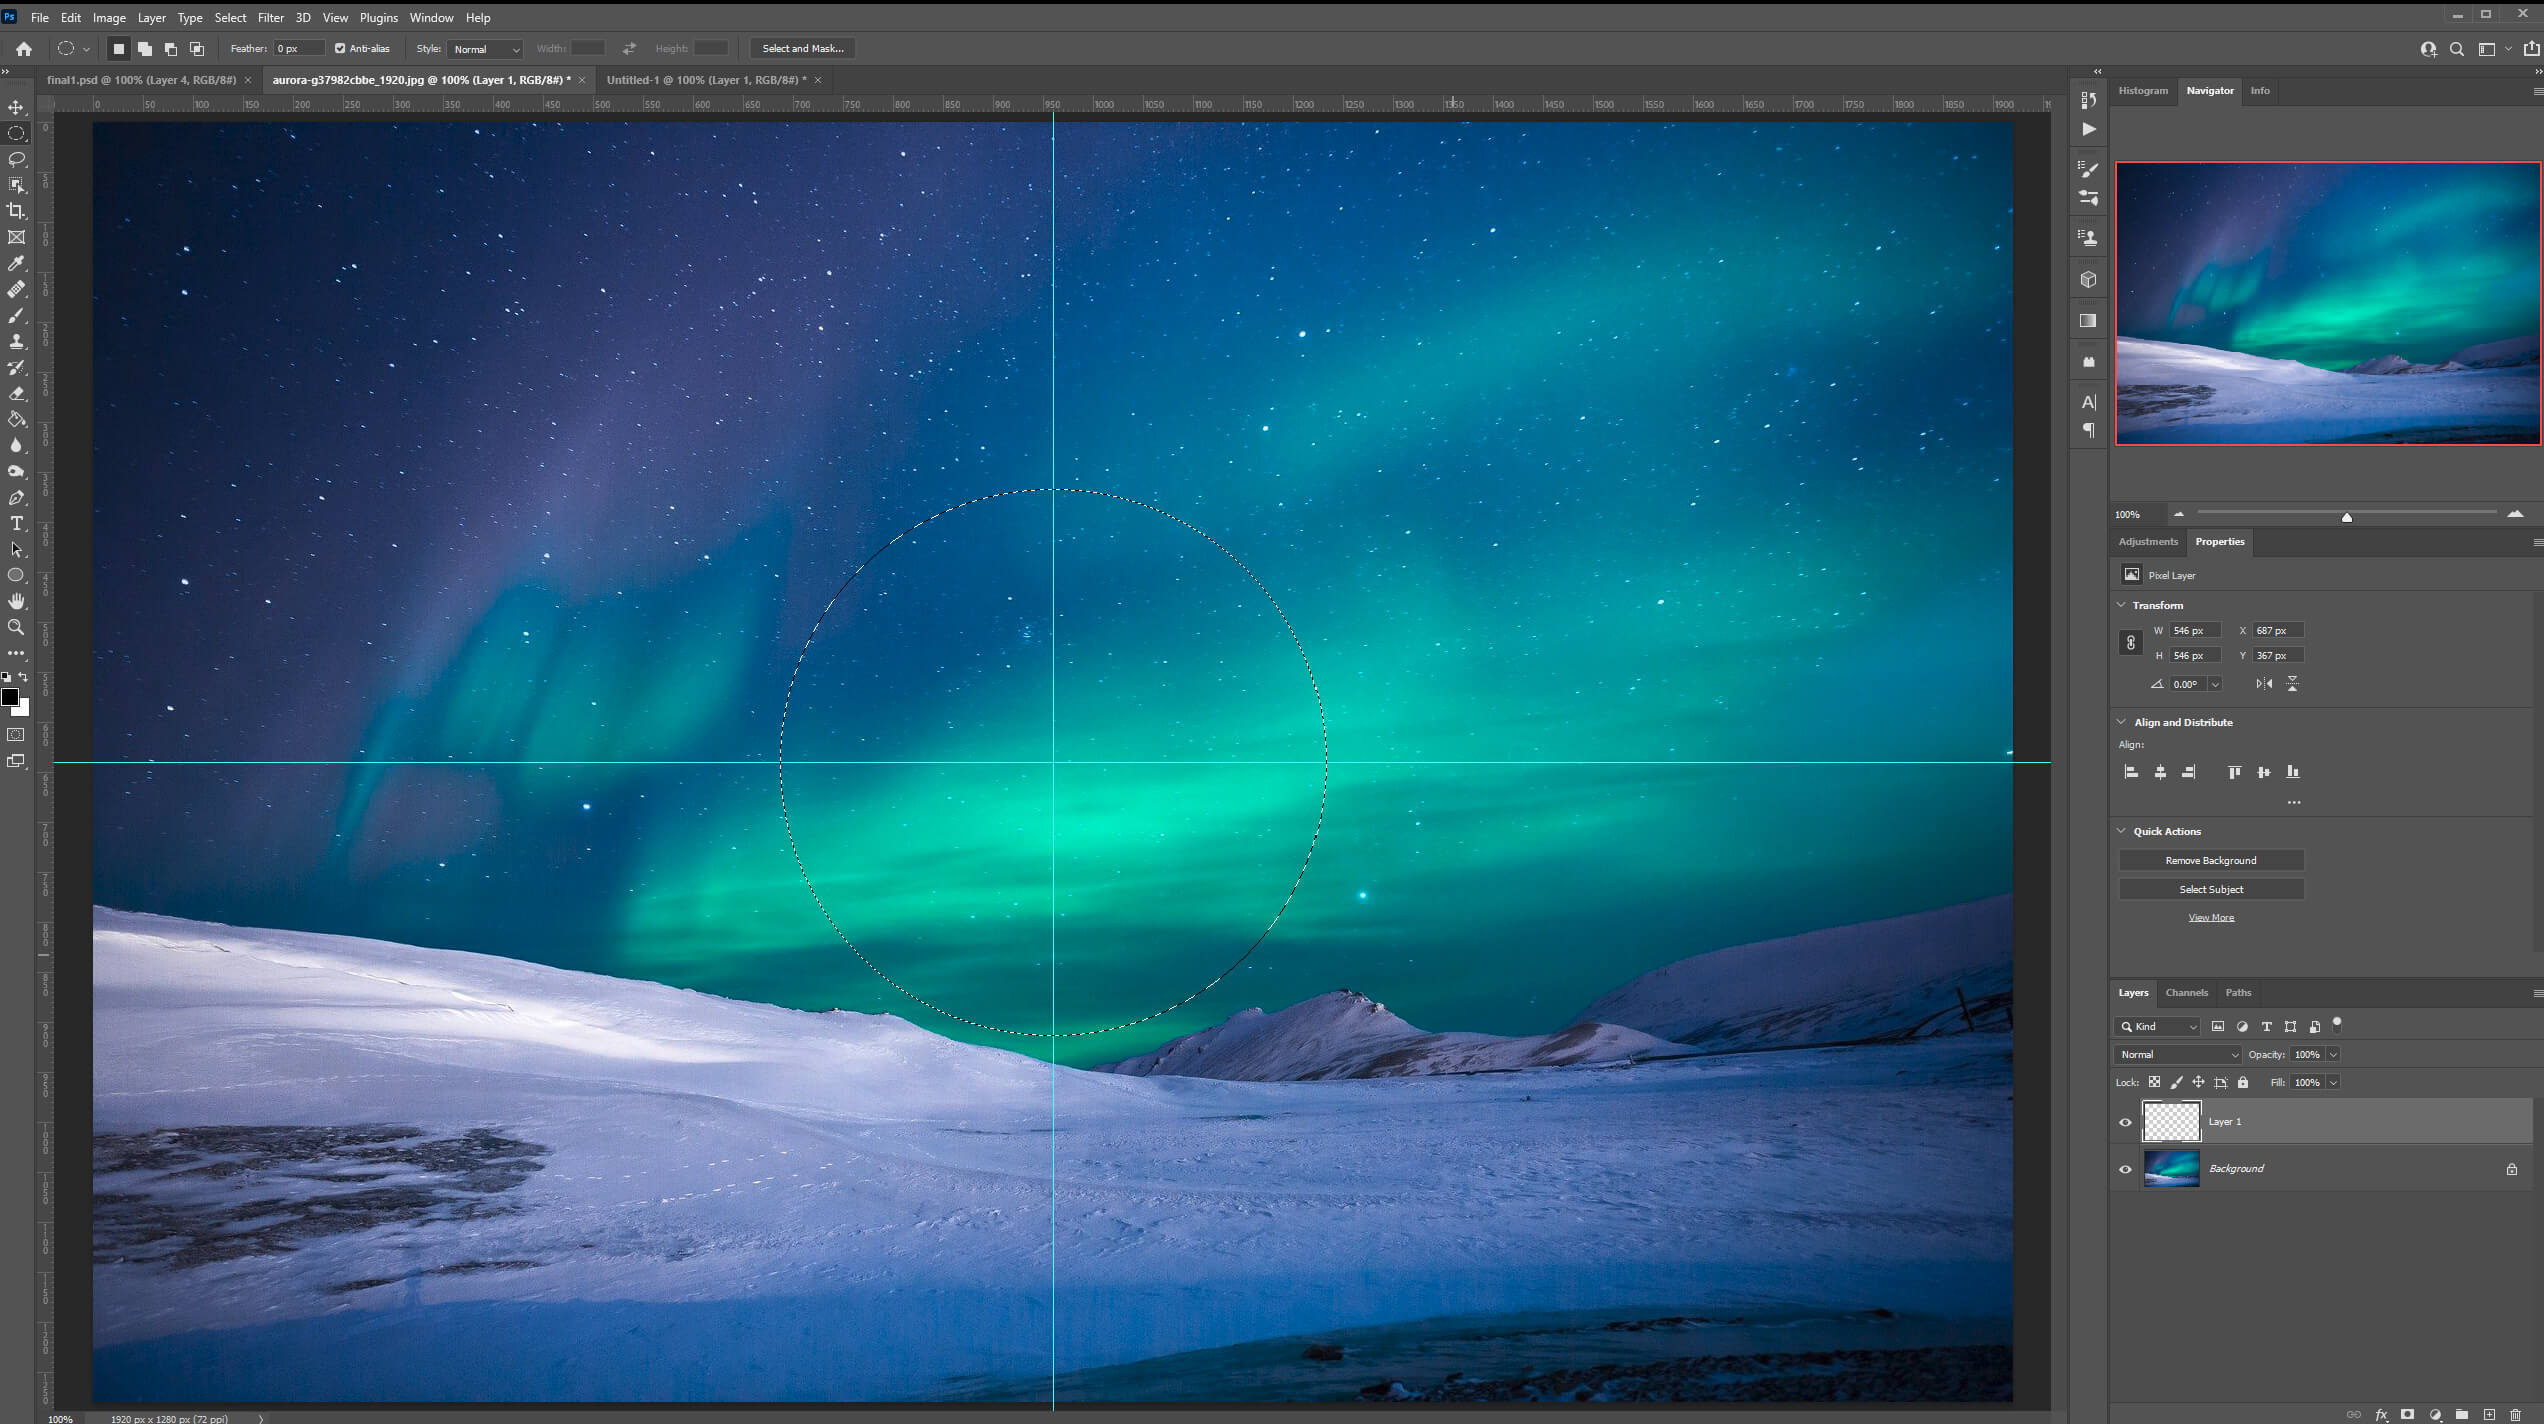
Step 1: Create a Spherical Selection
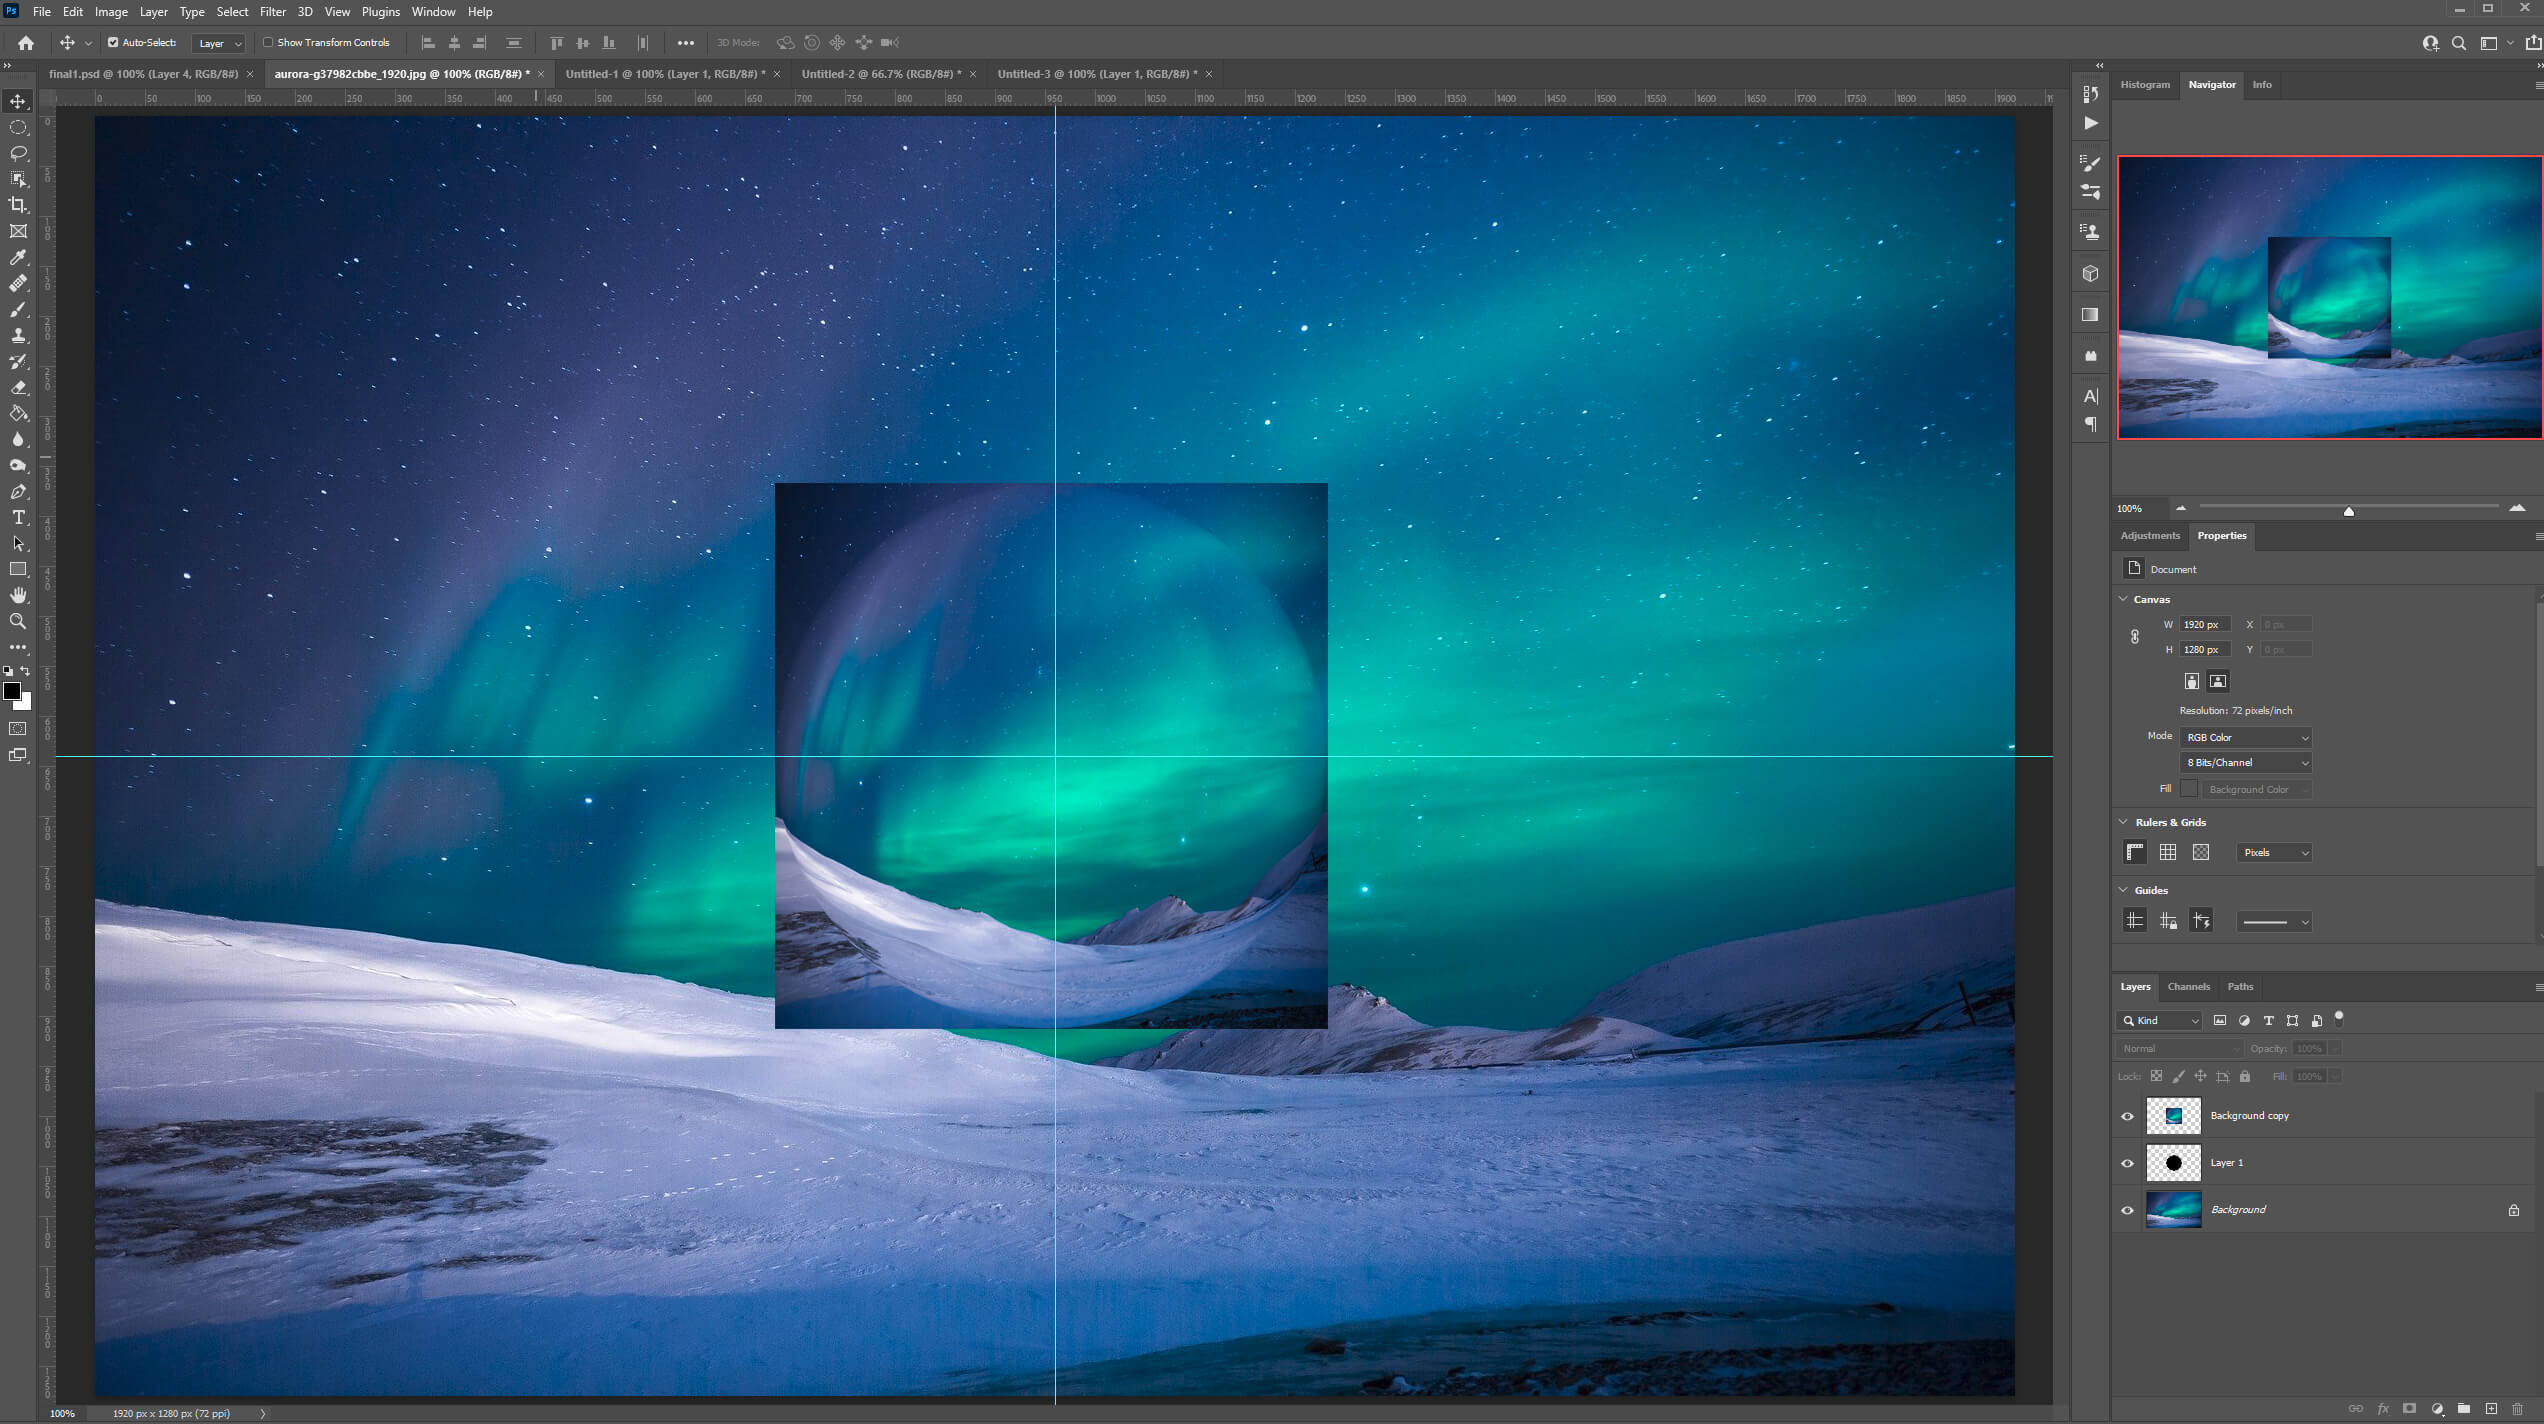
Open up your image in Photoshop and create a new layer. Go to your layer panel and click on the + sign.

Select the Elliptical Marquee Tool in the toolbar. Drag out a circular selection in the center of the image by holding Alt + Shift to draw a perfect circle. Scale it to the desired size of your sphere. You can use guides by pressing Ctrl + R to place your circle in the middle of the image.
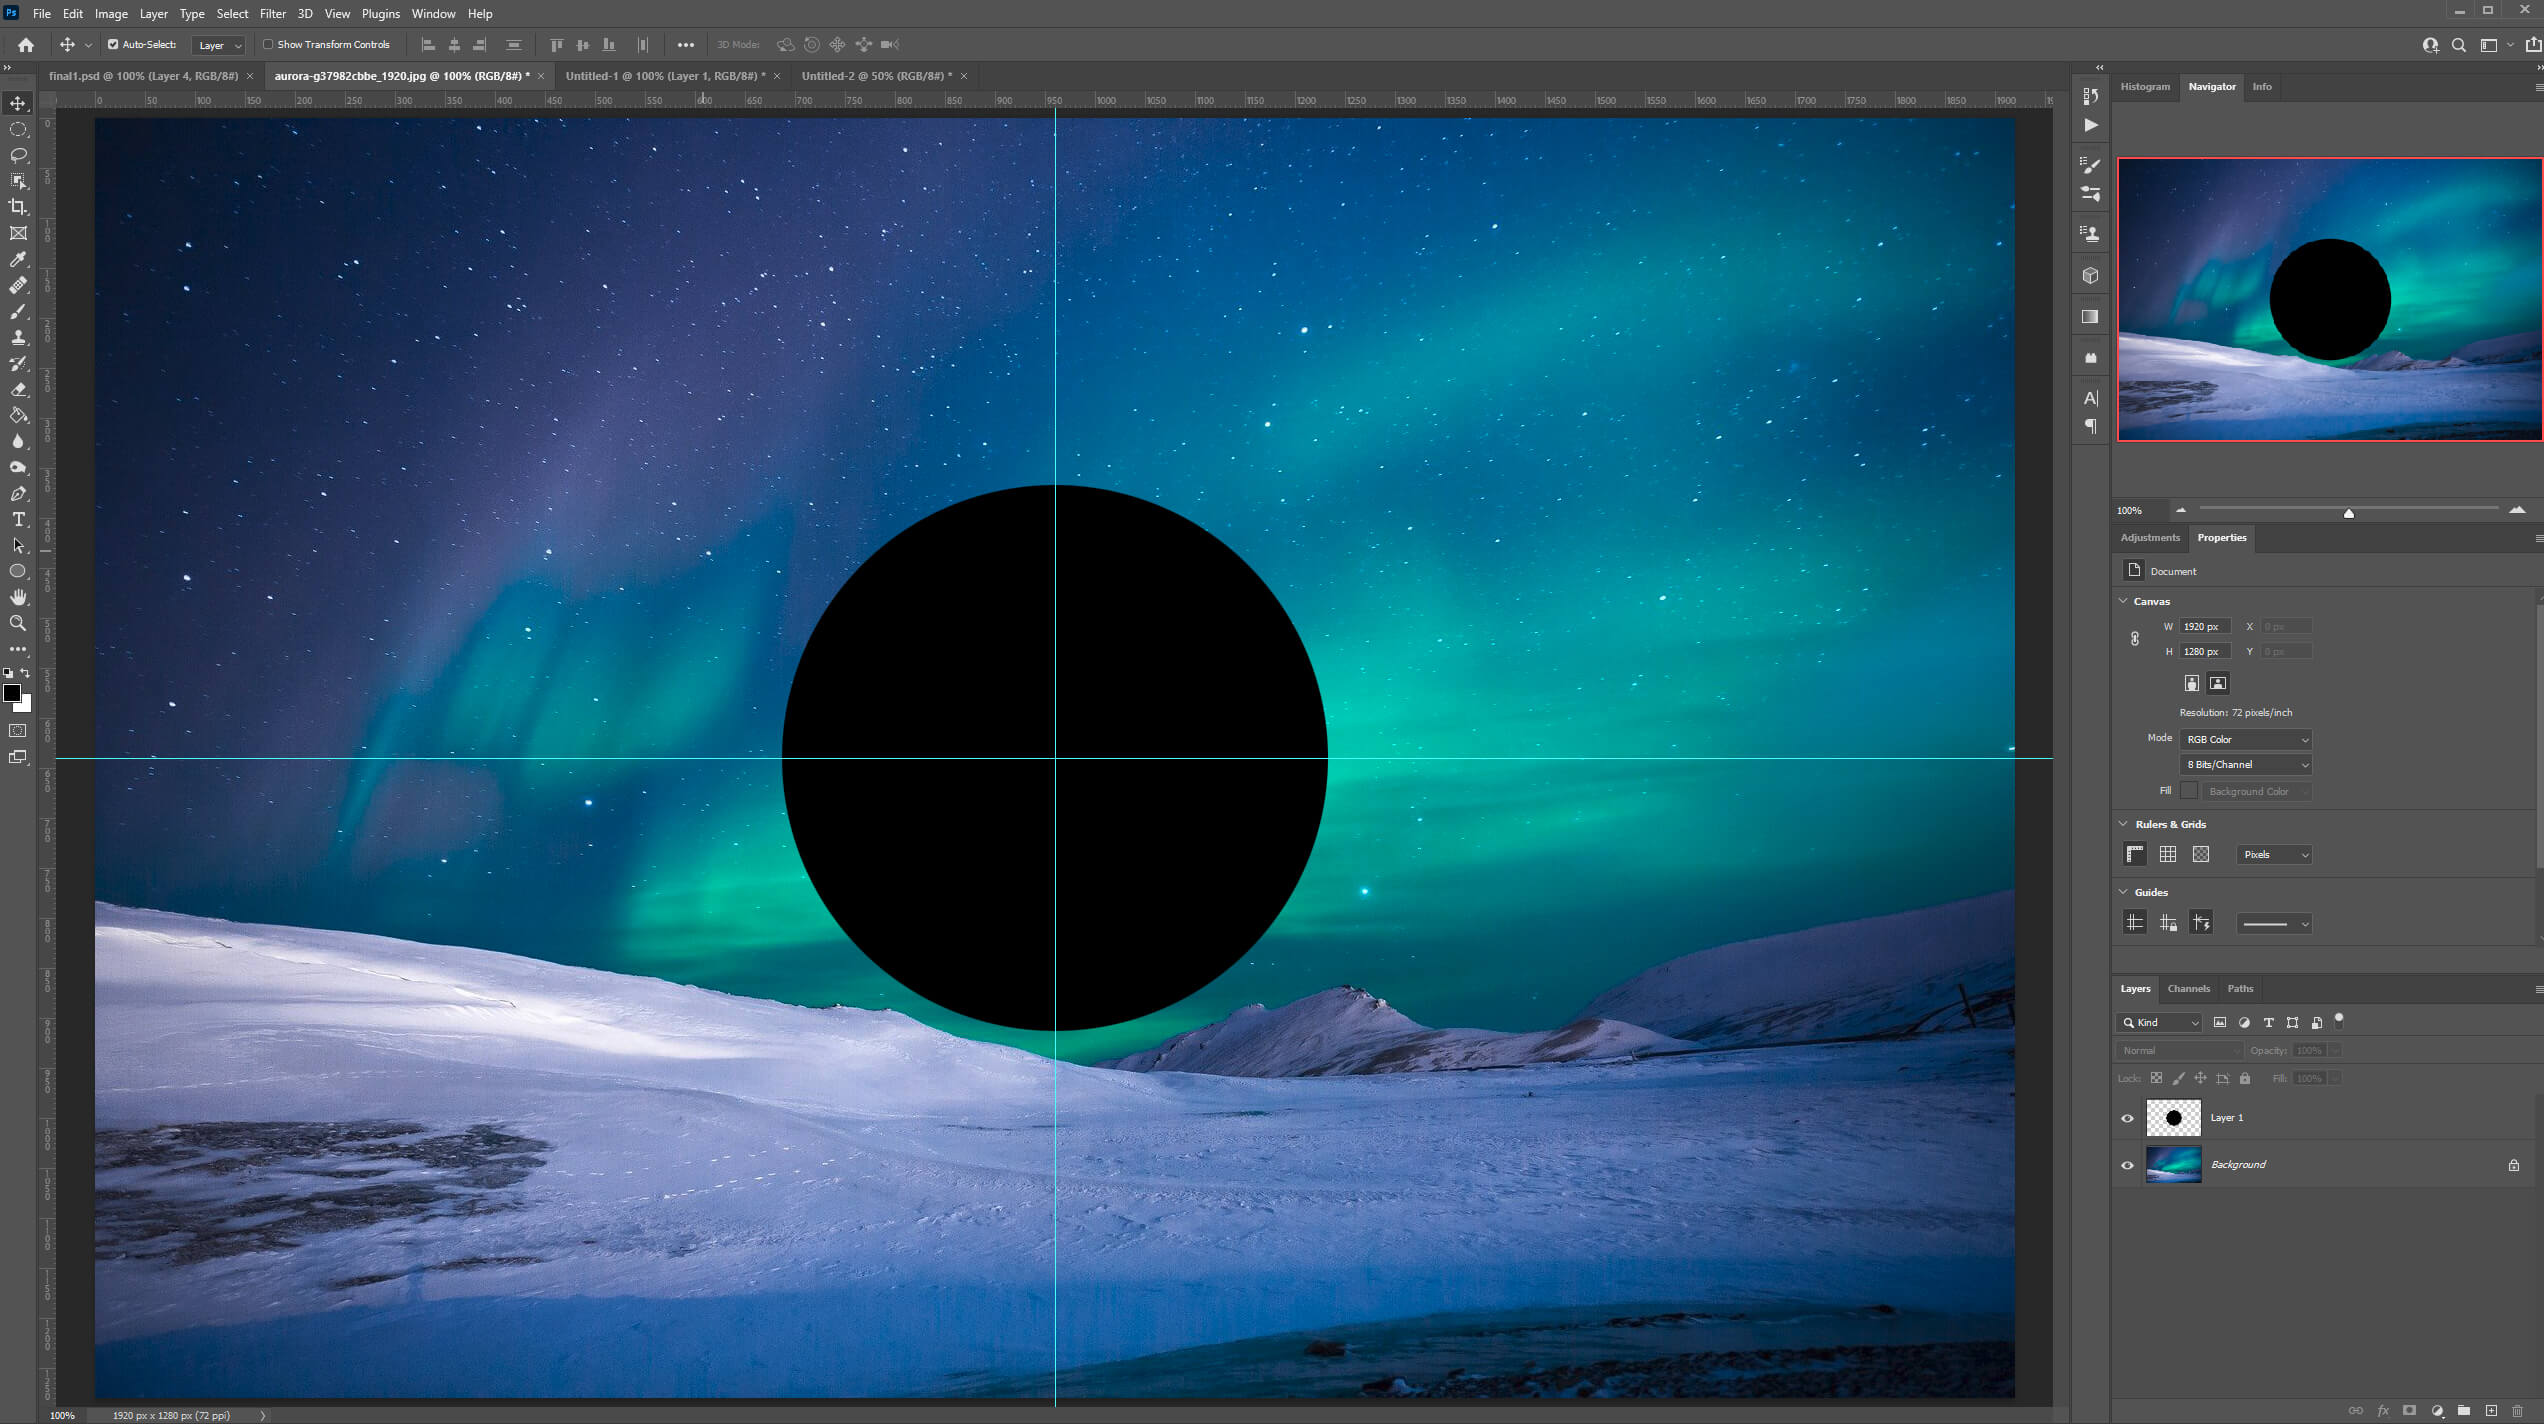
Next, fill that circle with black by pressing Alt + Backspace. Make sure to set your foreground color to black. Then, undo your selection by pressing Ctrl + D.

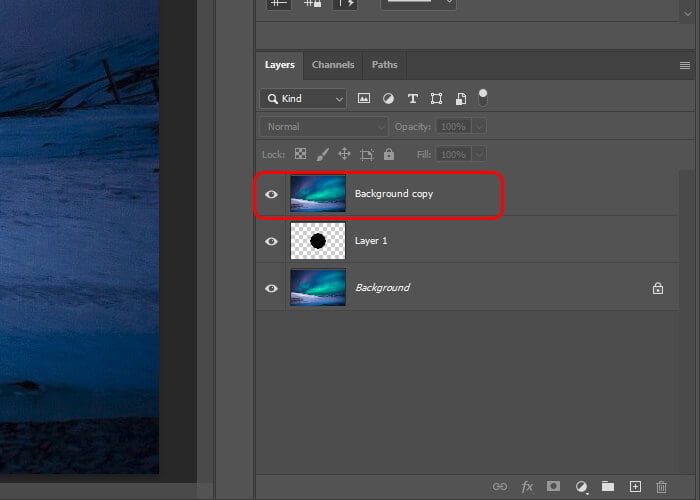
Step 2: Fillinig the Sphere
Select the background layer and duplicate it by pressing Ctrl + J. Drag this copy to the top of the layer stack.
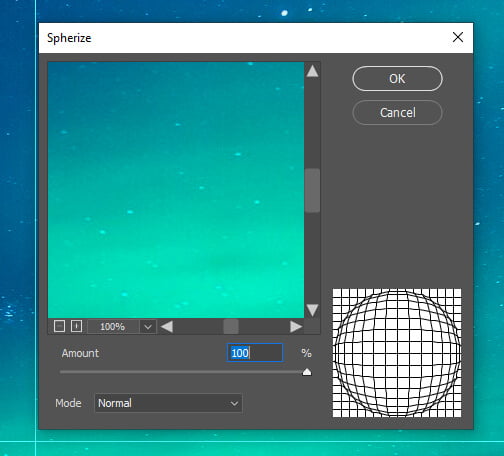
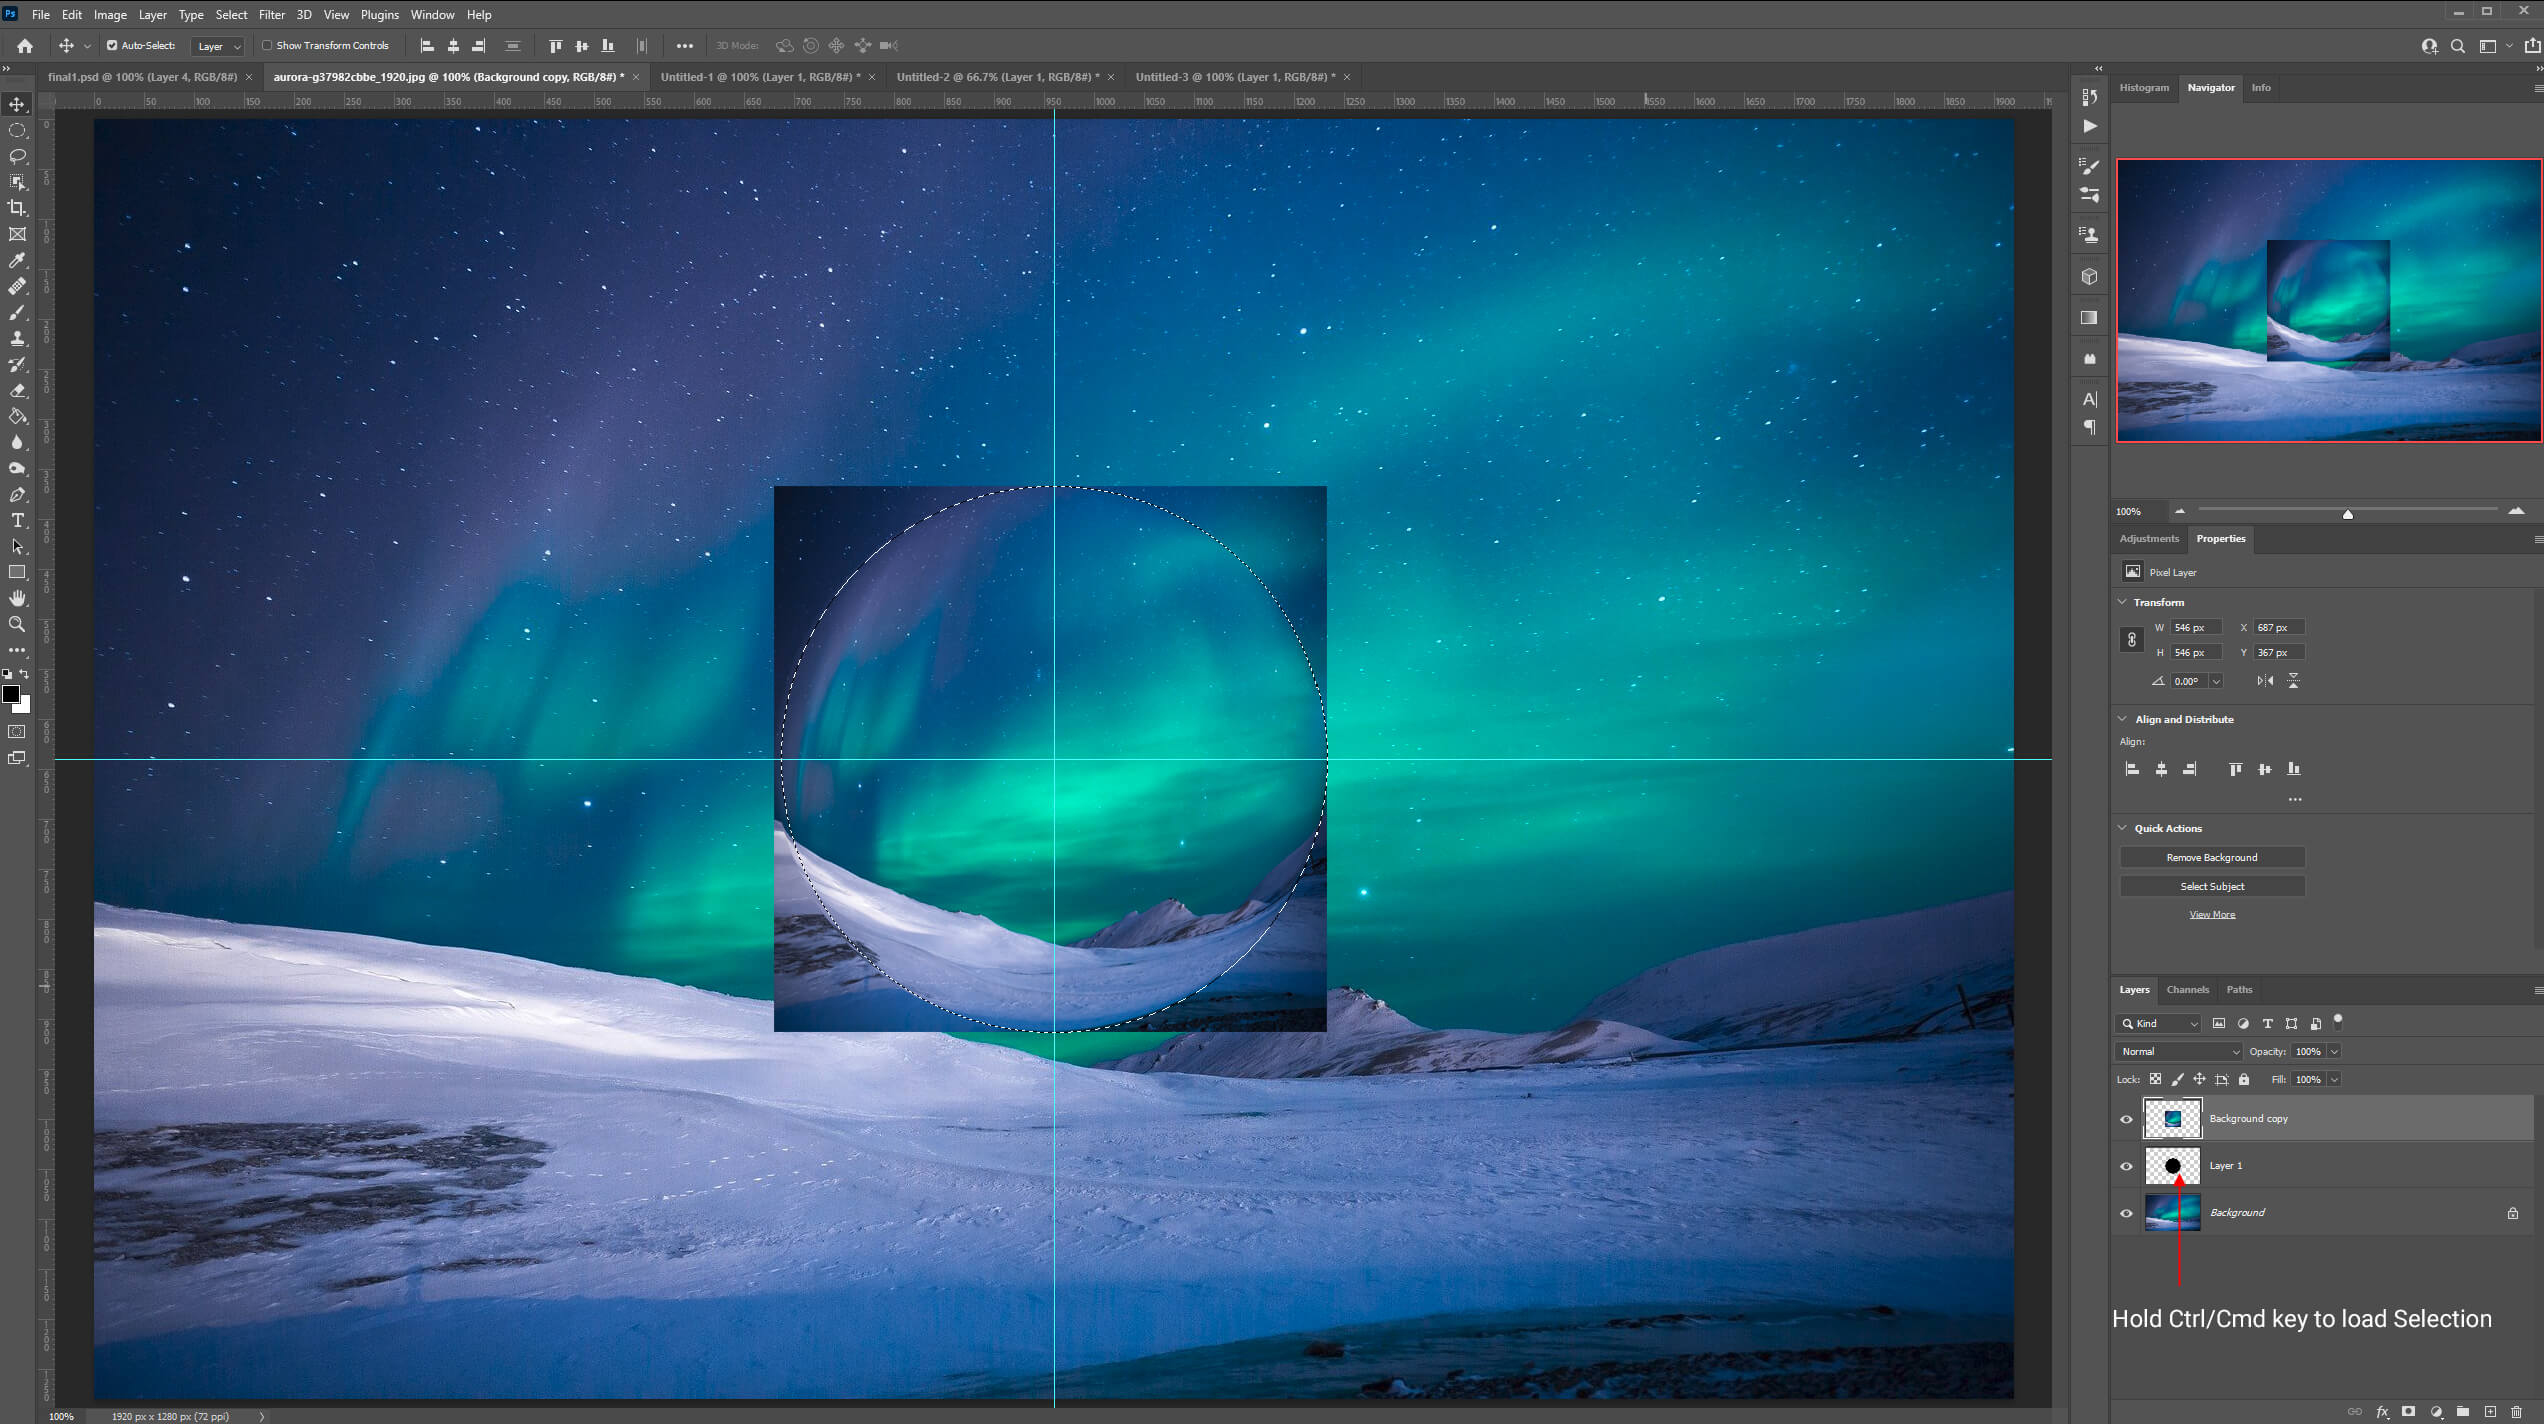
Go to Filter > Distort > Spherize and max out the amount to 100%.

Then press Ctrl + T to transform and scale it down to the same size of the black circle layer. You’ll need to scale non-proportional to make it fit perfectly.
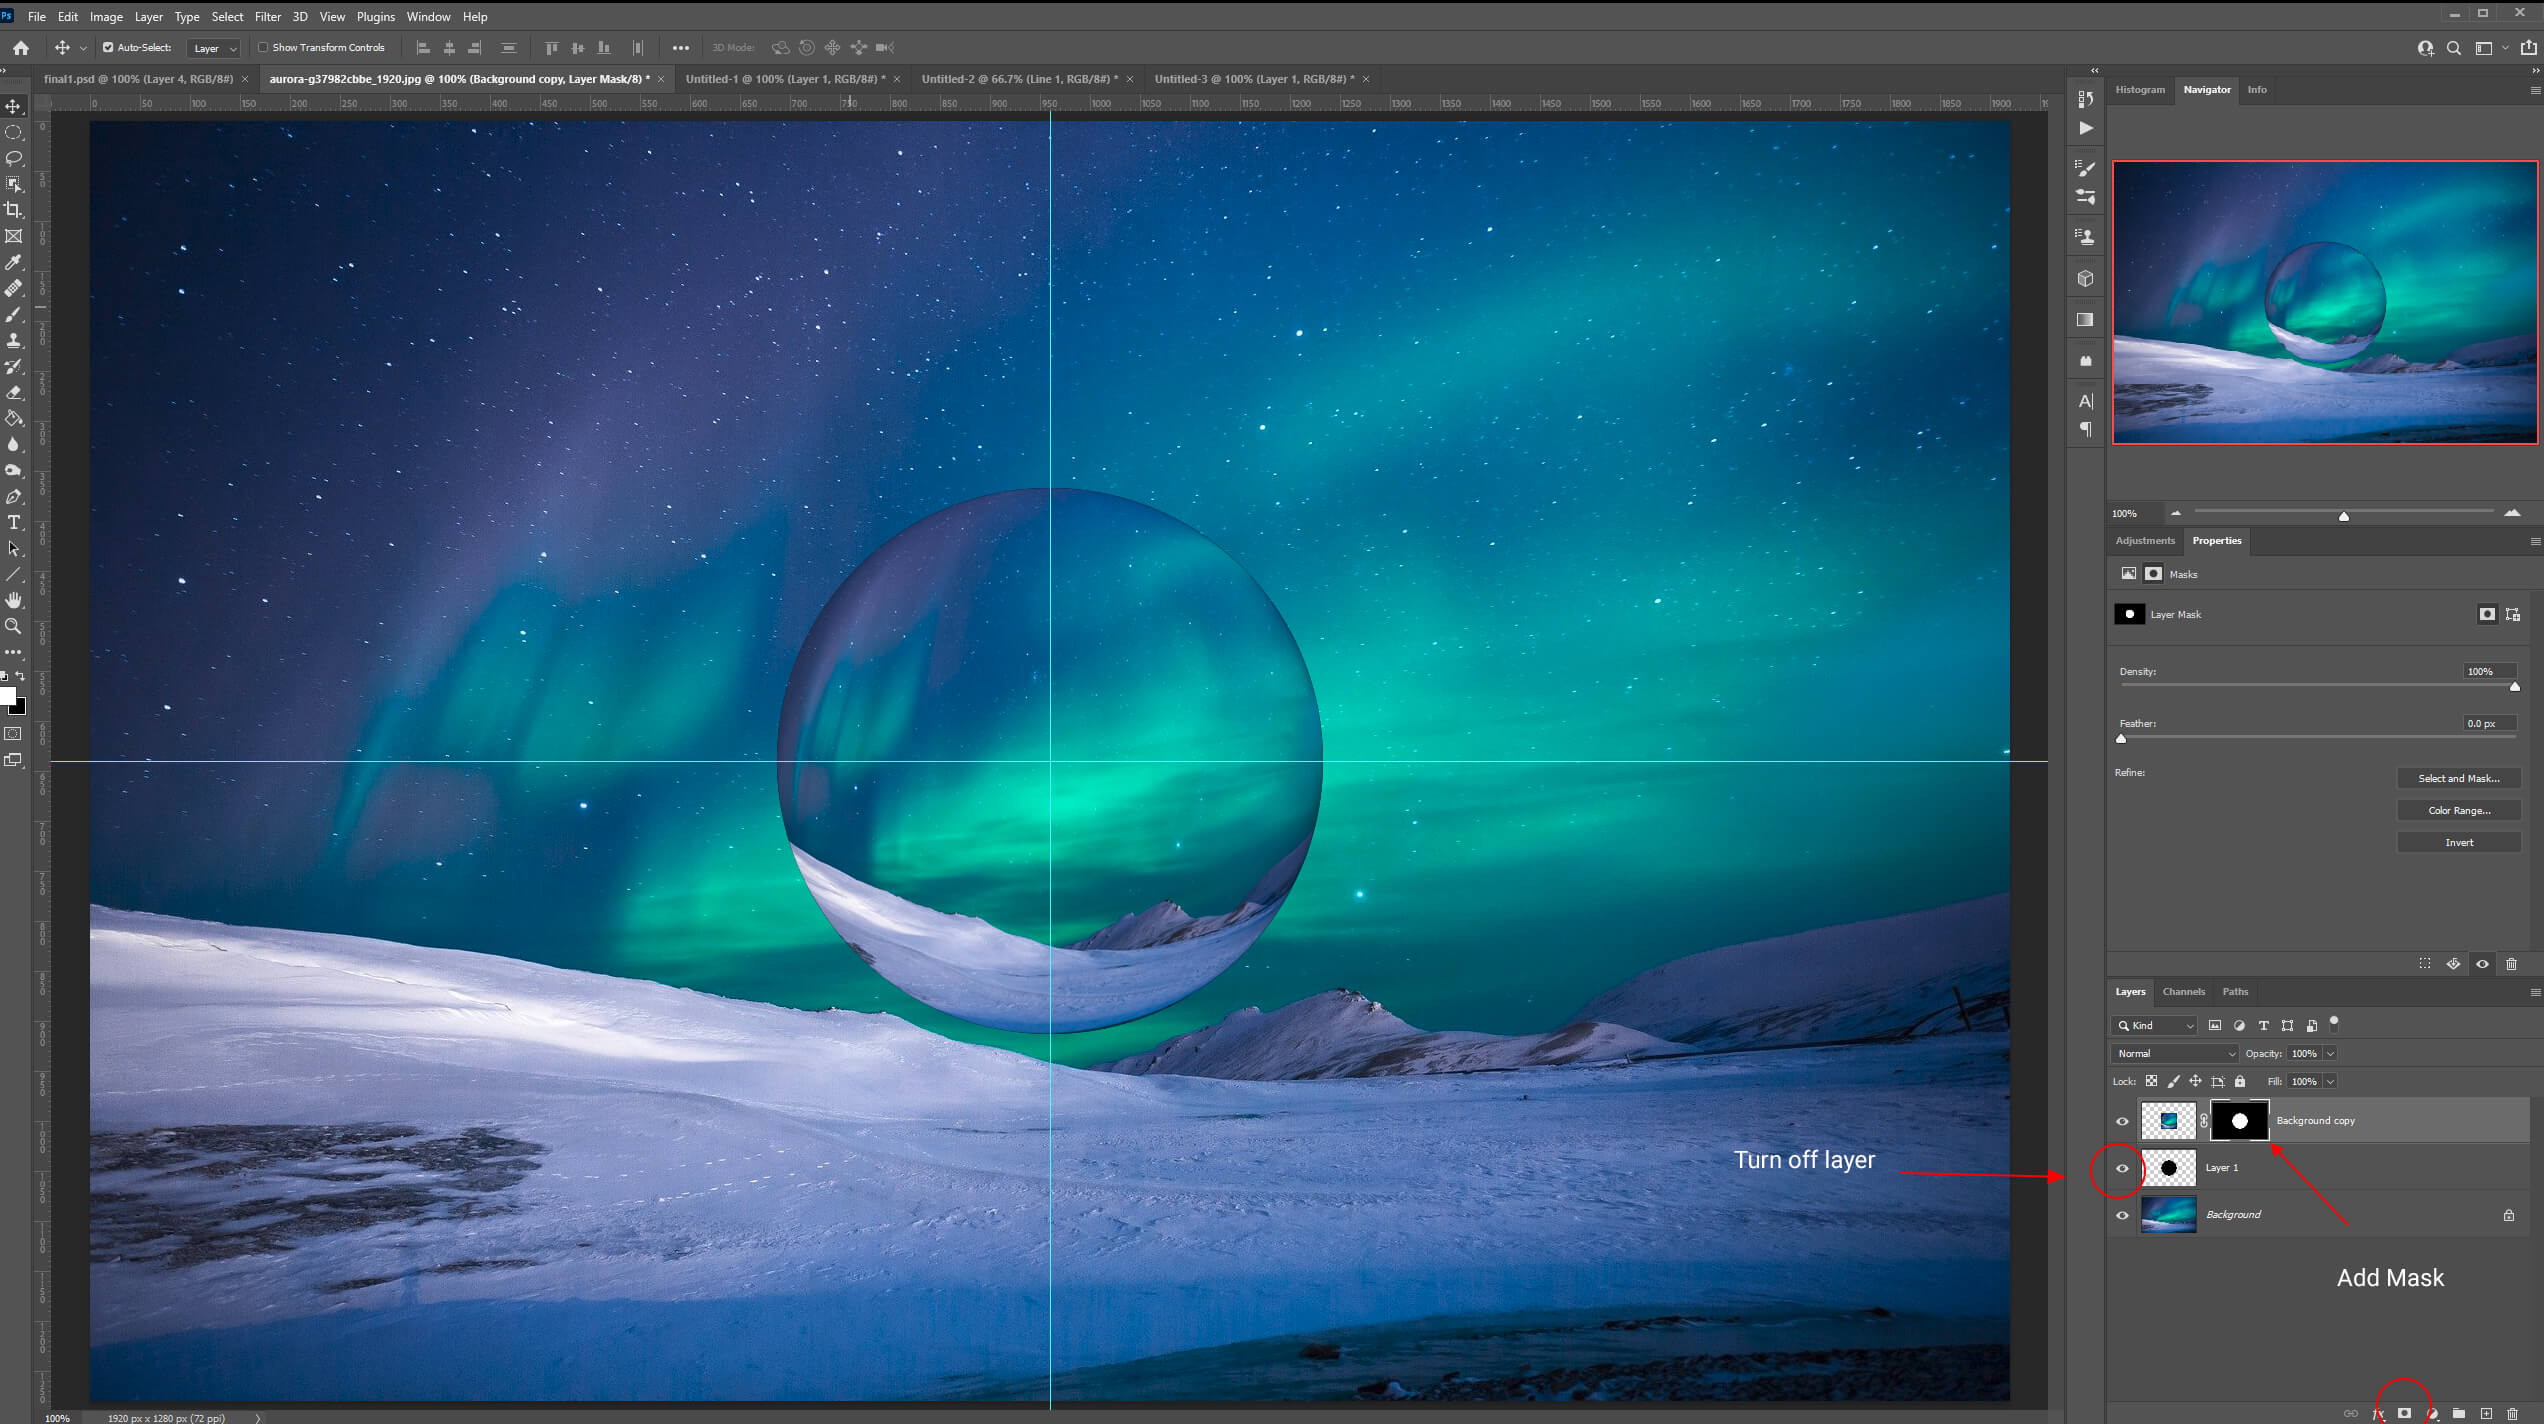
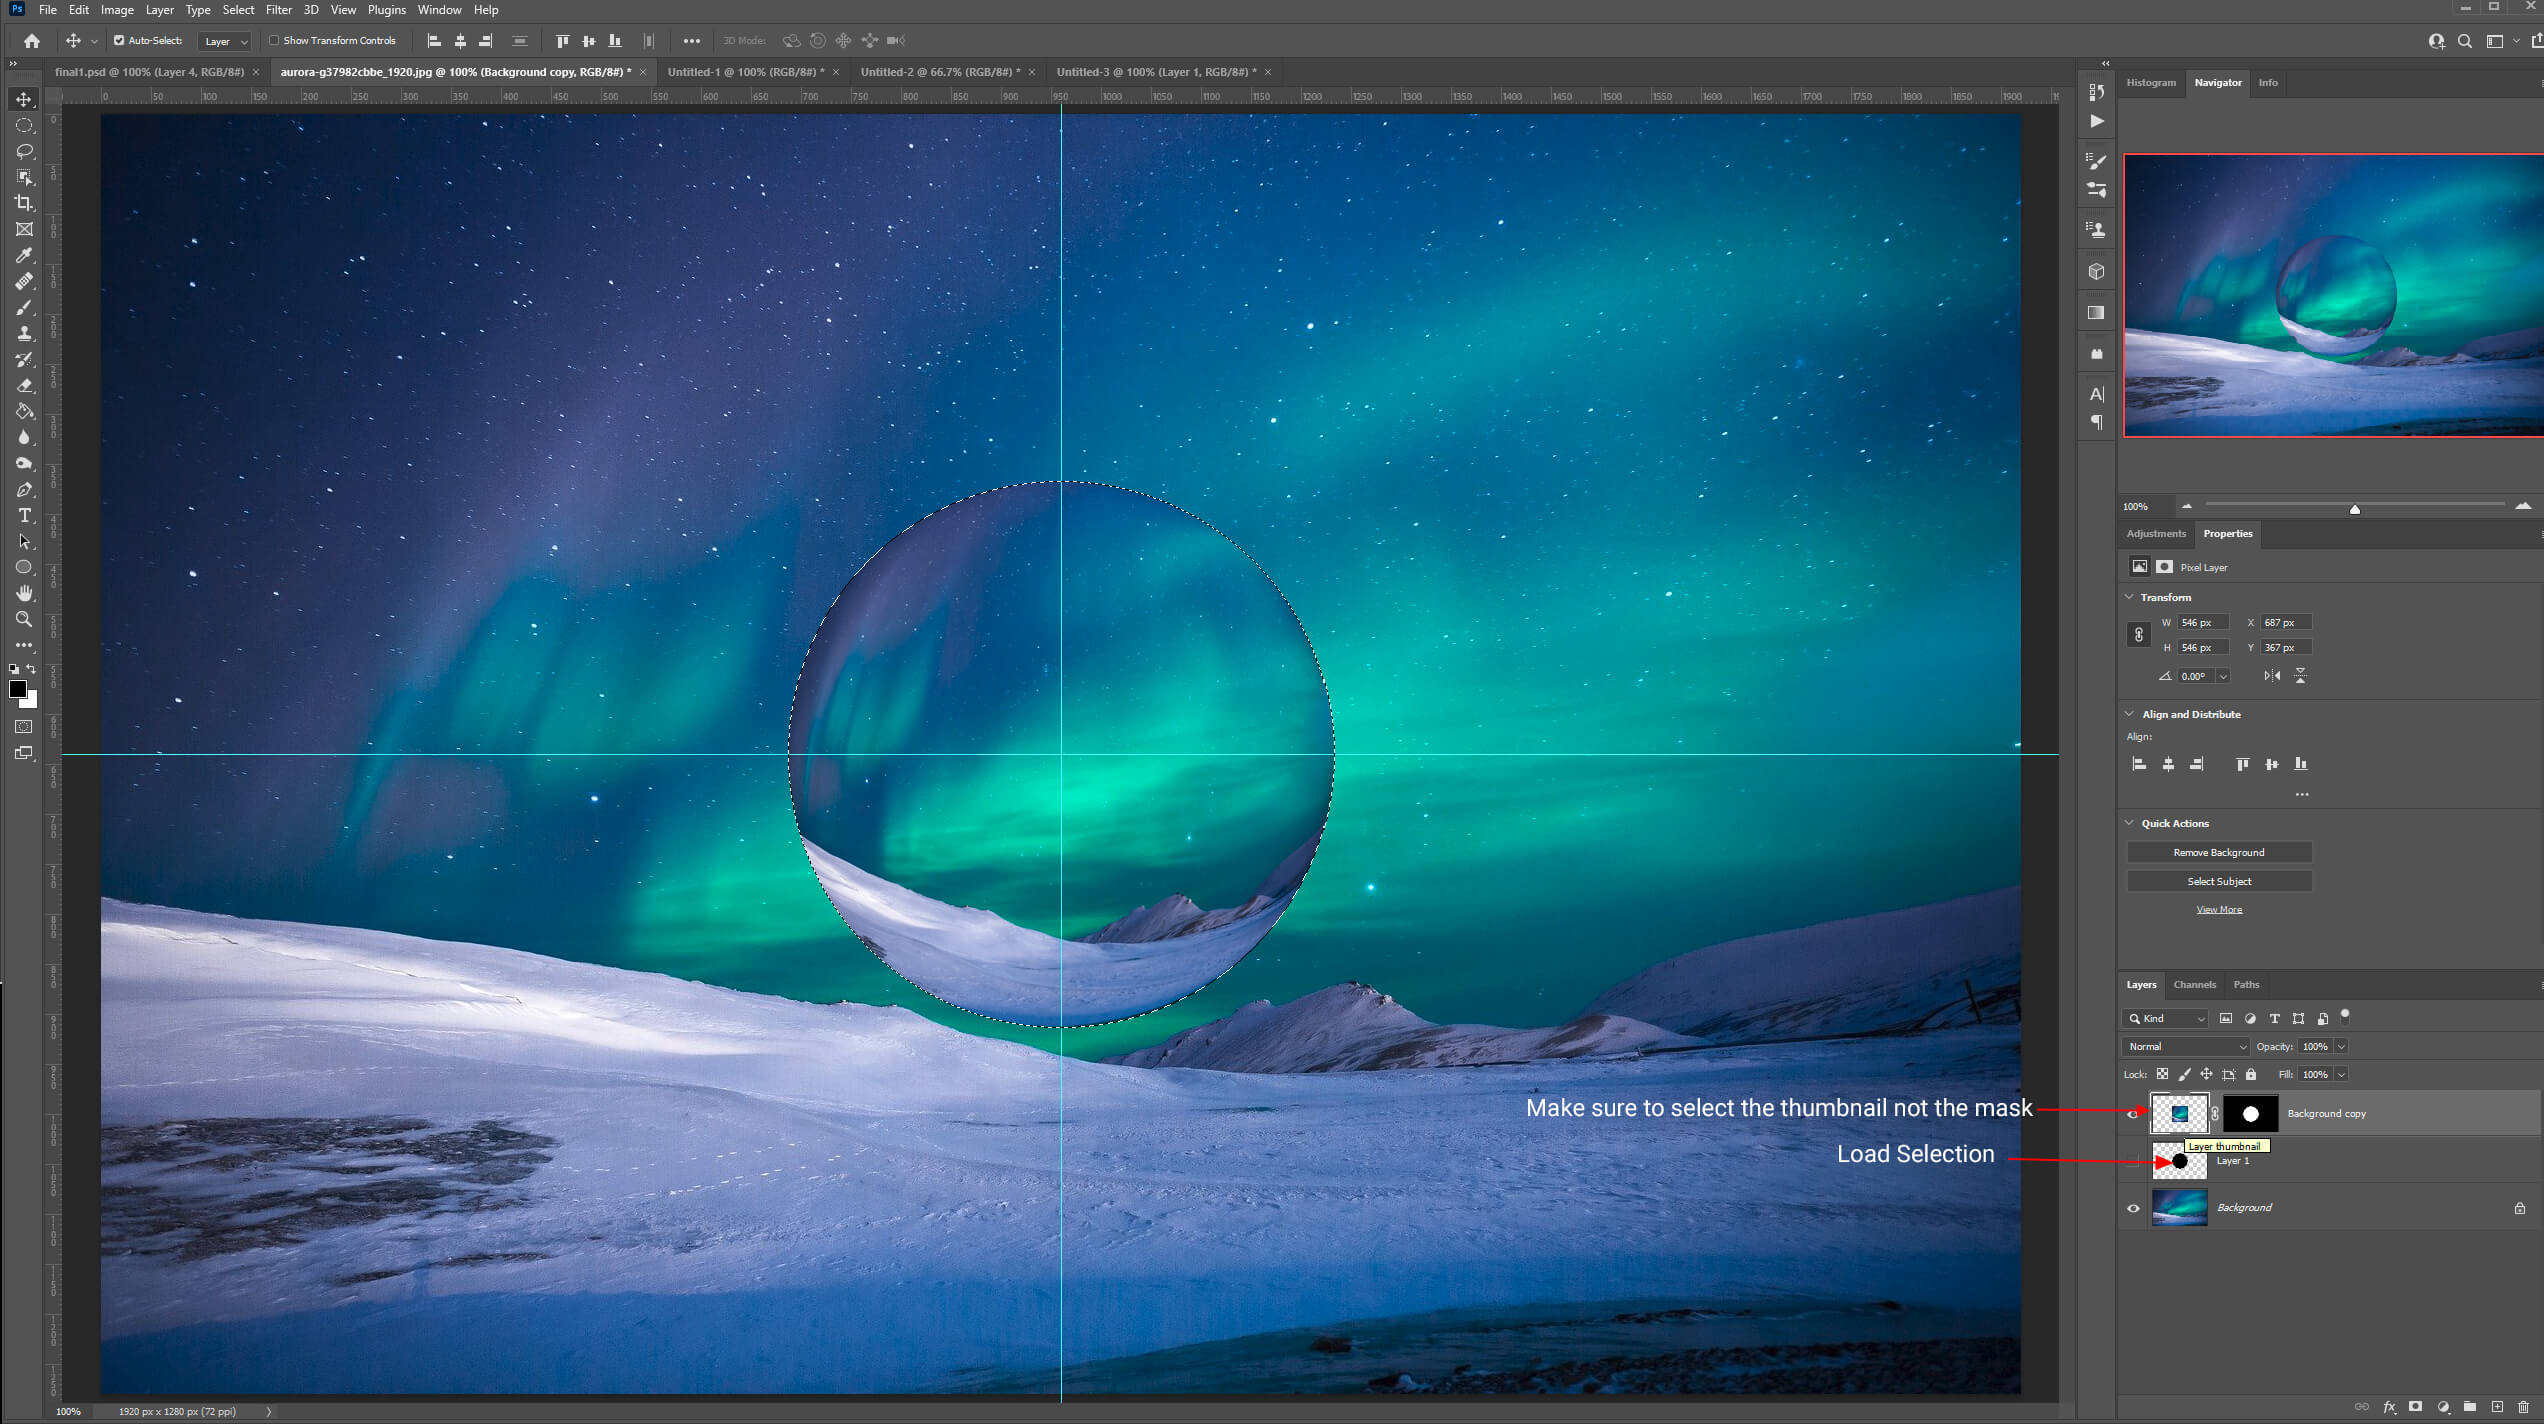
Hold the Ctrl/Cmd key and click on the layer thumbnail of the black circle layer to load its selection then add a layer mask. It should trim away the square corners. Turn off the visibility of the black circle layer.
Step 3: Add Effects
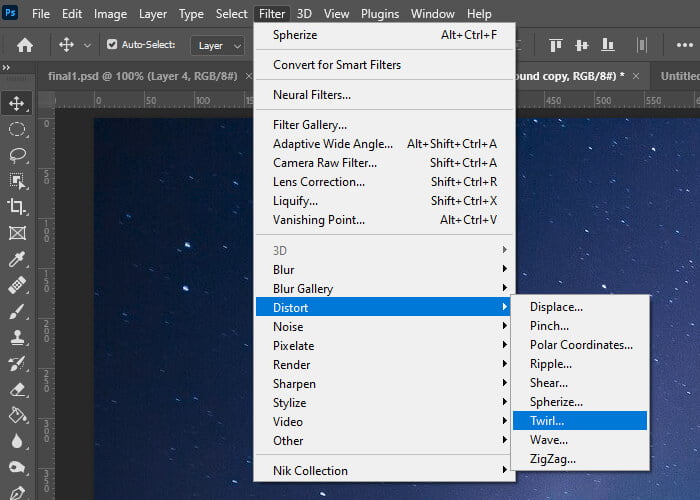
We’ll add a Twirl Effect. To do that, we’ll have to activate the black circle selection again. Hold the Ctrl/Cmd key and click on the layer thumbnail of the black circle layer. Before applying the Twirl Effect make sure you select the thumbnail of the background layer copy.
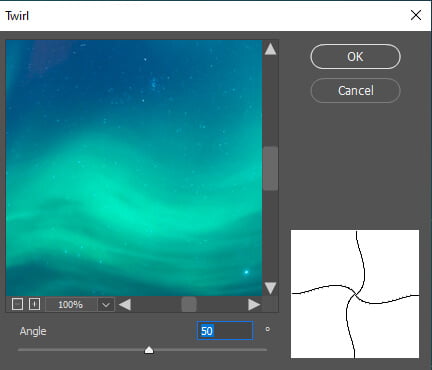
Go to Filter > Distort > Twirl. Add around 50% twirliness to distort the image slightly.
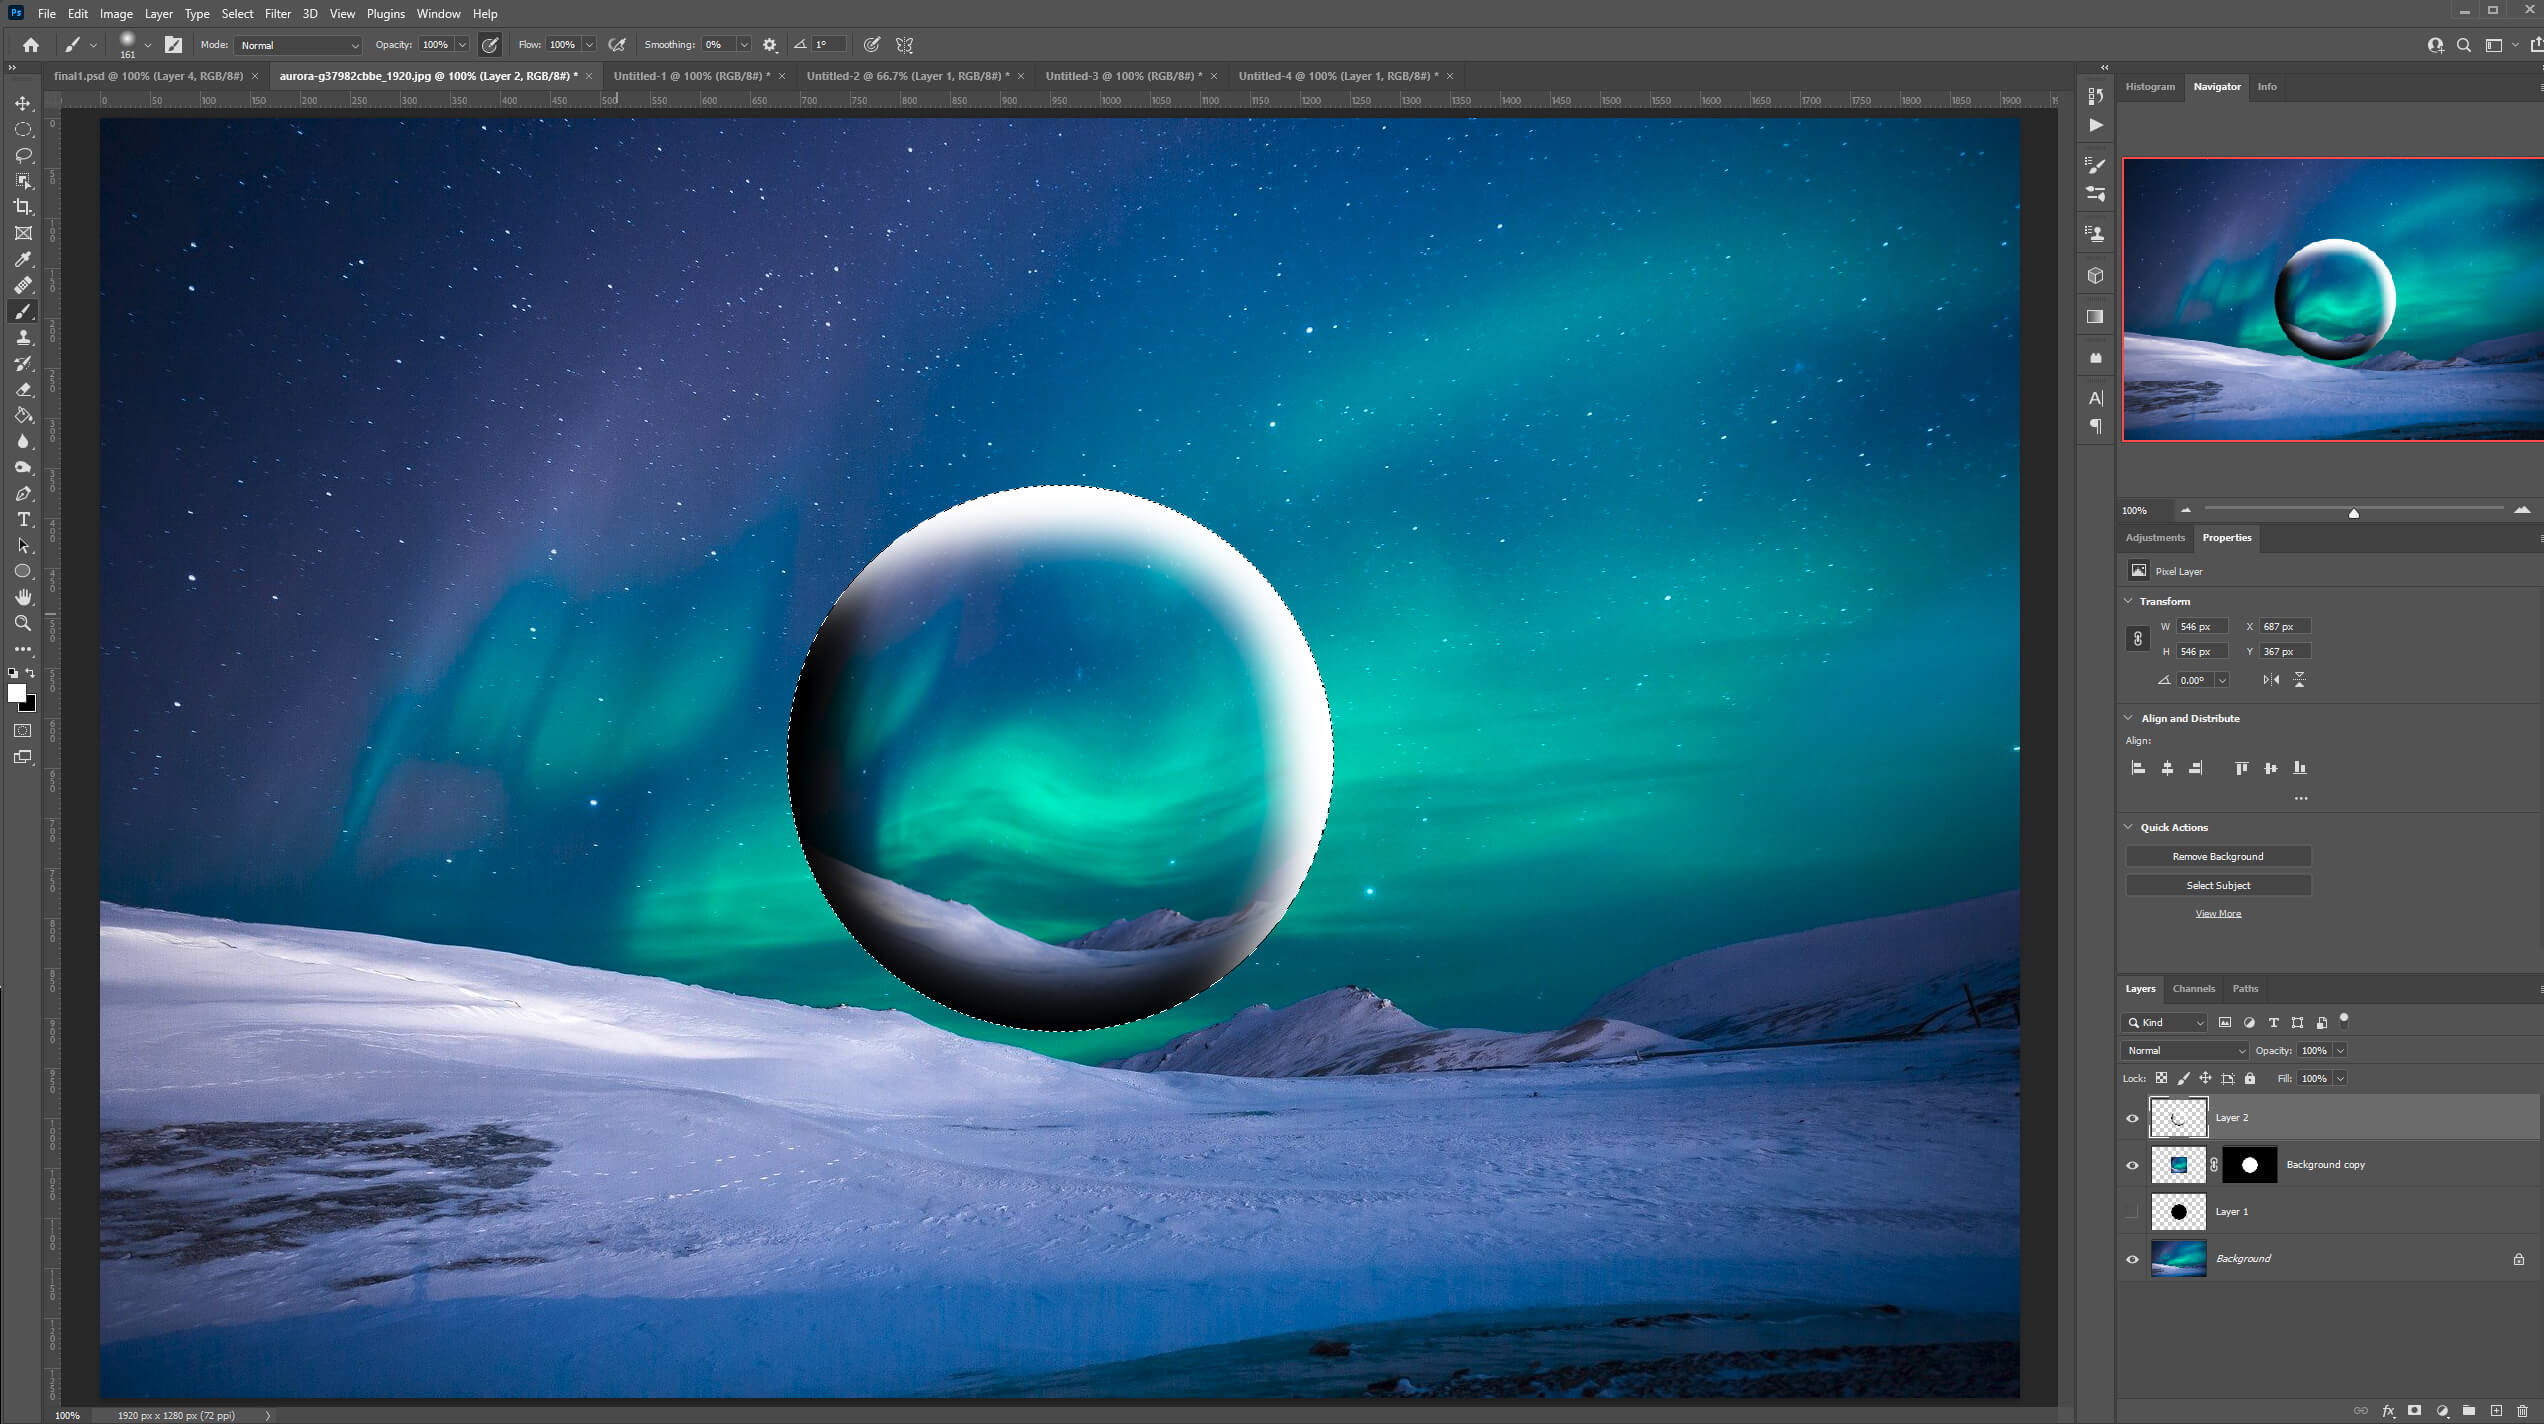
Add a new layer and select the Brush Tool. A soft tip with no hardness. Ctrl/Cmd click on the black circle layer to load the selection again.
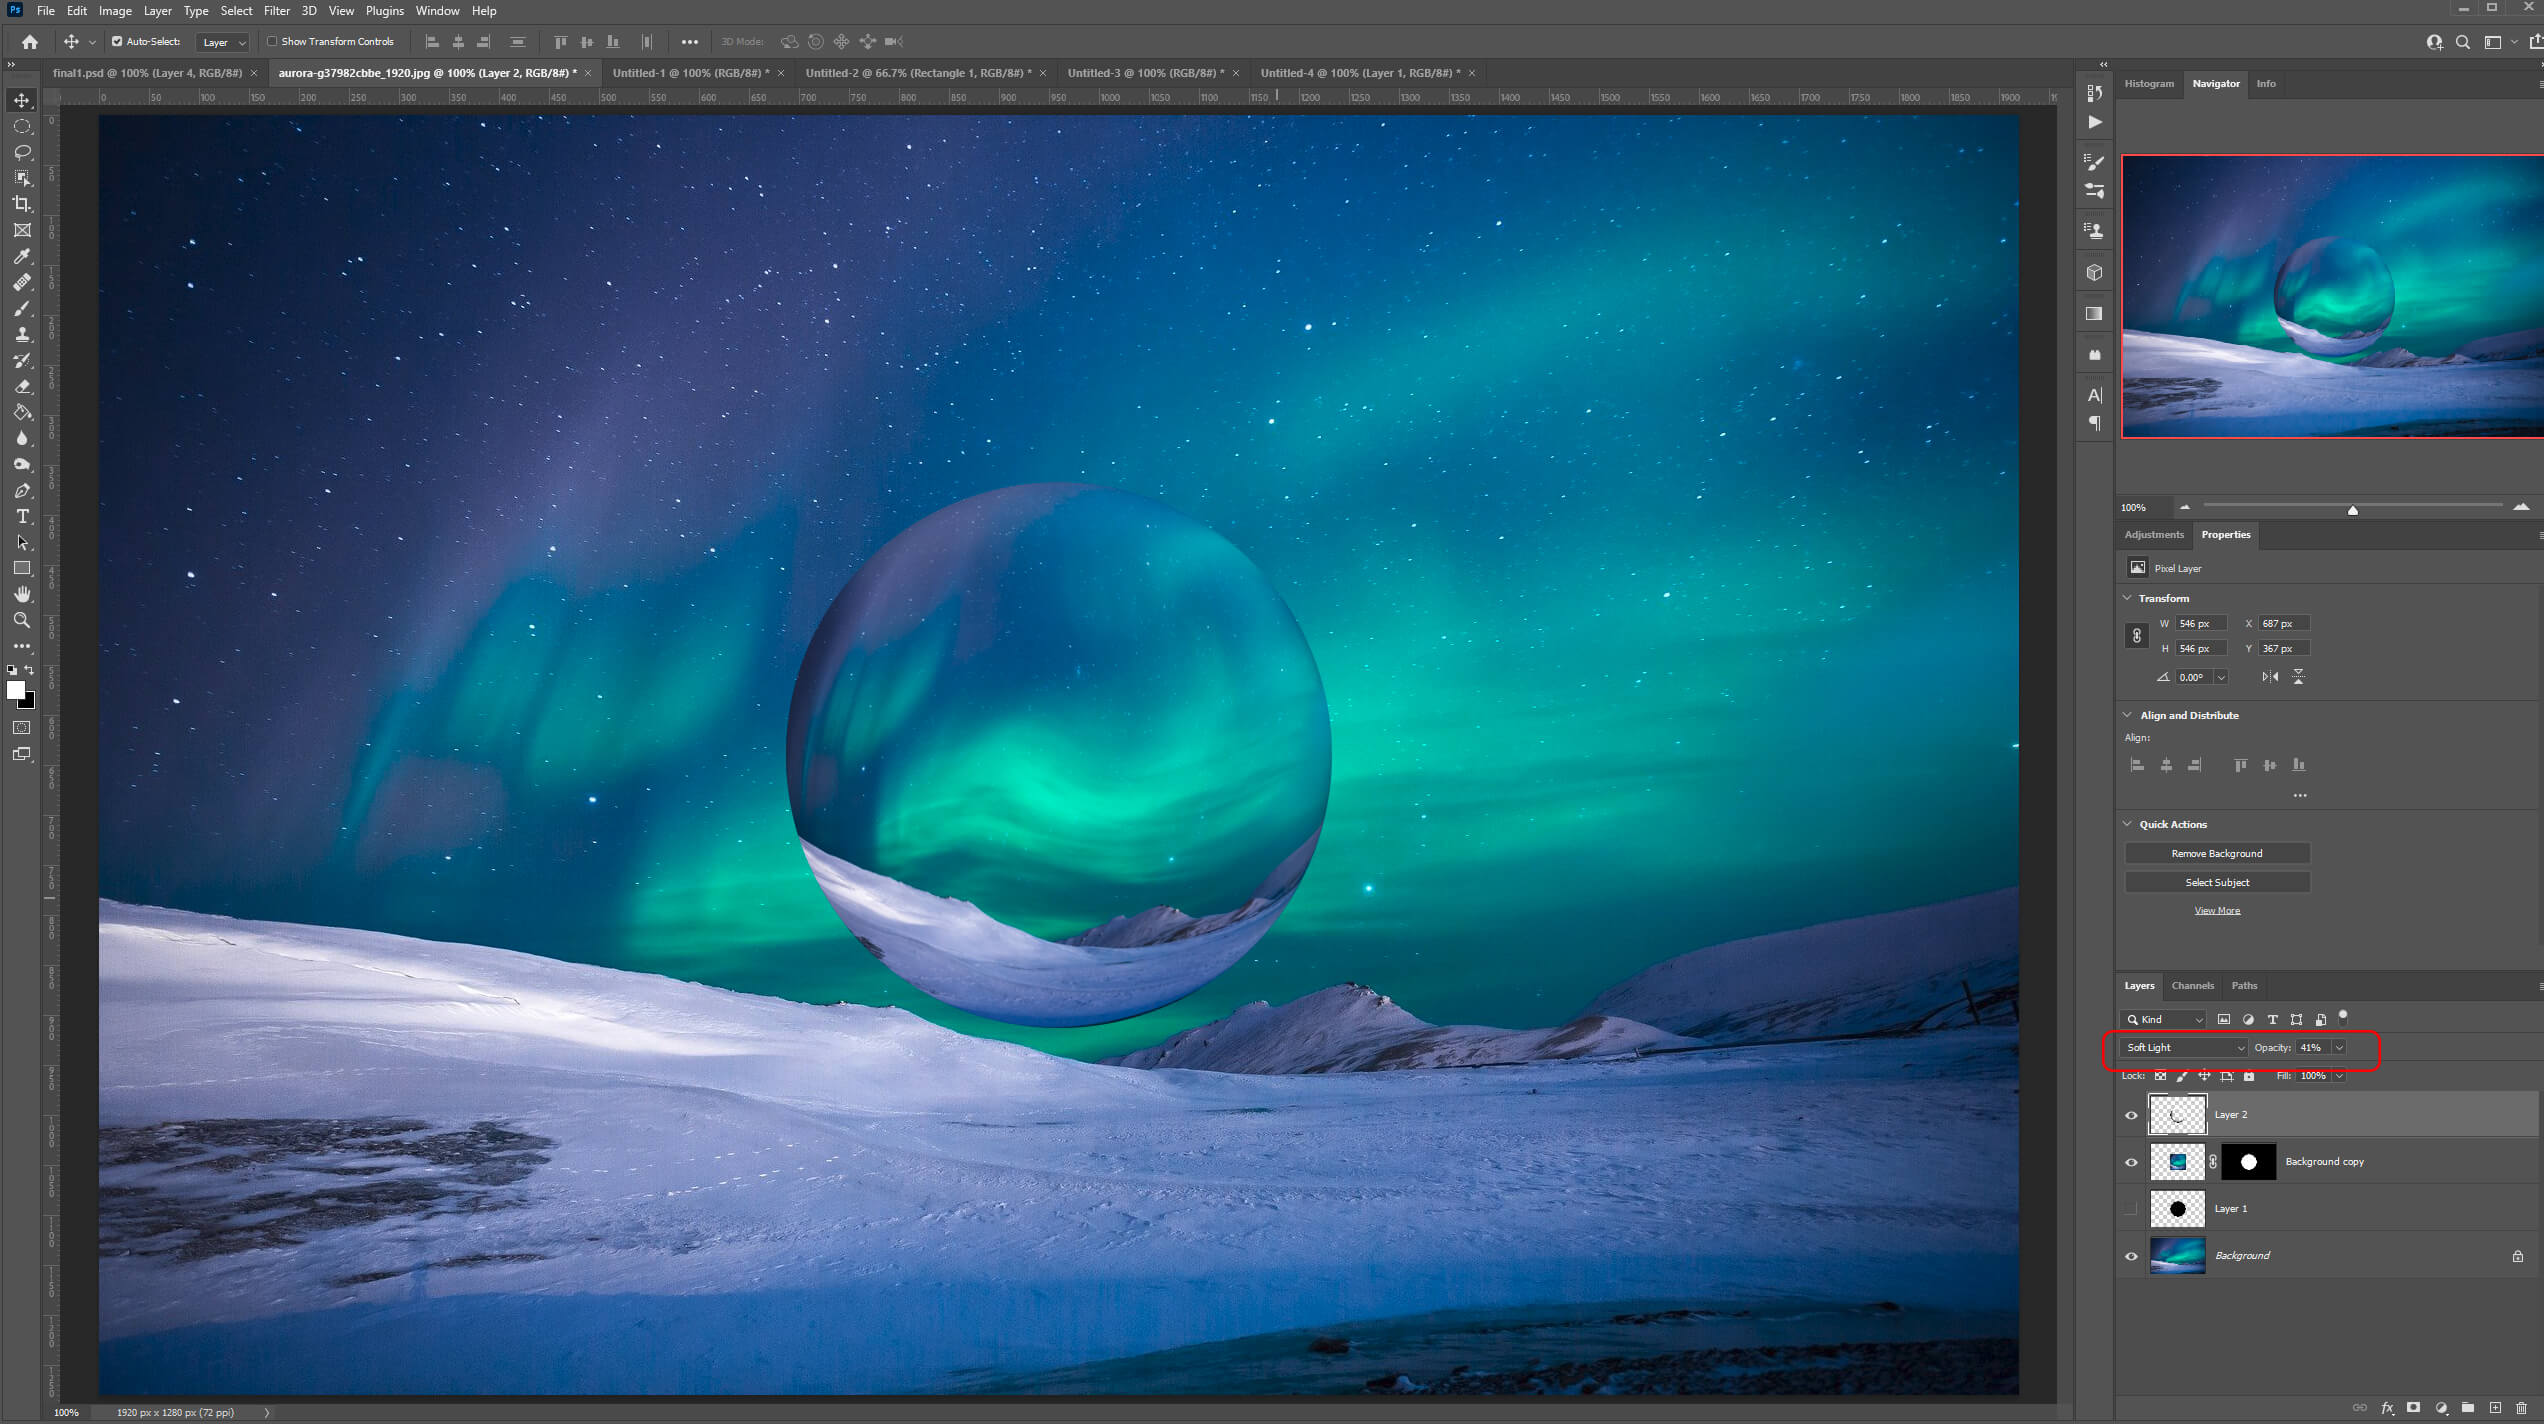
Pain in black on one side of your sphere to add some shading. Use the X key to swap the foreground and background color and paint with white on the opposite side to add some highlights.
Change the blending to Soft Light and reduce the opacity to around 40%.
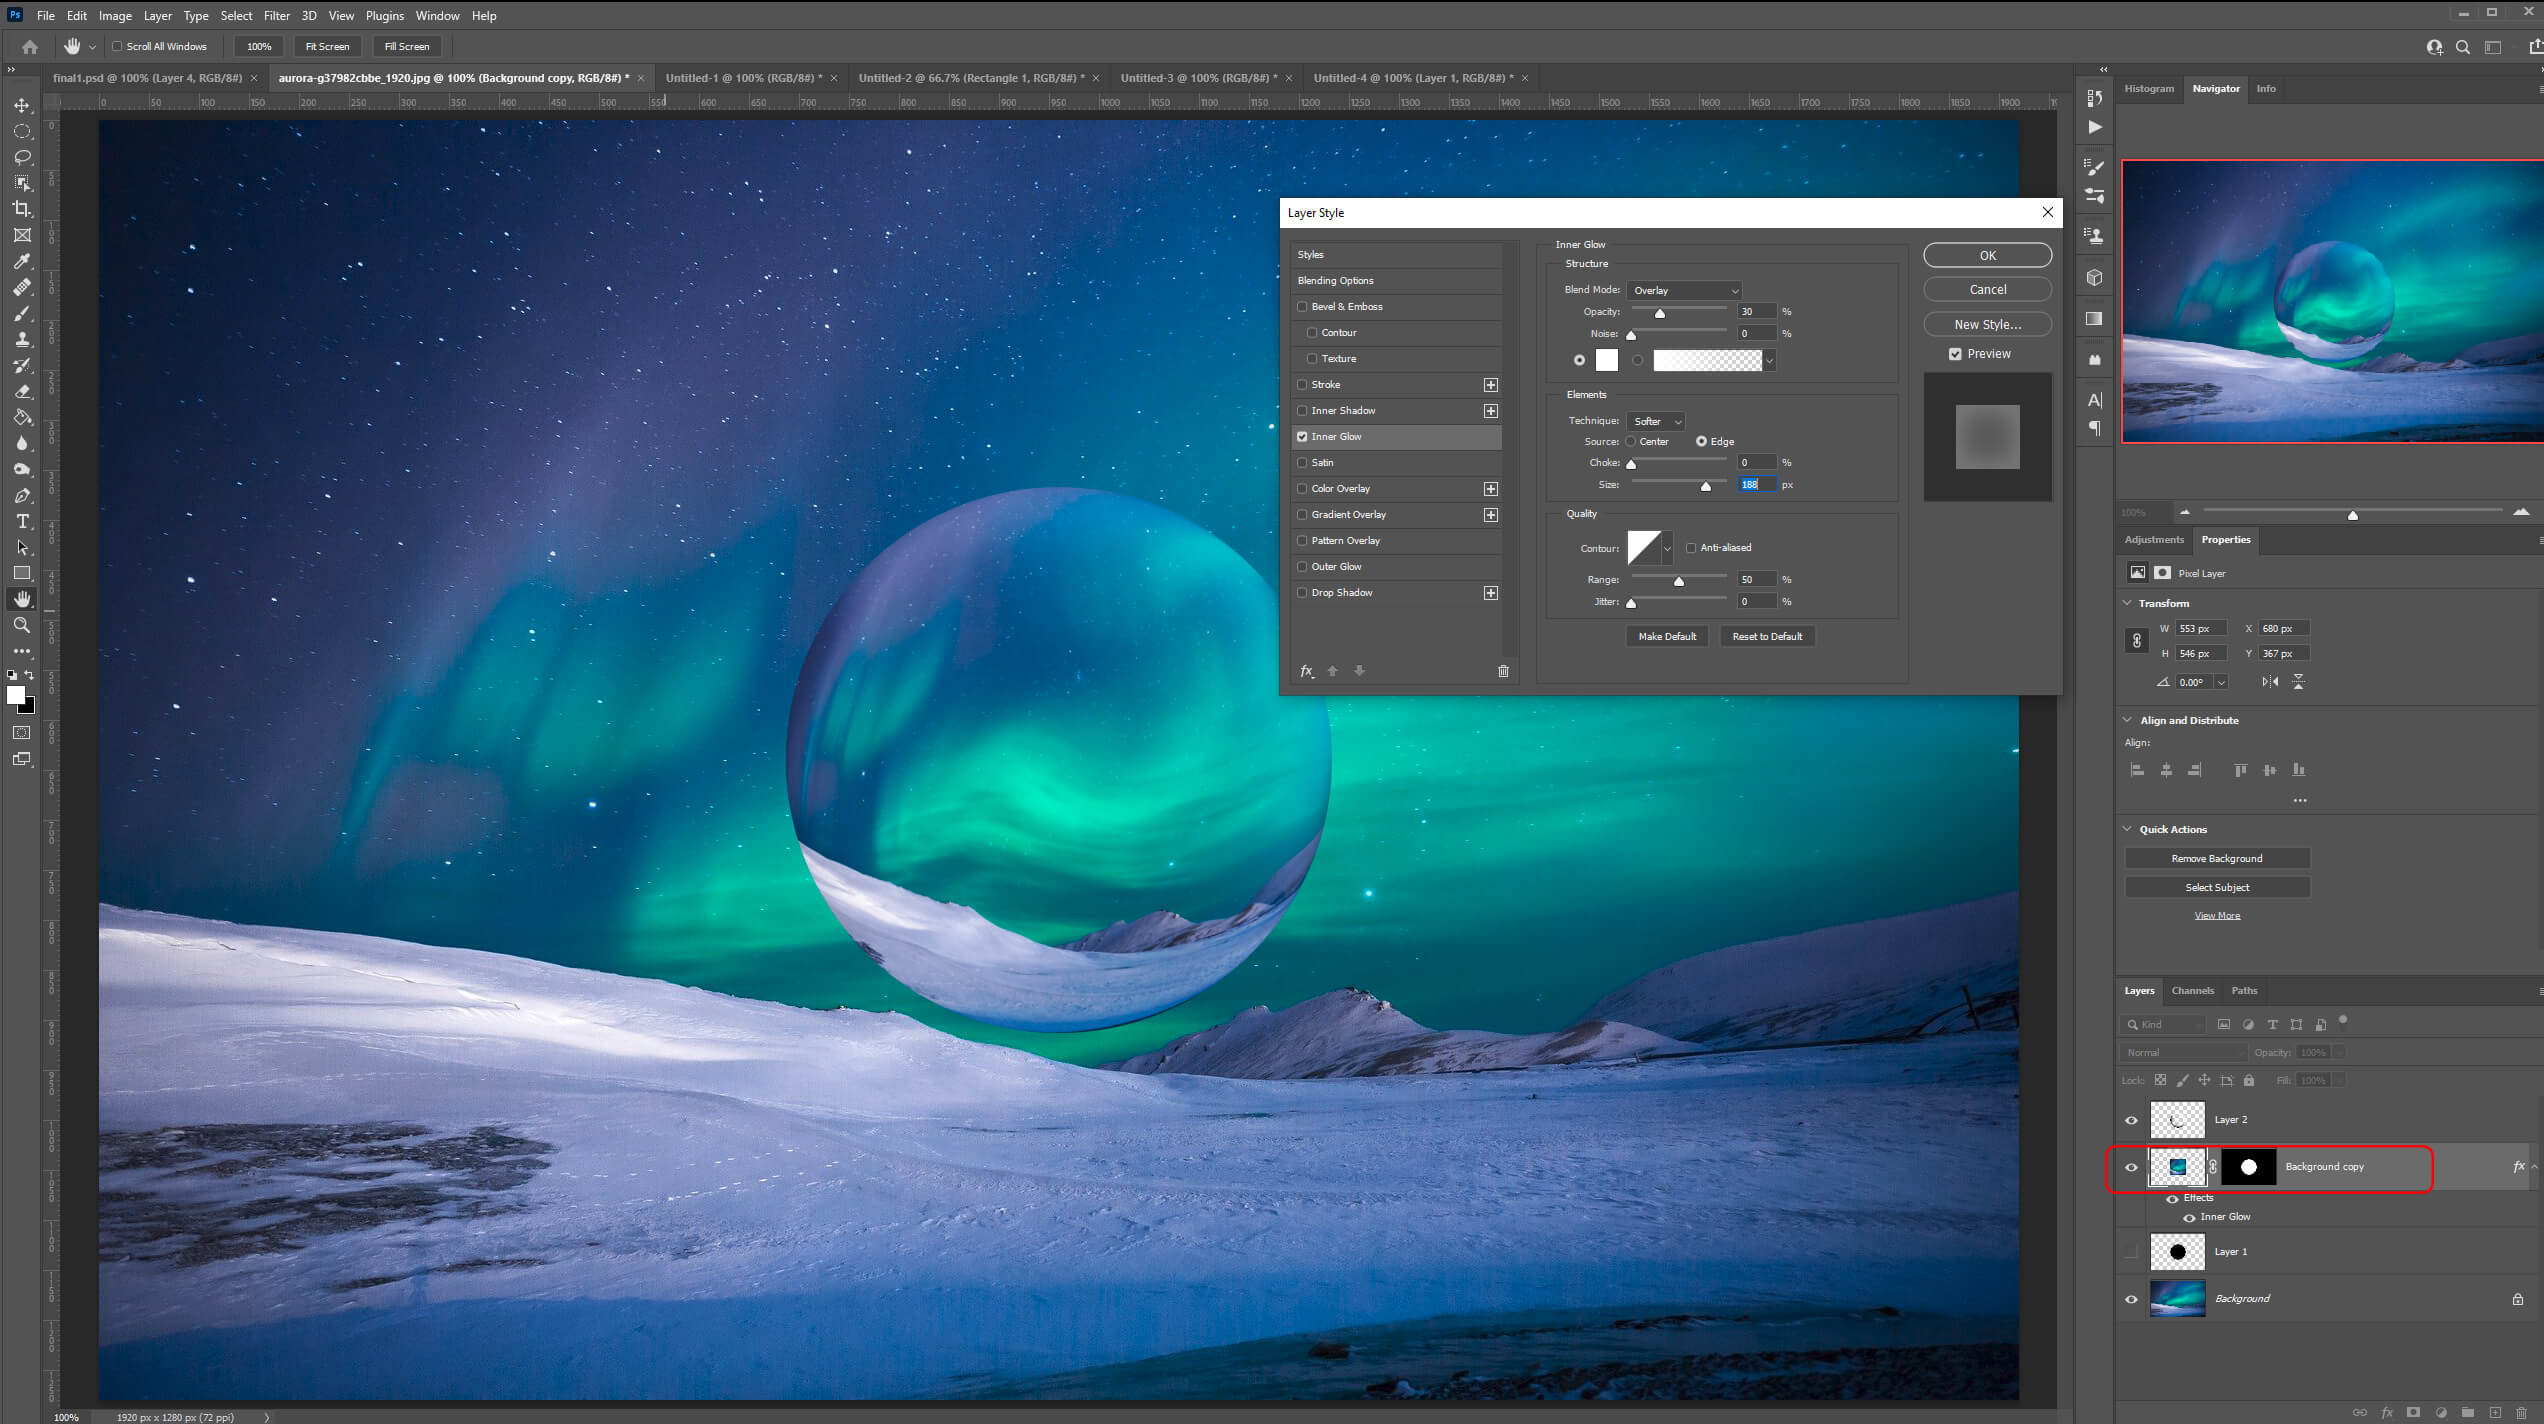
Double click the main sphere layer and add an Inner Glow Layer Style and copy my settings.
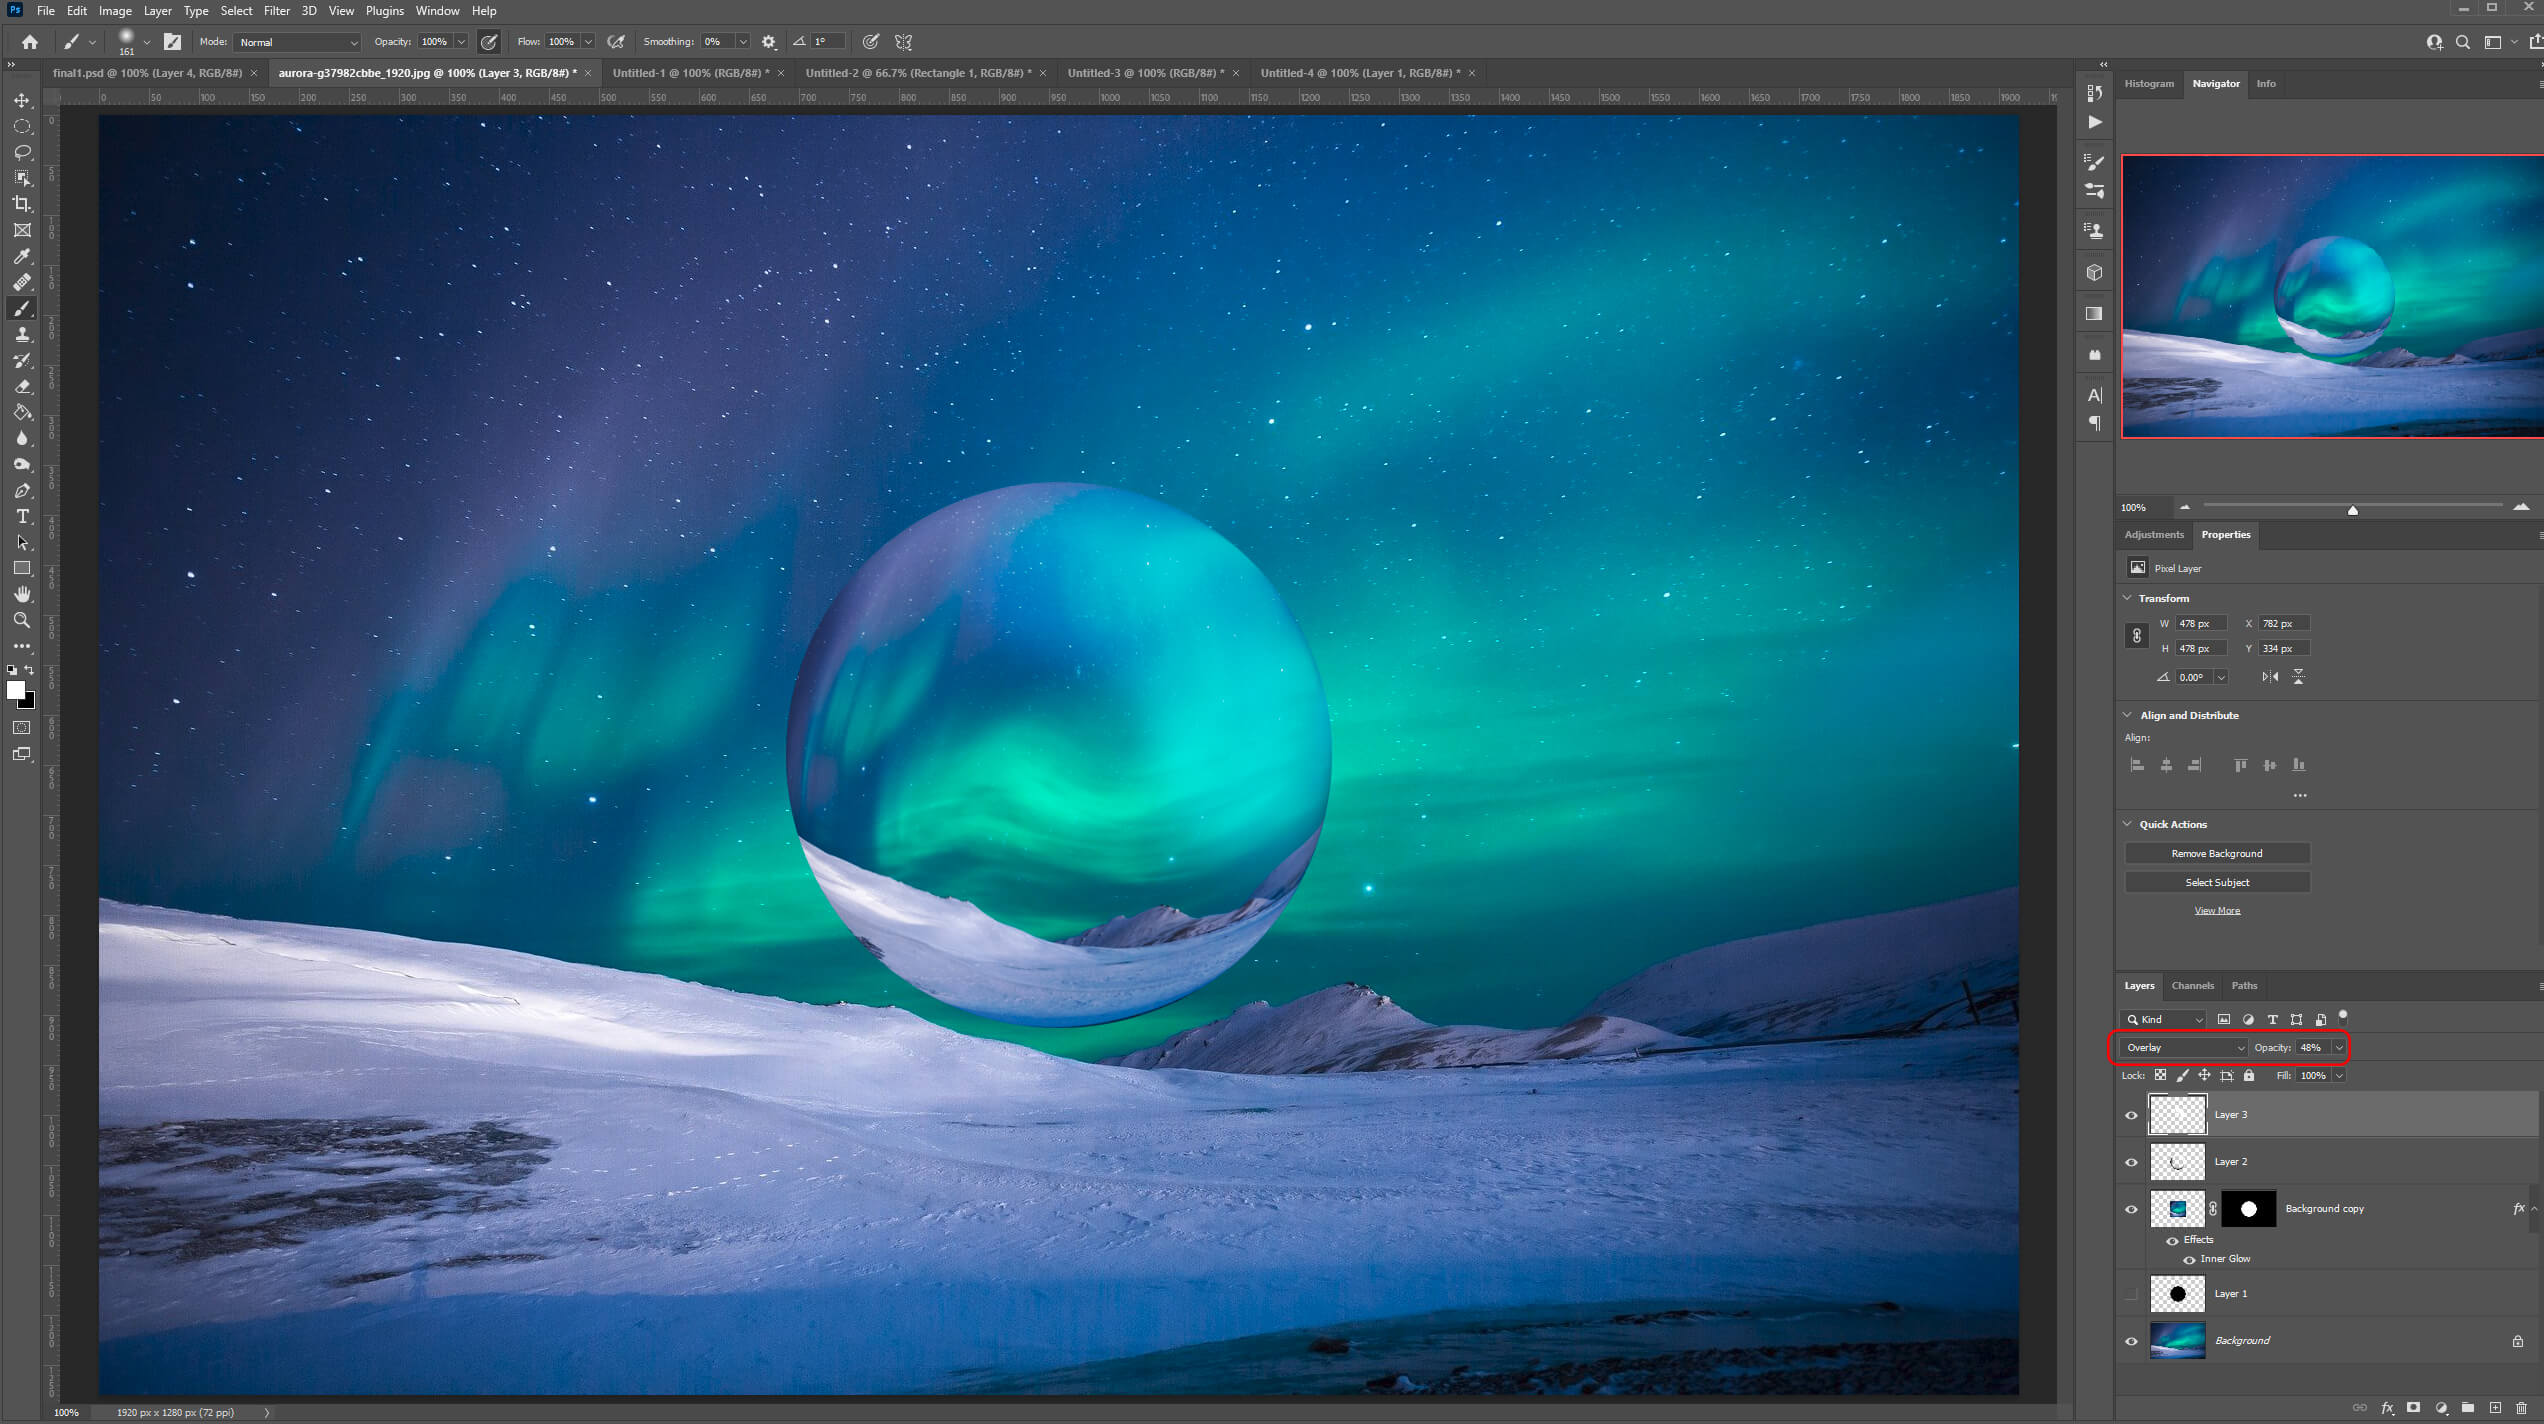
We’ll add a new layer on the top of all the layers and draw some basic highlights within the shape sphere area with a white brush and change the Blending Mode to Overlay. Reduce the opacity to around 50%.
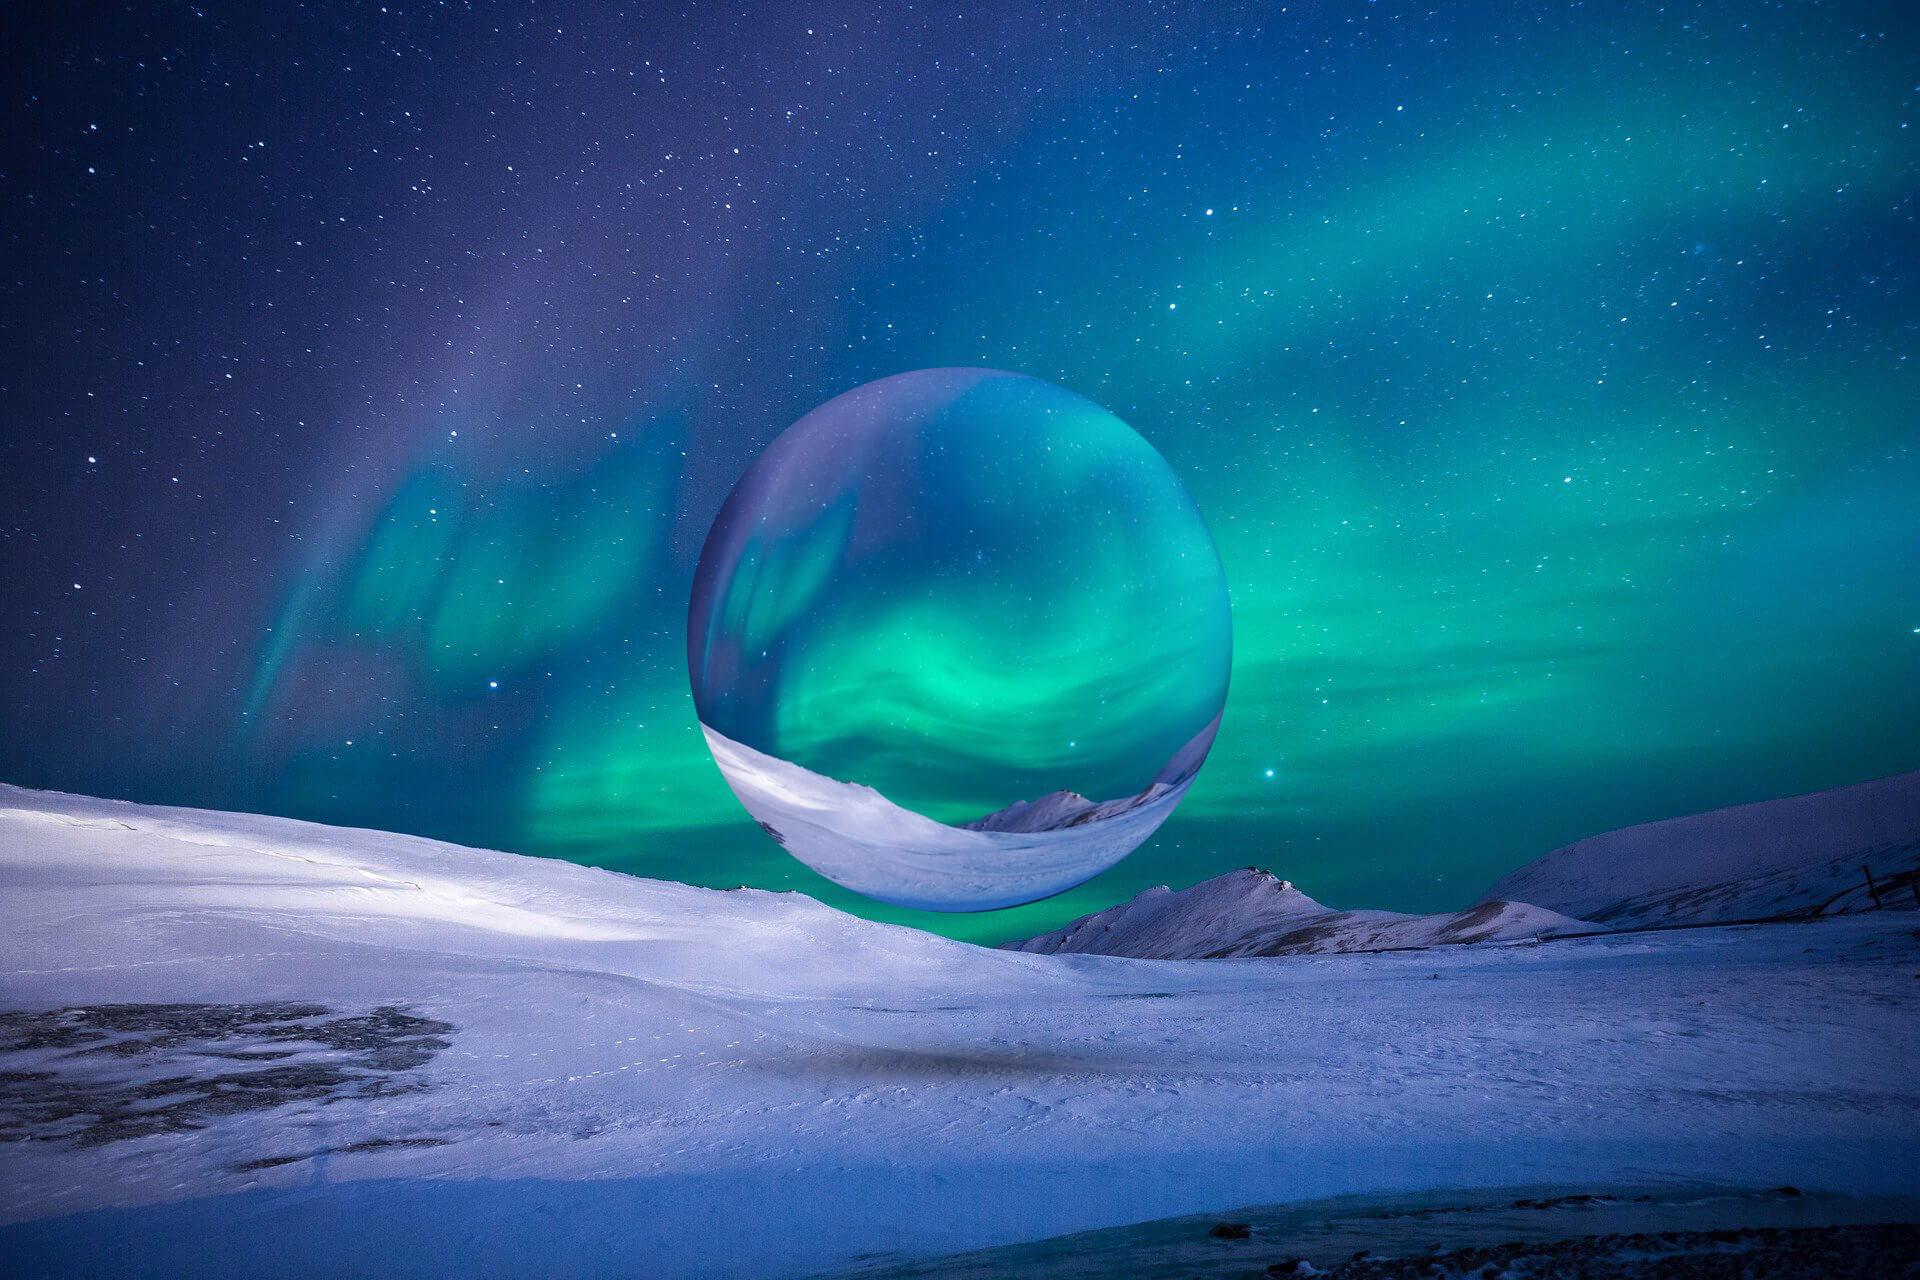
To add a bit of realism, we’ll add a shadow below the sphere to make it seem it’s floating in mid-air.
Add a new layer and use a black soft brush, place a single spot of black on the canvas then press Ctrl/Cmd T to transform it.
Squash and extend the shape to form a shadow and place it underneath the sphere.
Change the Blending mode to Linear Burn and reduce the opacity to around 45%.
And we are done!
After following this tutorial, you should be able to Make a Floating Glass Sphere in Photoshop. I hope you found this guide useful and easy to follow. If you have any questions or suggestions please let me know in the comments down below and I’ll get back to you as soon as possible.