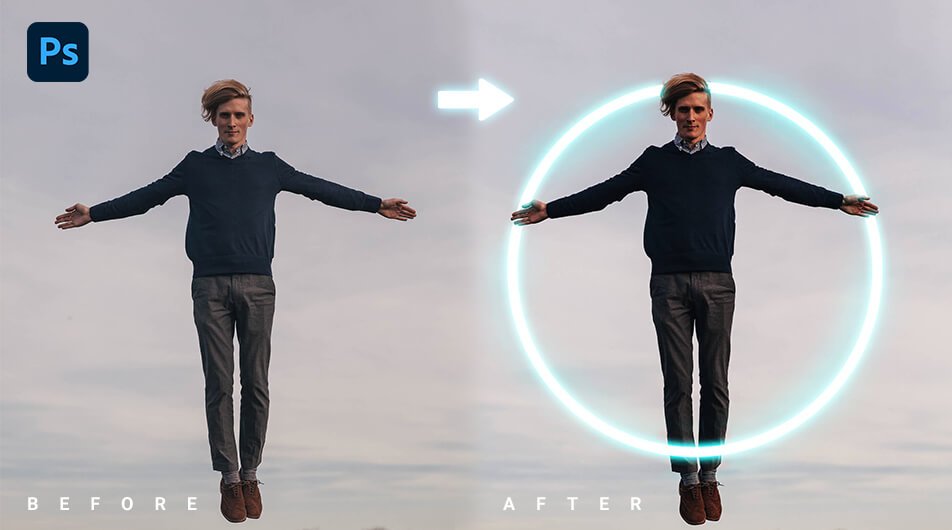
Using Photoshop to create special effects is a lot of fun, and it can result in some truly fantastic photographs. The nice thing about glow effects, such as the one we’re making in this article, is that they can be applied to nearly any photo.
In this tutorial, I’ll show you how to add a glow effect to a ring to make the picture looks like it came out of a superhero or sci-fi movie.
In just a few easy steps, you’ll be able to achieve this awesome glow effect.
For this lesson, I’ll use Photoshop 2022.
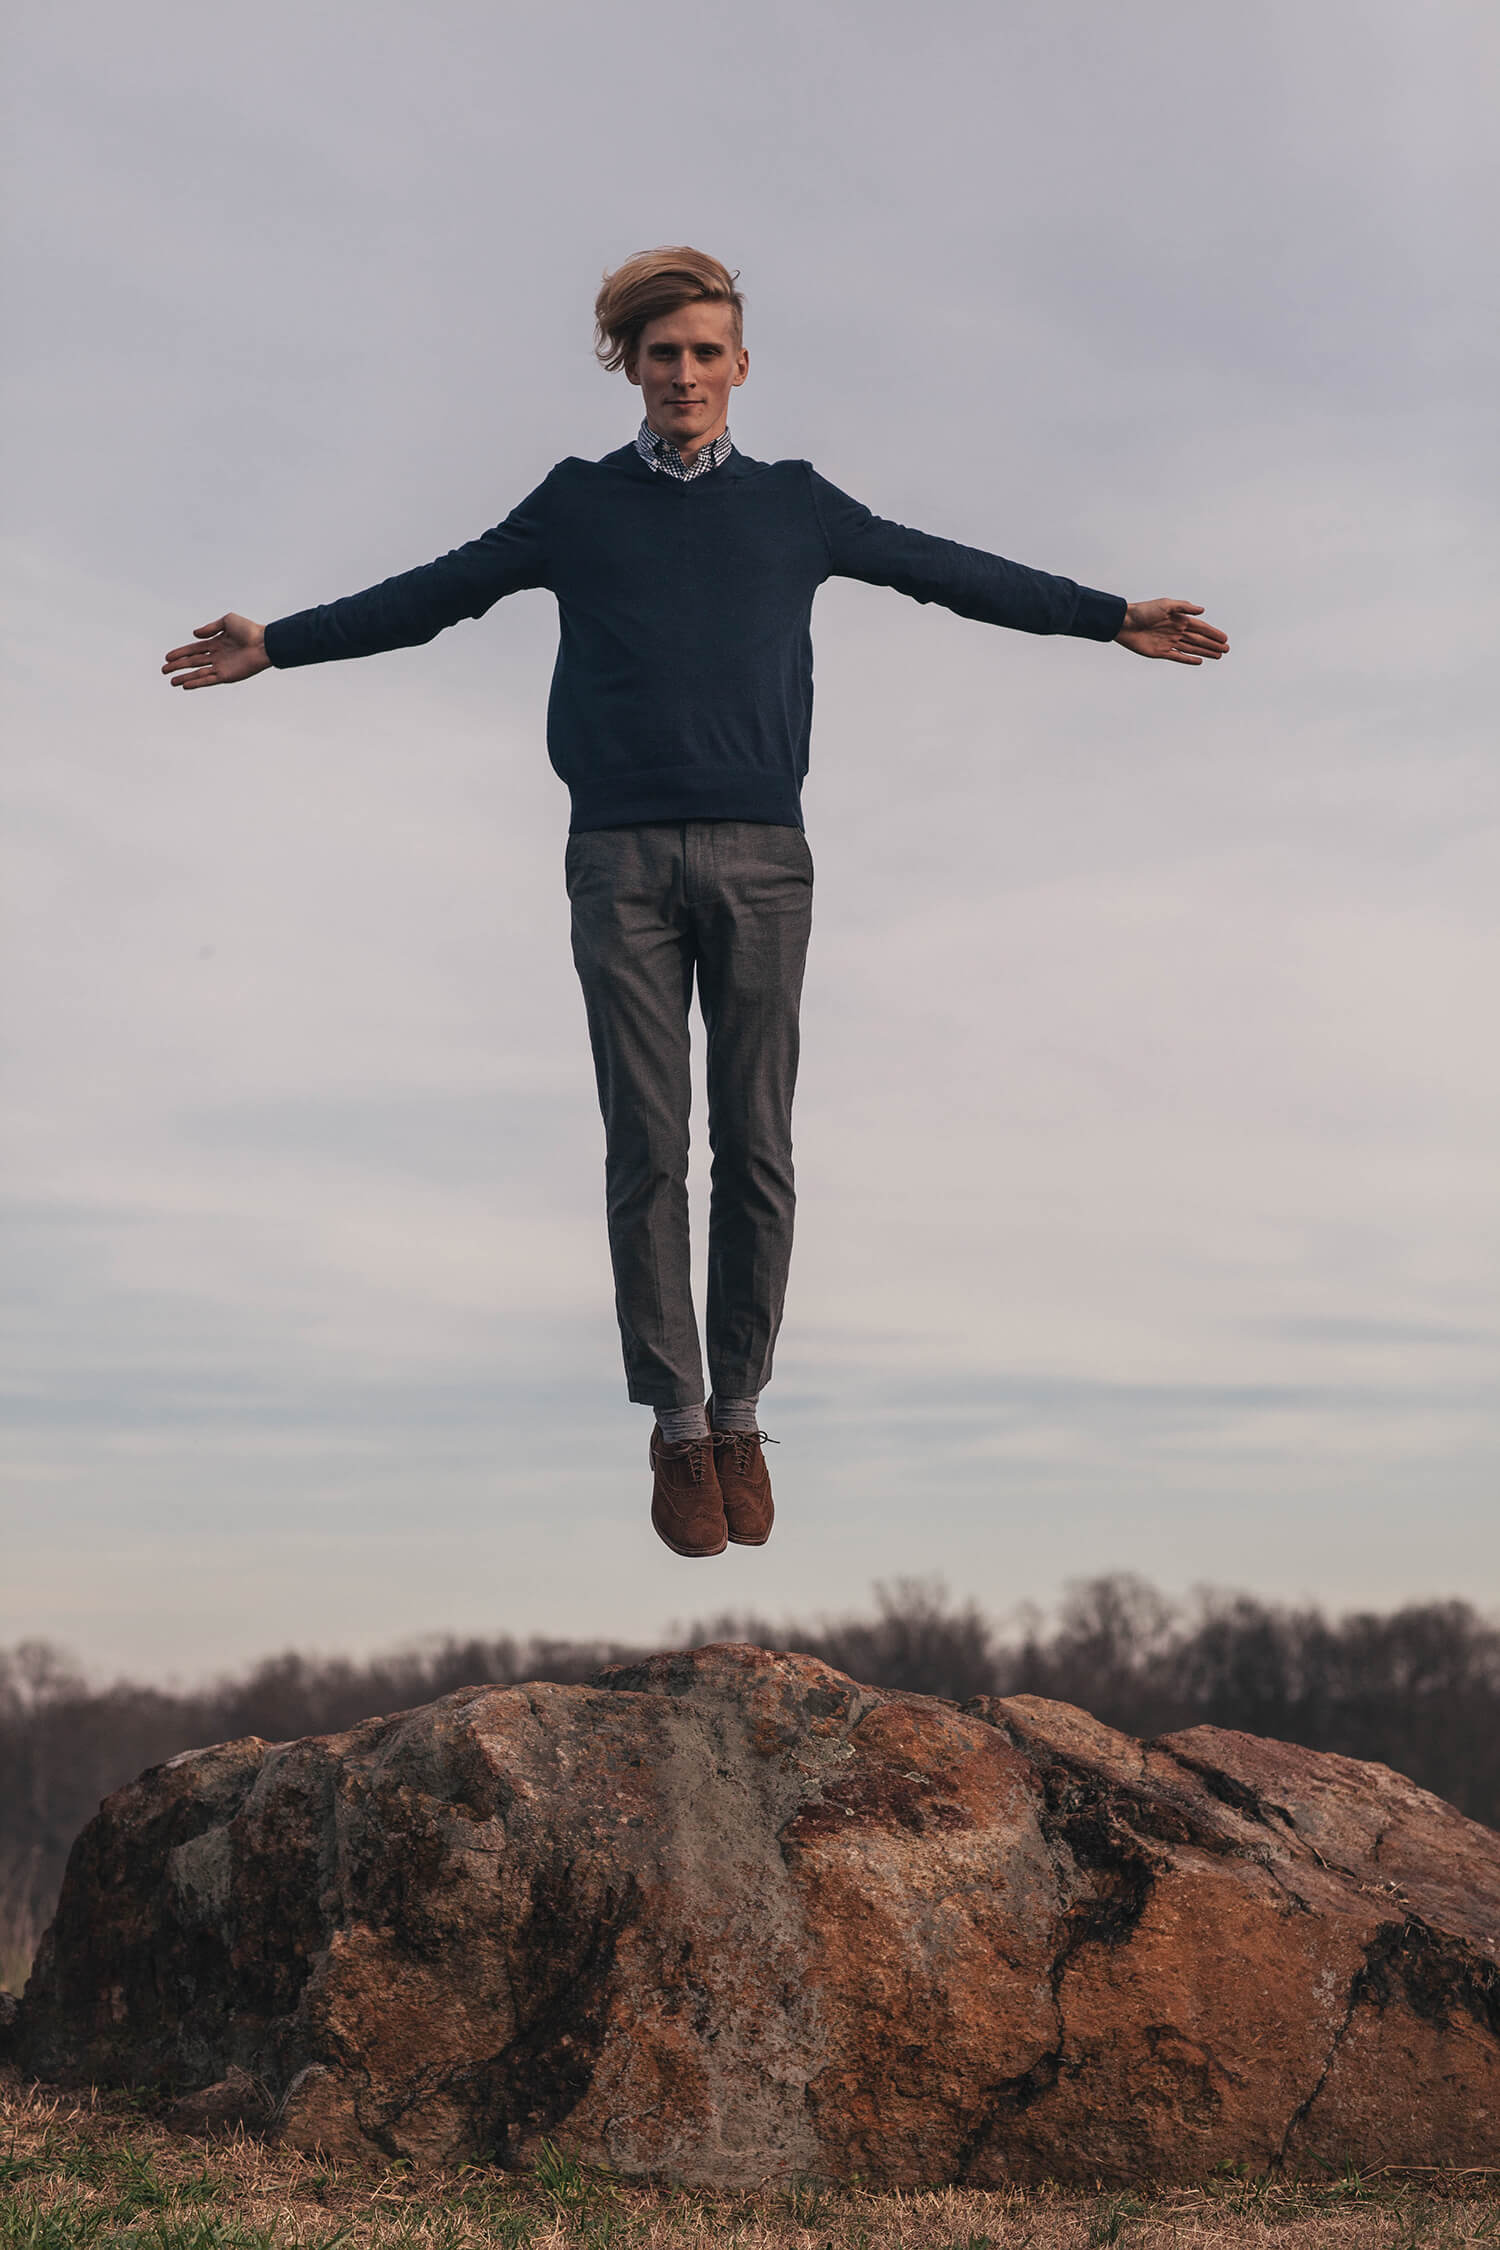
This project uses the image below download it to follow along:
Photo by Karina Carvalho on Unsplash
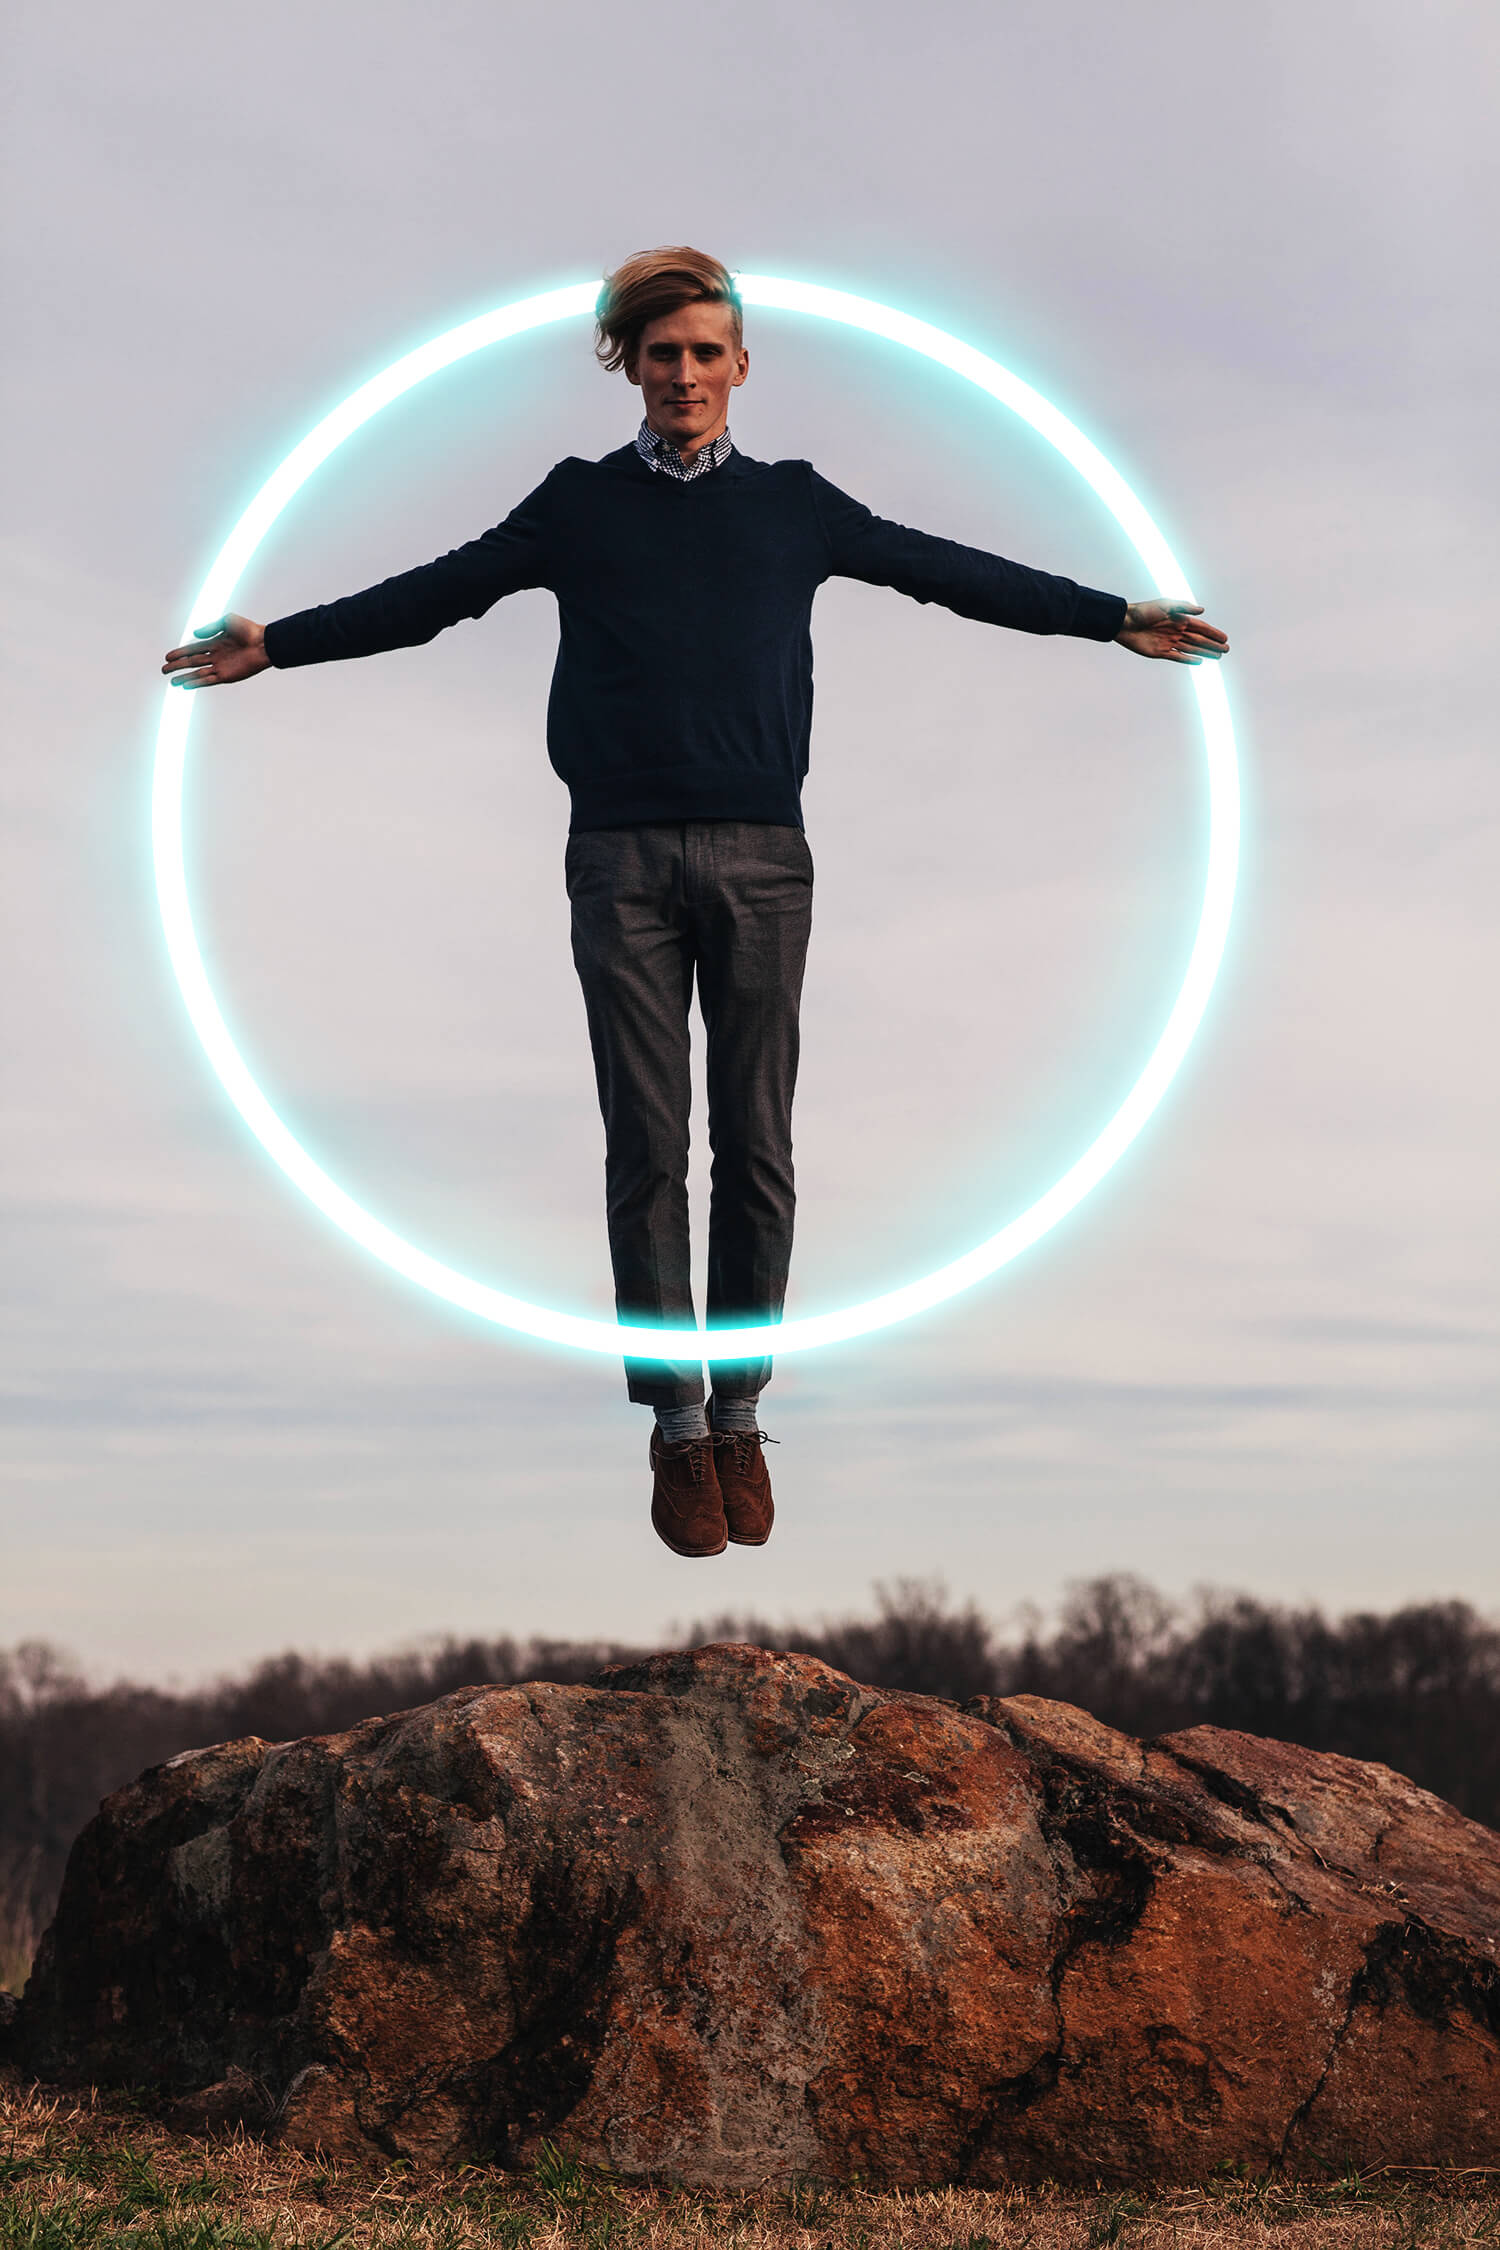
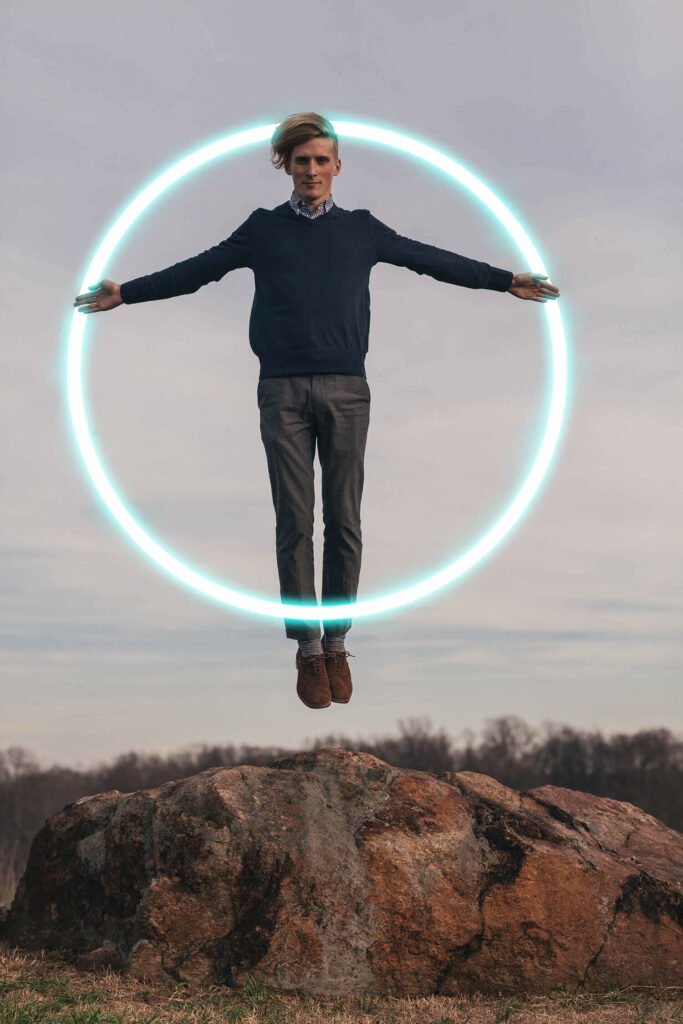
Final Image
Drag The Slider To See Before & After
Create a Glow Effect
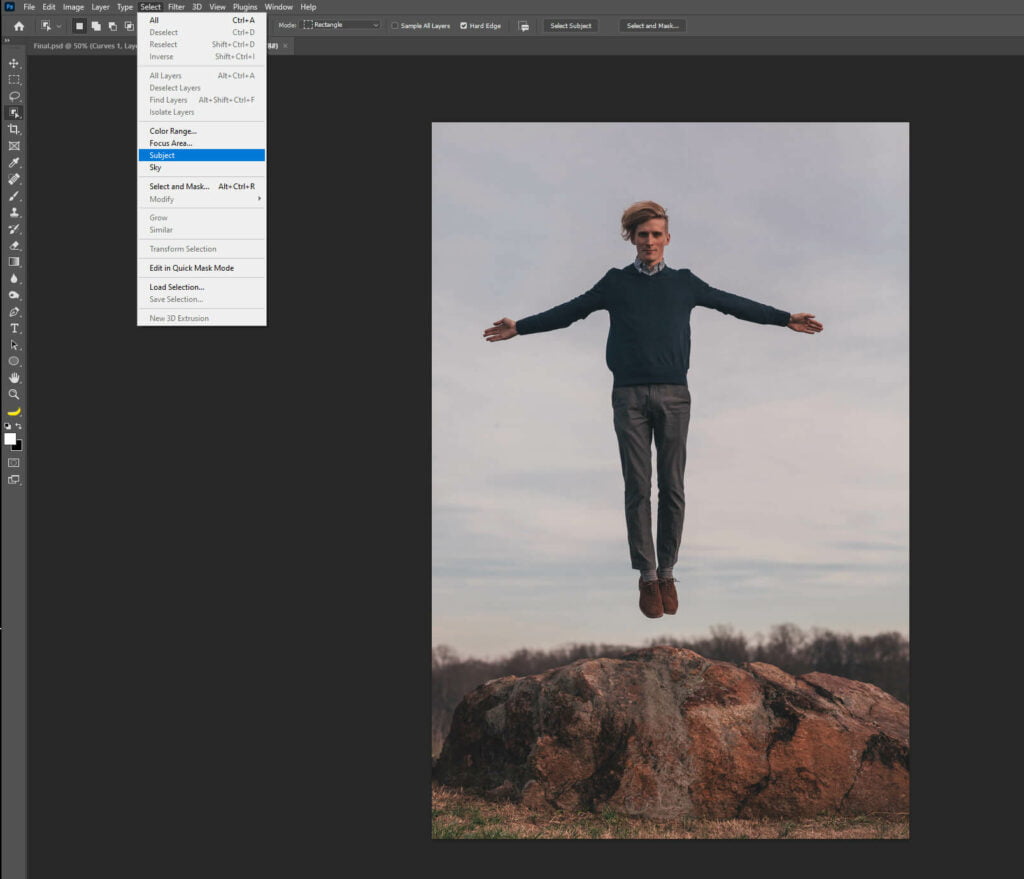
Step 1: Select Your Subject
First, select the subject by drawing a selection around him. You can choose any selection method that you like. In this case, you can just go for the easy way. Go to Select > Subject. Photoshop will work its magic and draw a selection around the subject automatically.
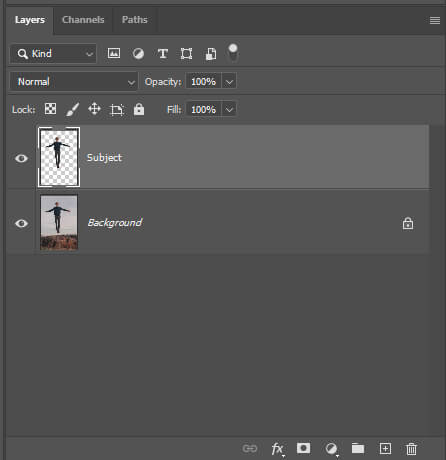
Once your selection is active press Ctrl + J to copy it on a new layer.

Step 2: Create a Glowing Ring
The idea for this photograph is to create a glowing ring of energy around the subject. To get started, we’ll need a ring.
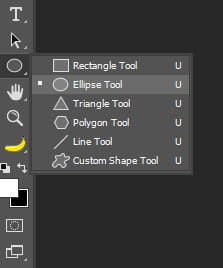
Grab the Ellipse Tool located in the toolbar and click and drag around the subject while holding SHIFT to preserve a perfect circle. Make sure that the Fill is set to none and the Stroke is set to white. You can also choose the size of the stroke. I set it to 29 pixels.
After you’ve drawn the circle, you can use the Move Tool (V) to reposition it or the Transform Tool (Ctrl + T) to resize it.
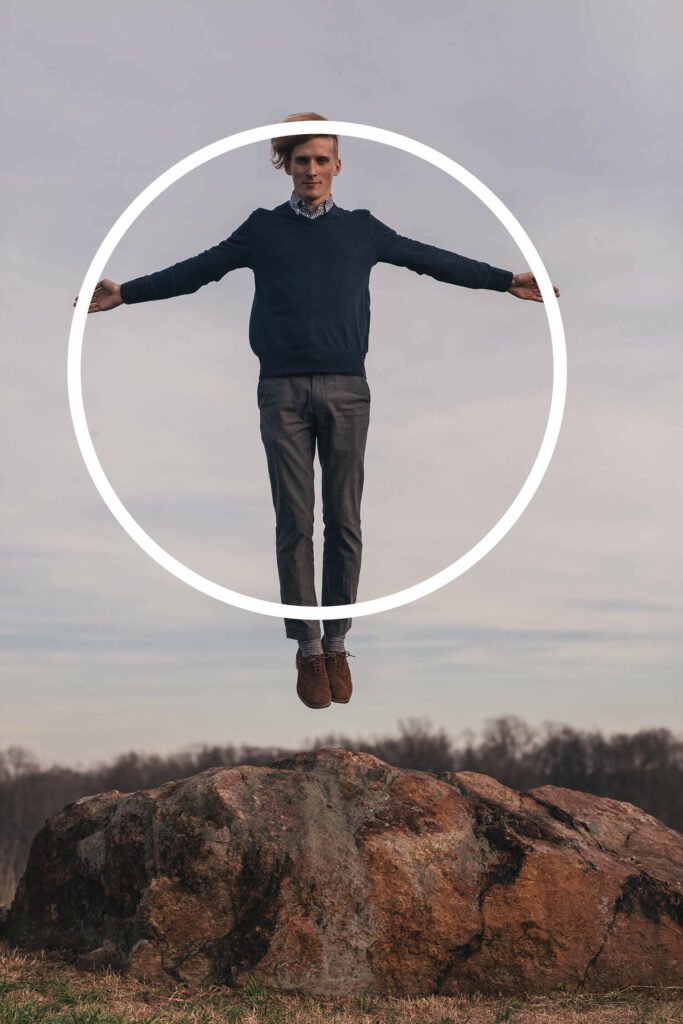
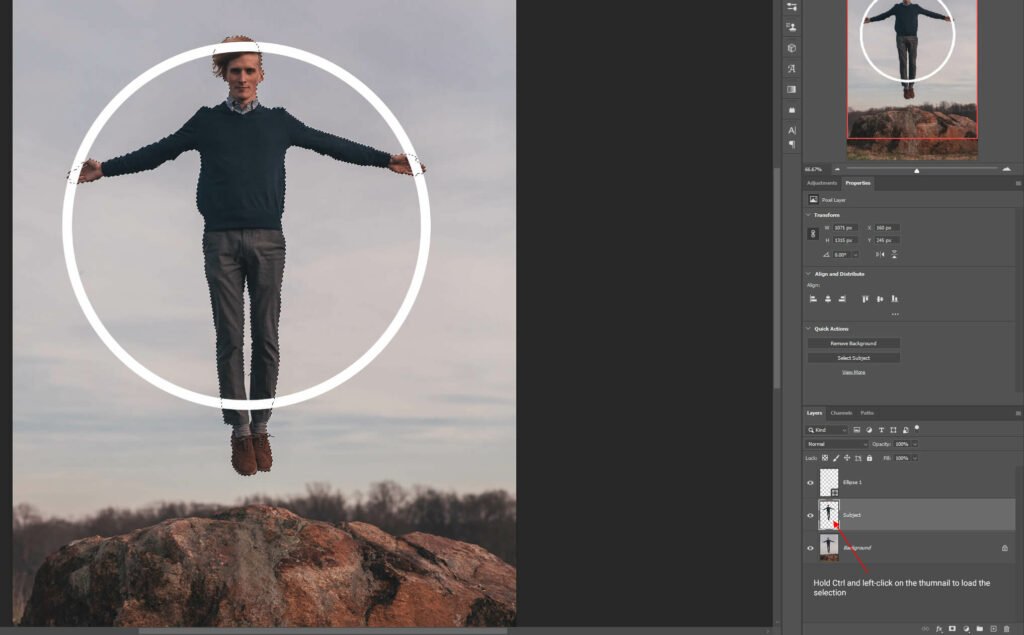
Now that we have the base of our glowing ring, we’ll mask it so that it stands behind the subject. We do that instead of dragging the circle layer below the subject because we’ll bring back some part of that circle in front of the man.
Simply hold Ctrl and left-click on the Subject layer thumbnail to load the selection.
Next, with your selection active click on the ellipse layer and add a mask.
Then, press Ctrl + I to invert that mask.
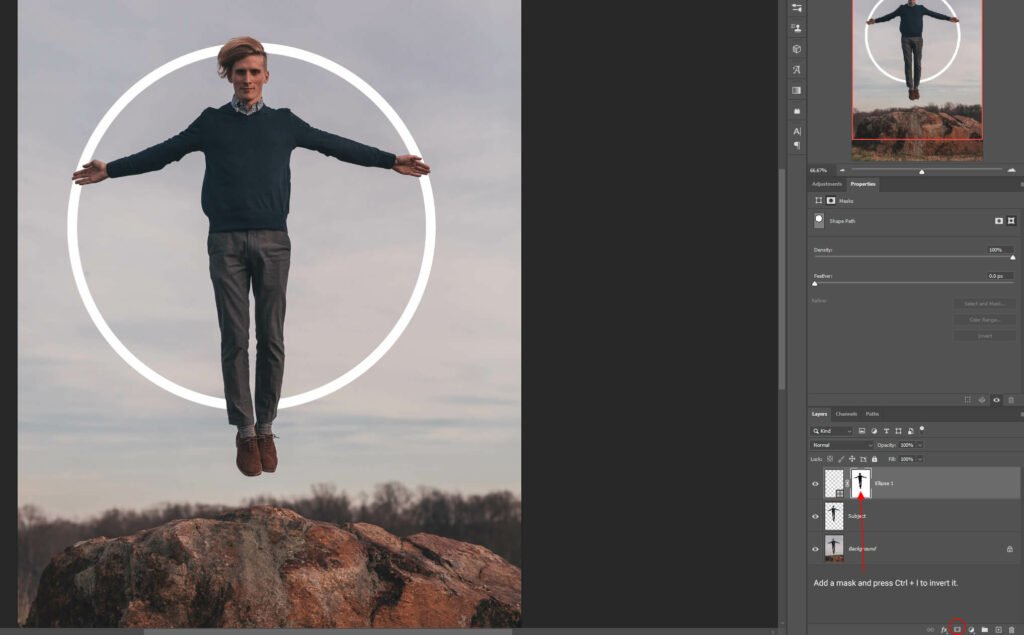
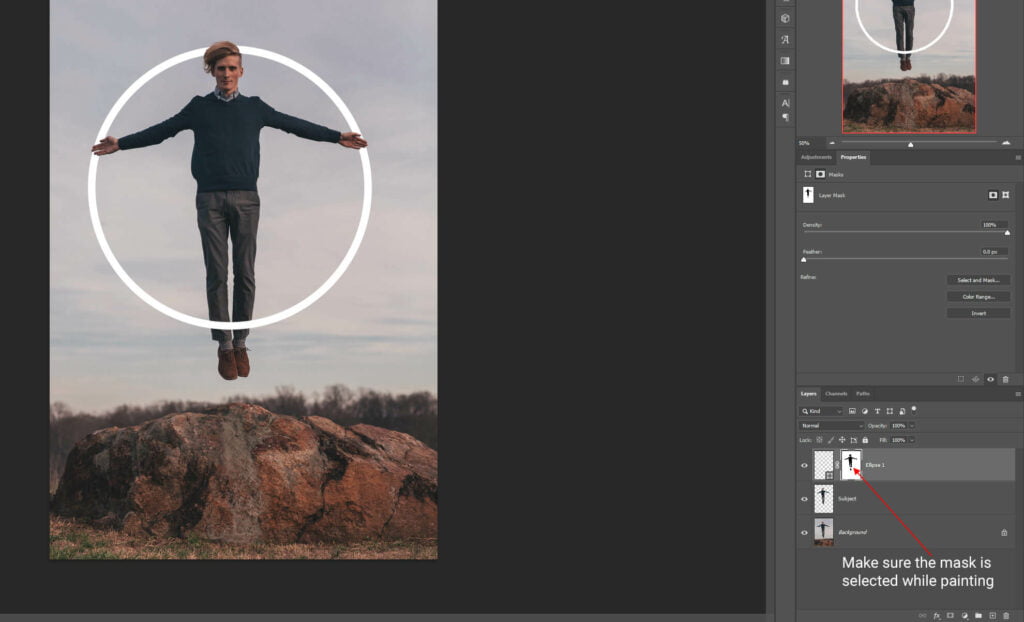
To make the circle looks like it’s around the subject we’ll select the mask and brush over the legs of the subject.
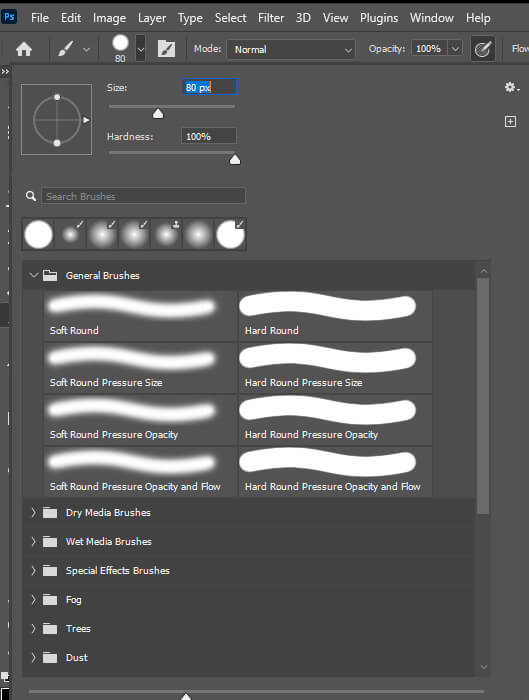
Press B and select a Soft Brush. Make sure your mask is selected and that the foreground color is set to white.
With the brush selected paint over the legs of the subject. The circle will now appear in front of the man.
Step 3: Create the Glow Effect
Let’s now add the glow effect to our ring.
Head over to your layer panel and right-click on the ellipse layer and select Blending Options.
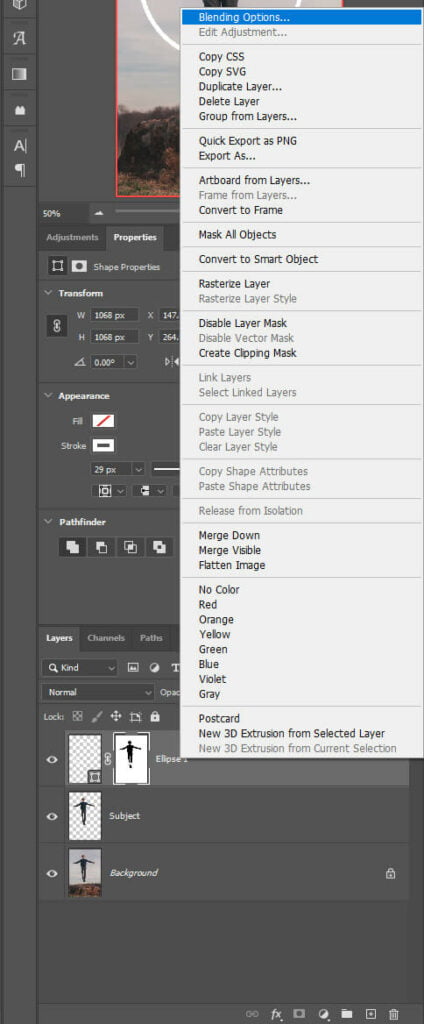
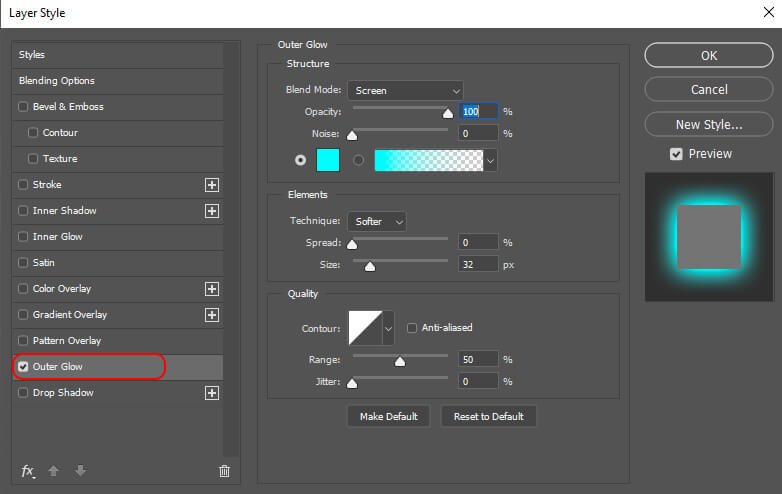
A dialog box will open, select Outer Glow and copy the settings on the image below.
Double click on the color square to set the color of your glow.
Also, make sure your gradient is set as Solid to Transparent.

Step 4: Enhance the Glow Effect
Now that the main effect is done, let’s intensify the glow.
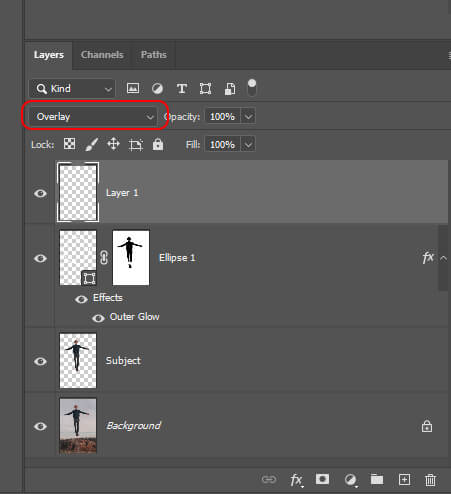
First, add a new layer on top of the ellipse layer and set the blending mode to Overlay.
Head over to your layer panel select the ellipse layer and press the + sign to add a new layer.
Next, select a soft brush by pressing B. I’ll paint over the ring with a bright blue. Same as the one that I use for my outer glow (#33ffff).
Set the flow of the brush to 20%.

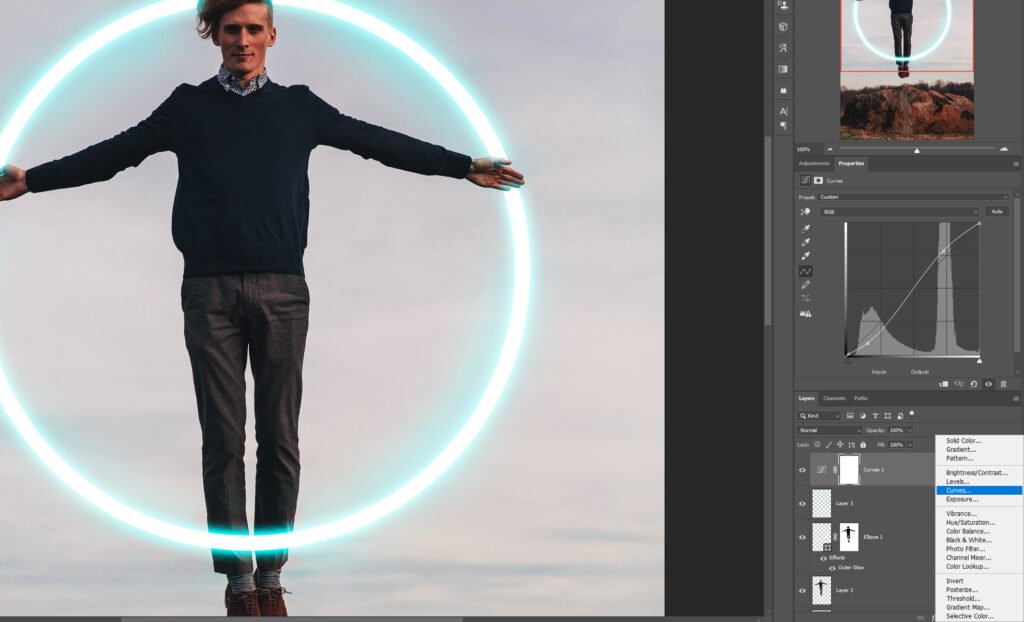
To add a little bit of drama to the image, I darkened it by adding a Curve Adjustment Layer.
And We Are Done!
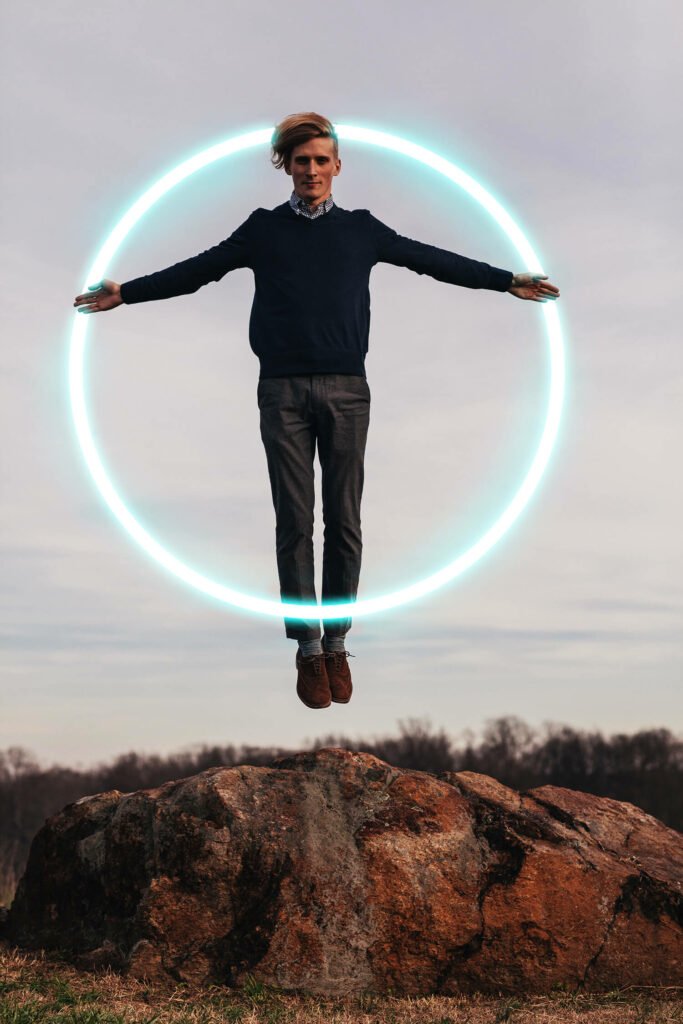
After following this tutorial, you should be able to create a Glow Effect in Photoshop. I hope you found this guide useful and easy to follow. If you have any questions or suggestions please let me know in the comments down below and I’ll get back to you as soon as possible.

