Although infrared light is outside of the human visible spectrum, it produces a surreal effect when it comes into contact with plants and grass, as the foliage strongly reflects the light in the same way that snow does with visible light, making this photography method very popular among landscape photographers.
In this tutorial, you will learn how to make a Fake Color Infrared Effect in Photoshop.
For this lesson, I’ll use Photoshop 2022 but any version of Photoshop will work for this short demonstration.
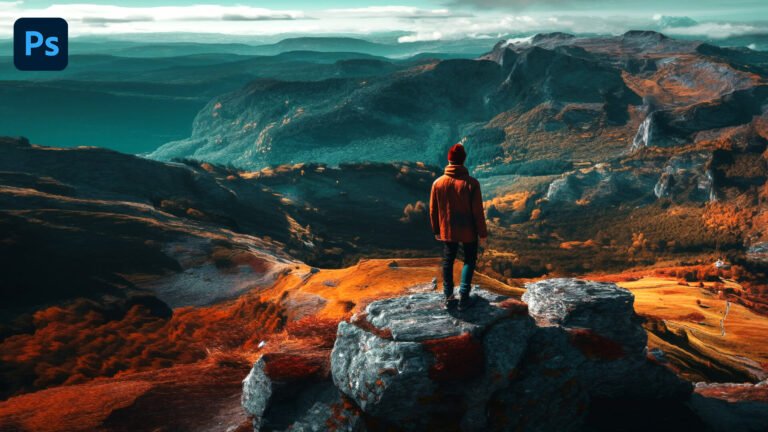
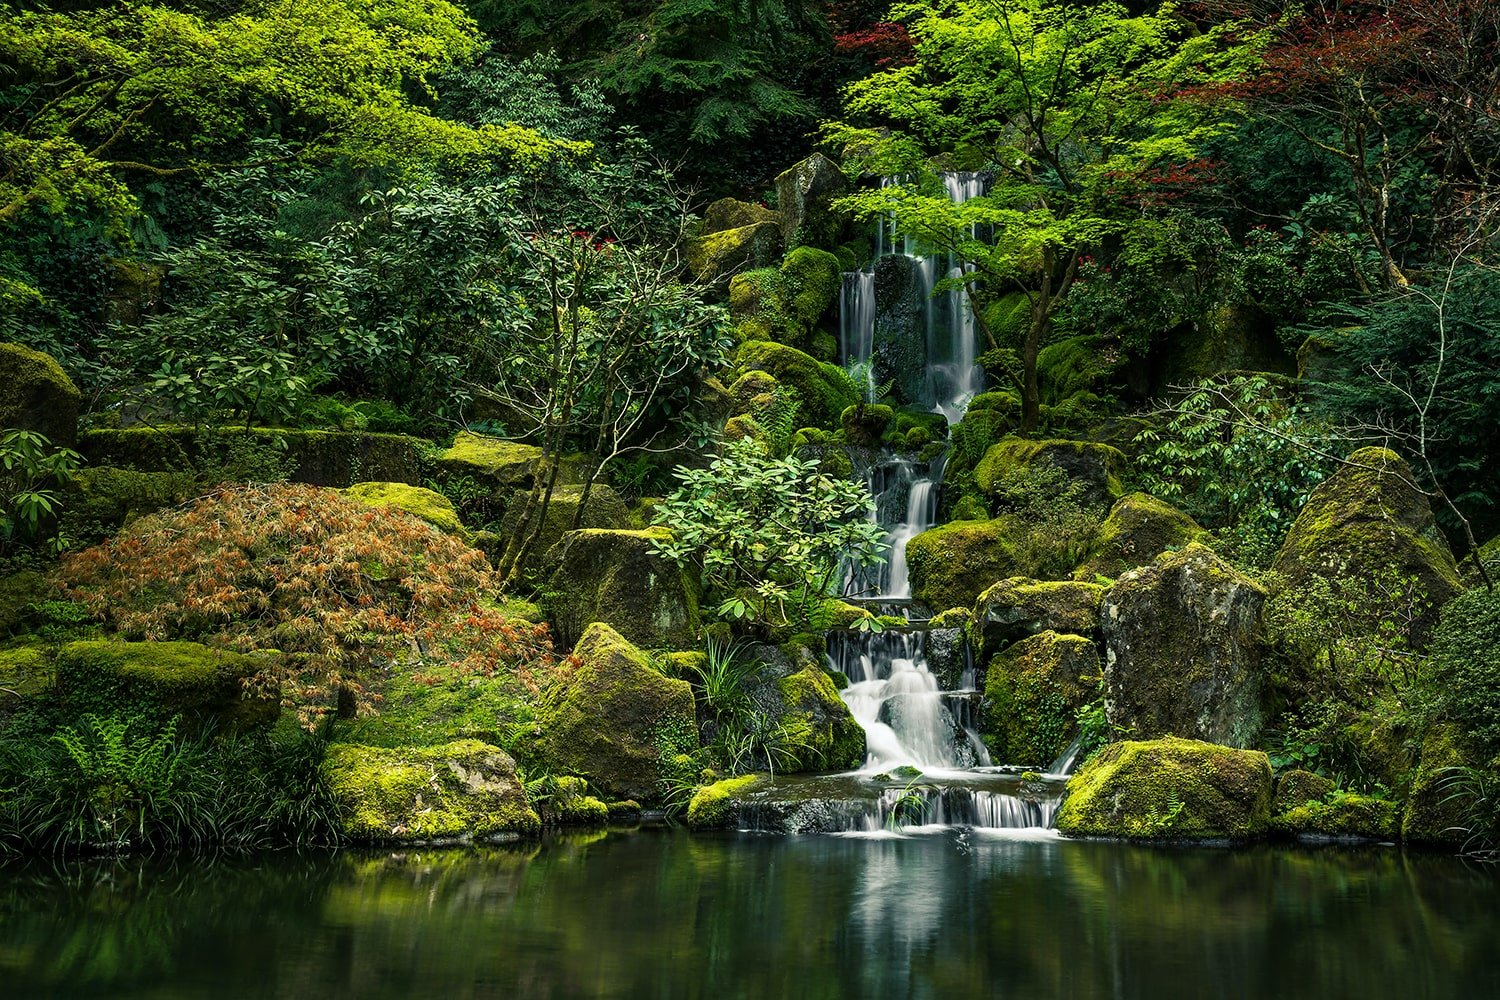
This project uses the image below. You can download it to follow along or you can pick your own image. Usually, this infrared photo effect works best with landscapes.
Photo by Cody Weaver on Unsplash.
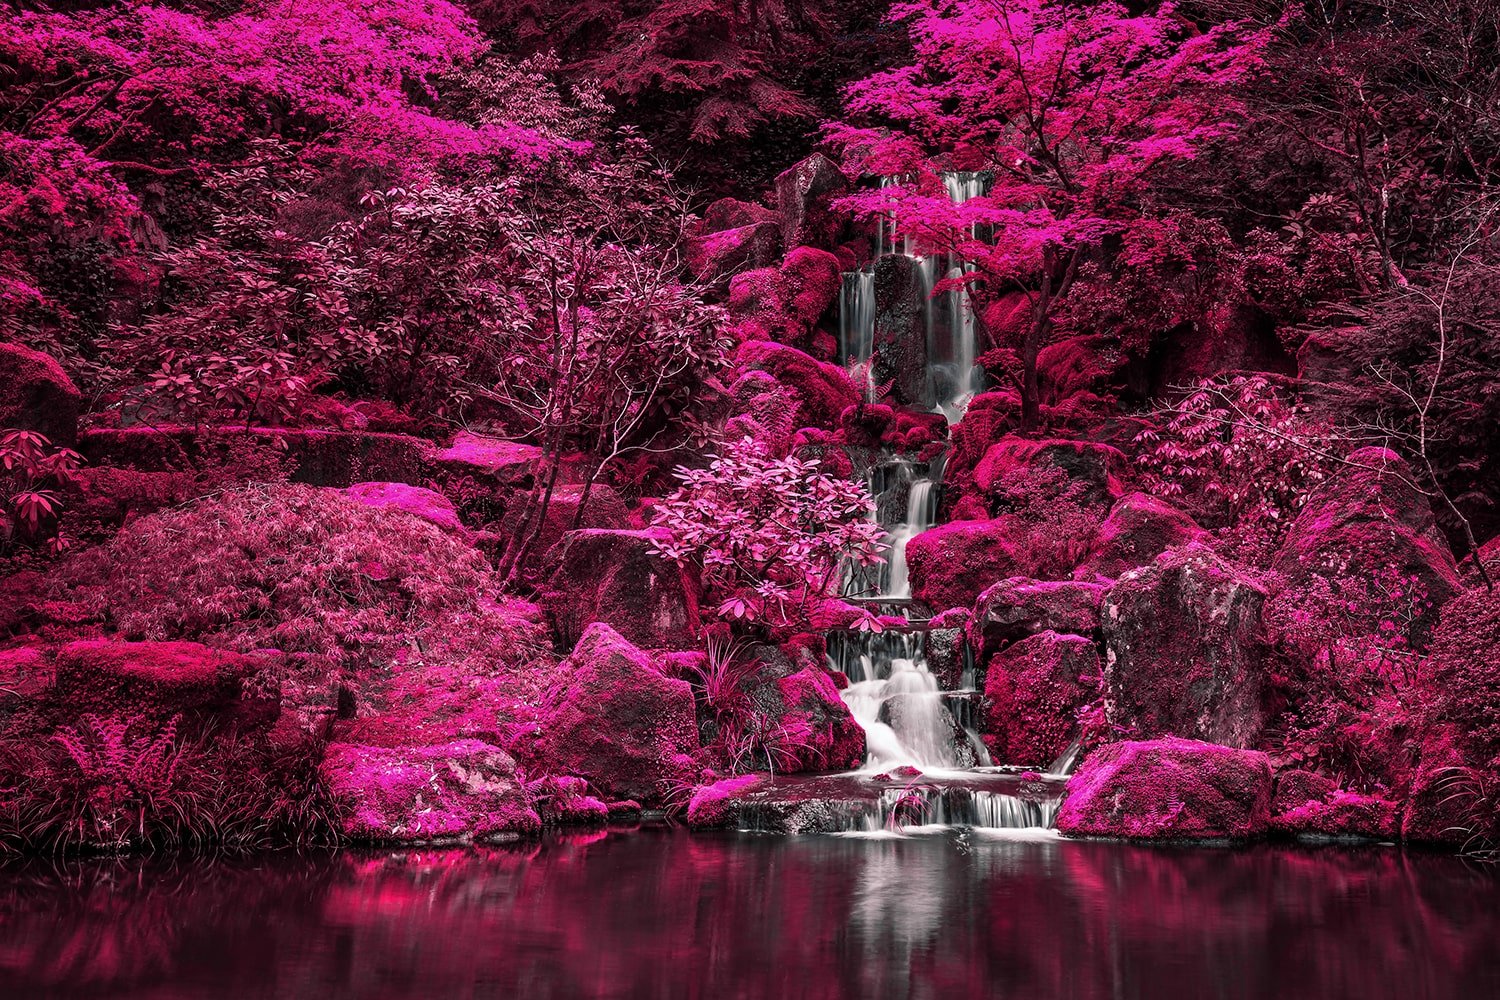
Final Image
Drag The Slider To See Before & After
Create an Infrared Photo Effect in Photoshop
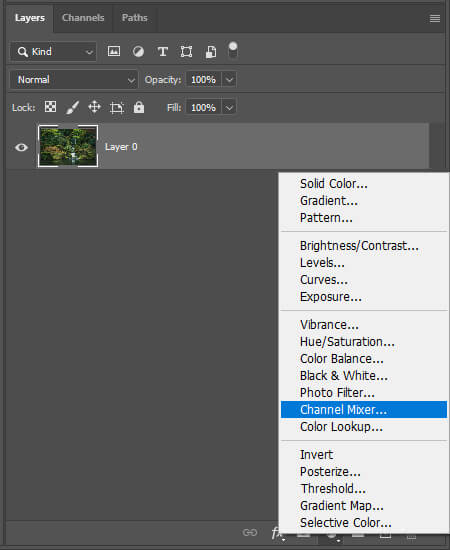
Step1: Add a Channel Mixer Adjustment Layer
First, open up your image in Photoshop and head over to your layer panel, and add a Channel Mixer adjustment layer

Next, select the Red Channel and copy my settings as shown on the image below:
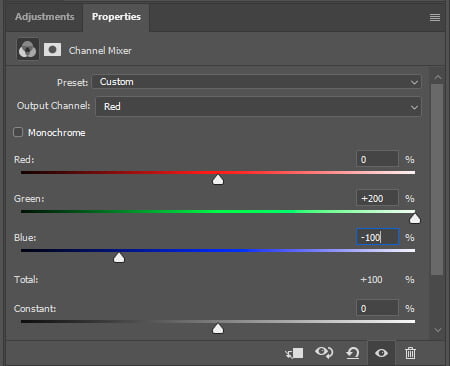
Red Channel
Red: 0
Green: +200
Blue: -100
After adding the Channel Mixer adjustment layer your image should look like this:

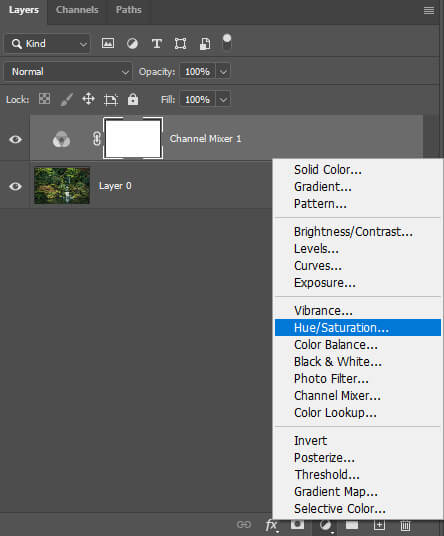
Step 2: Add a Hue/Saturation Adjustment Layer
First, let’s add a Hue/Saturation adjustment layer. Go back to your layer panel and choose Hue/Saturation.
Next in the properties panel select the Yellows and copy my settings as shown on the image below:
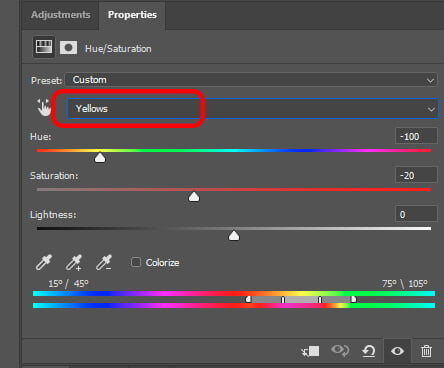
Yellows
Hue: -100
Saturation: -20
Lightness: 0
To finish, select the Blues and copy my settings as shown below:
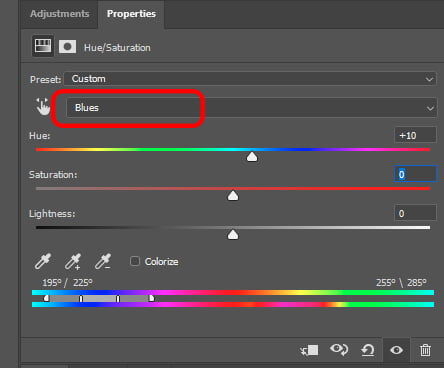
Blues
Hue: +10
Saturation: 0
Lightness: 0
And We Are Done!

After following this tutorial, you should be able to create an Infrared Photo Effect in Photoshop. I hope you found this guide useful and easy to follow. If you have any questions or suggestions please let me know in the comments down below and I’ll get back to you as soon as possible.