GIFs are a trendy thing these days, appearing almost everywhere on the internet. In this tutorial, I’ll show you how you can make a Color Changing GIF in just a few steps.
Animated GIFs are excellent marketing tools. They’re simple to consume, offer a fresh approach to attract your audience’s attention, and may have a significant emotional impact.
The best part about Color Changing GIFs is that they aren’t too difficult to create.
For this lesson, I’ll use Photoshop 2022 however, the process should be the same in other versions.
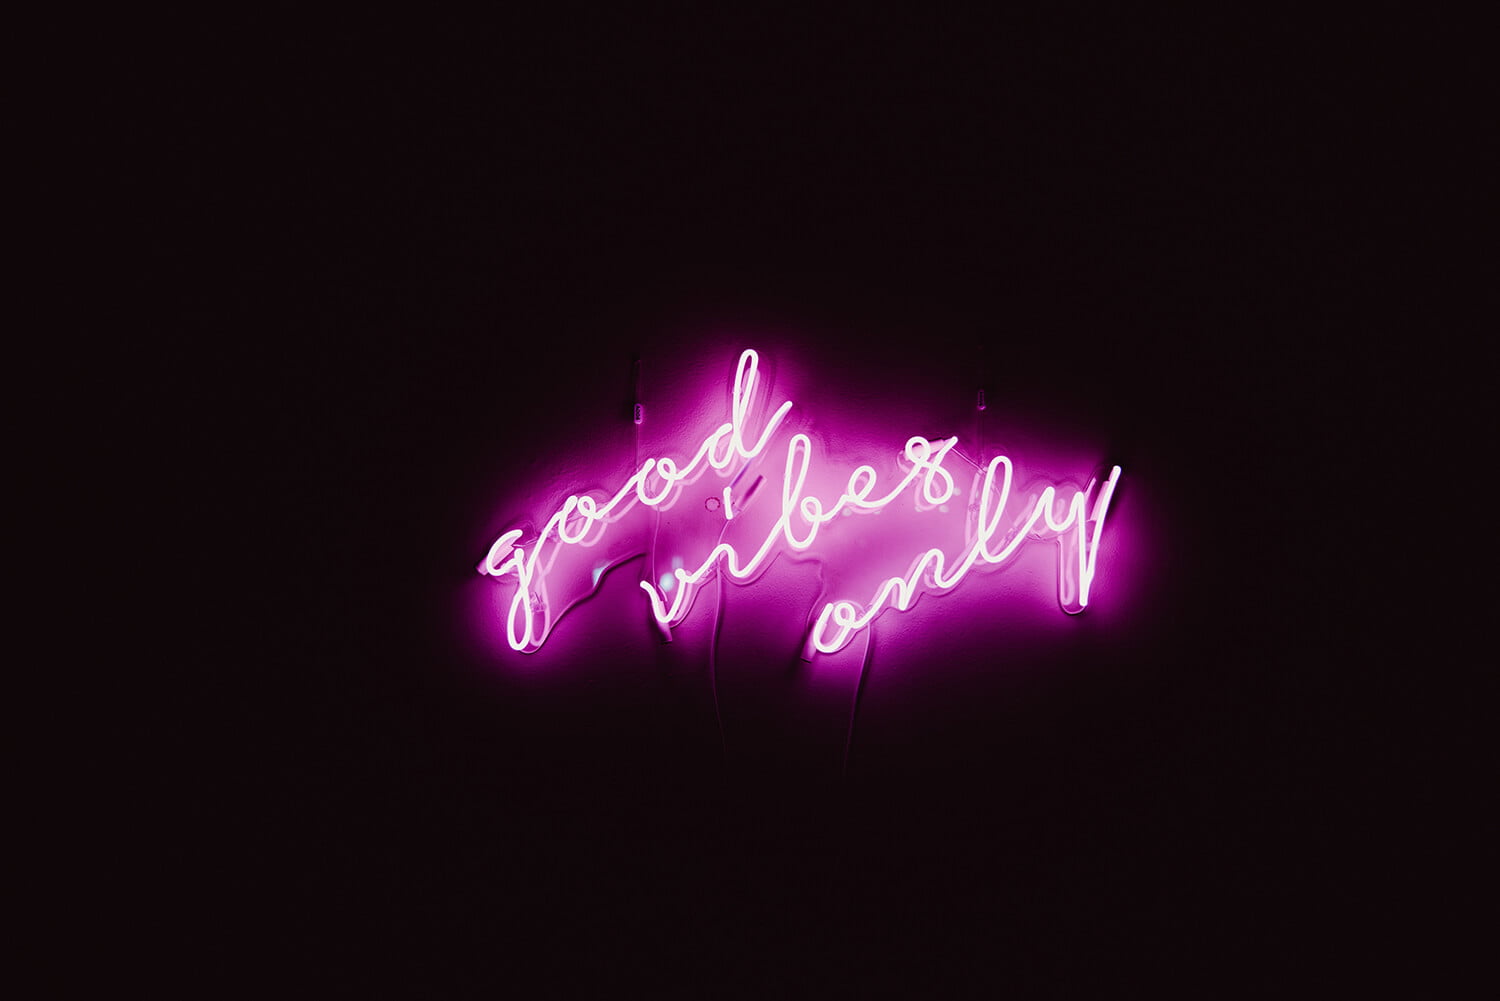
You can use the image listed below for this lesson, but feel free to use your own image for your own design.
Image by Maryna Yazbeck on Unsplash.
Final Image
Step 1
Open the image in Photoshop.
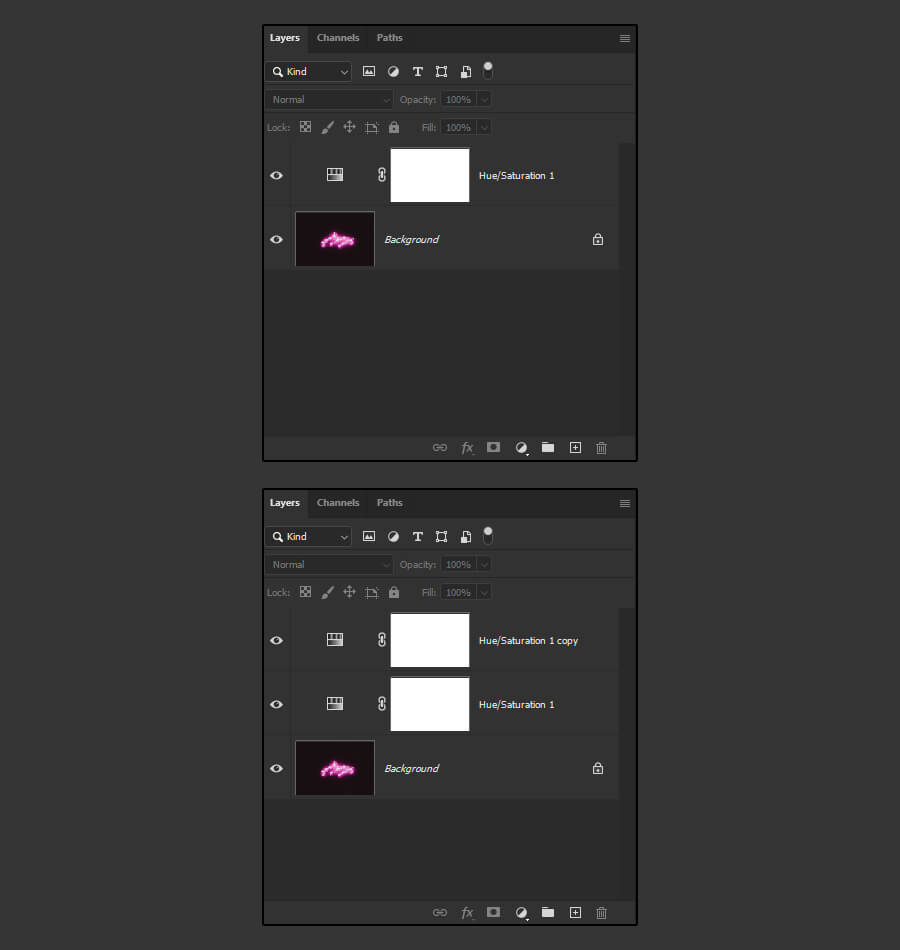
Step 2
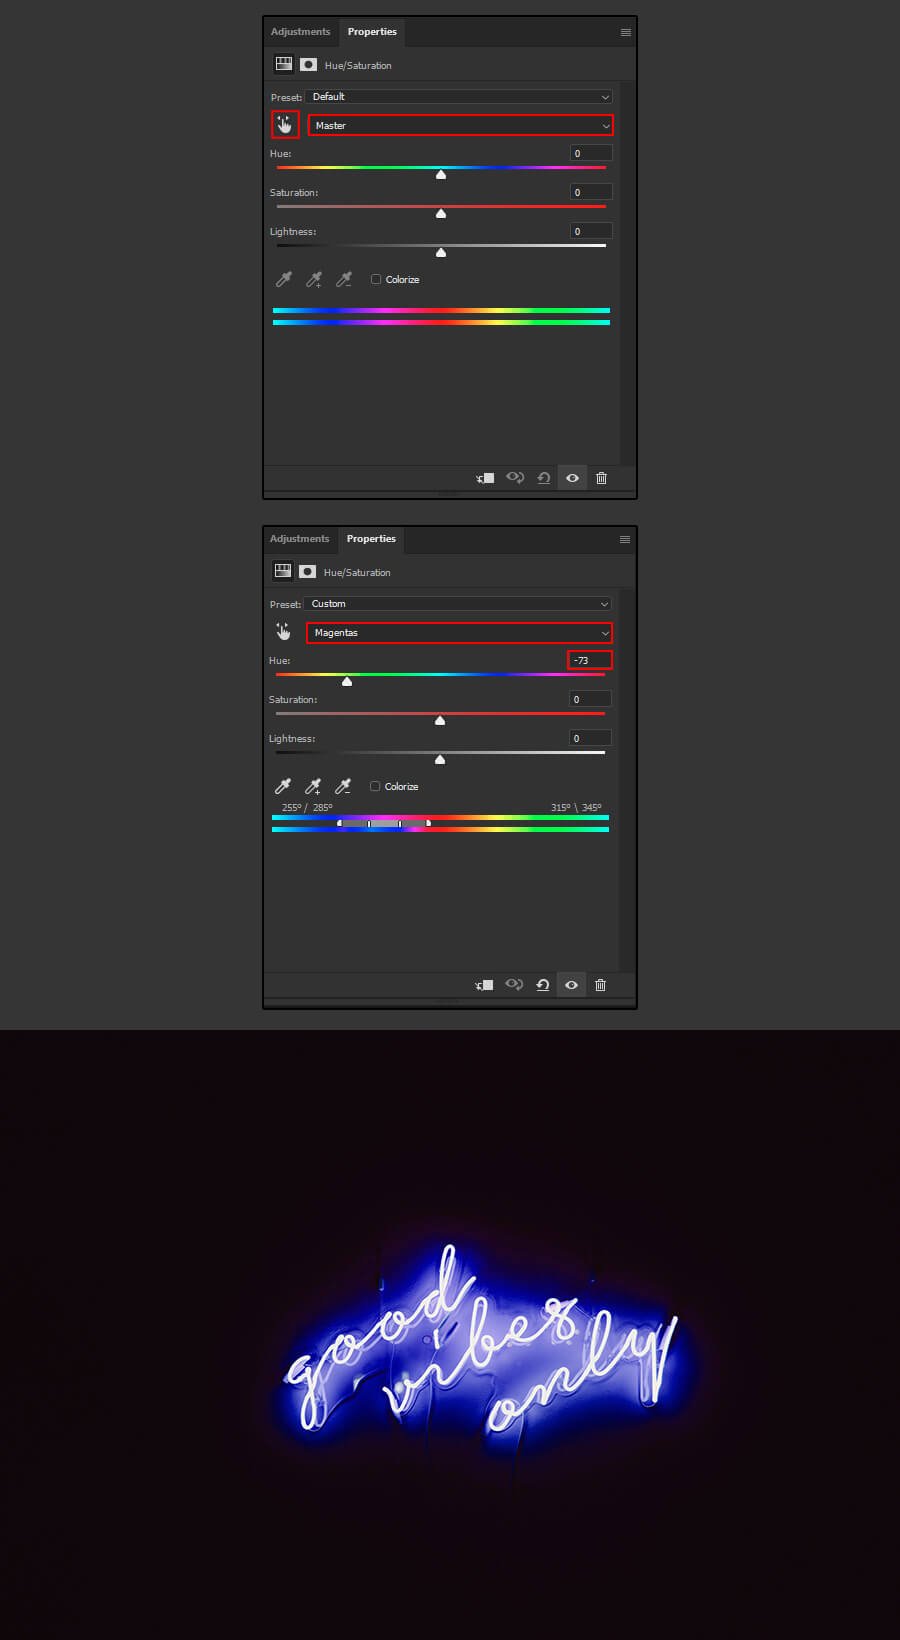
Head over to the Layers Panel and add a Hue/Saturation adjustment layer.
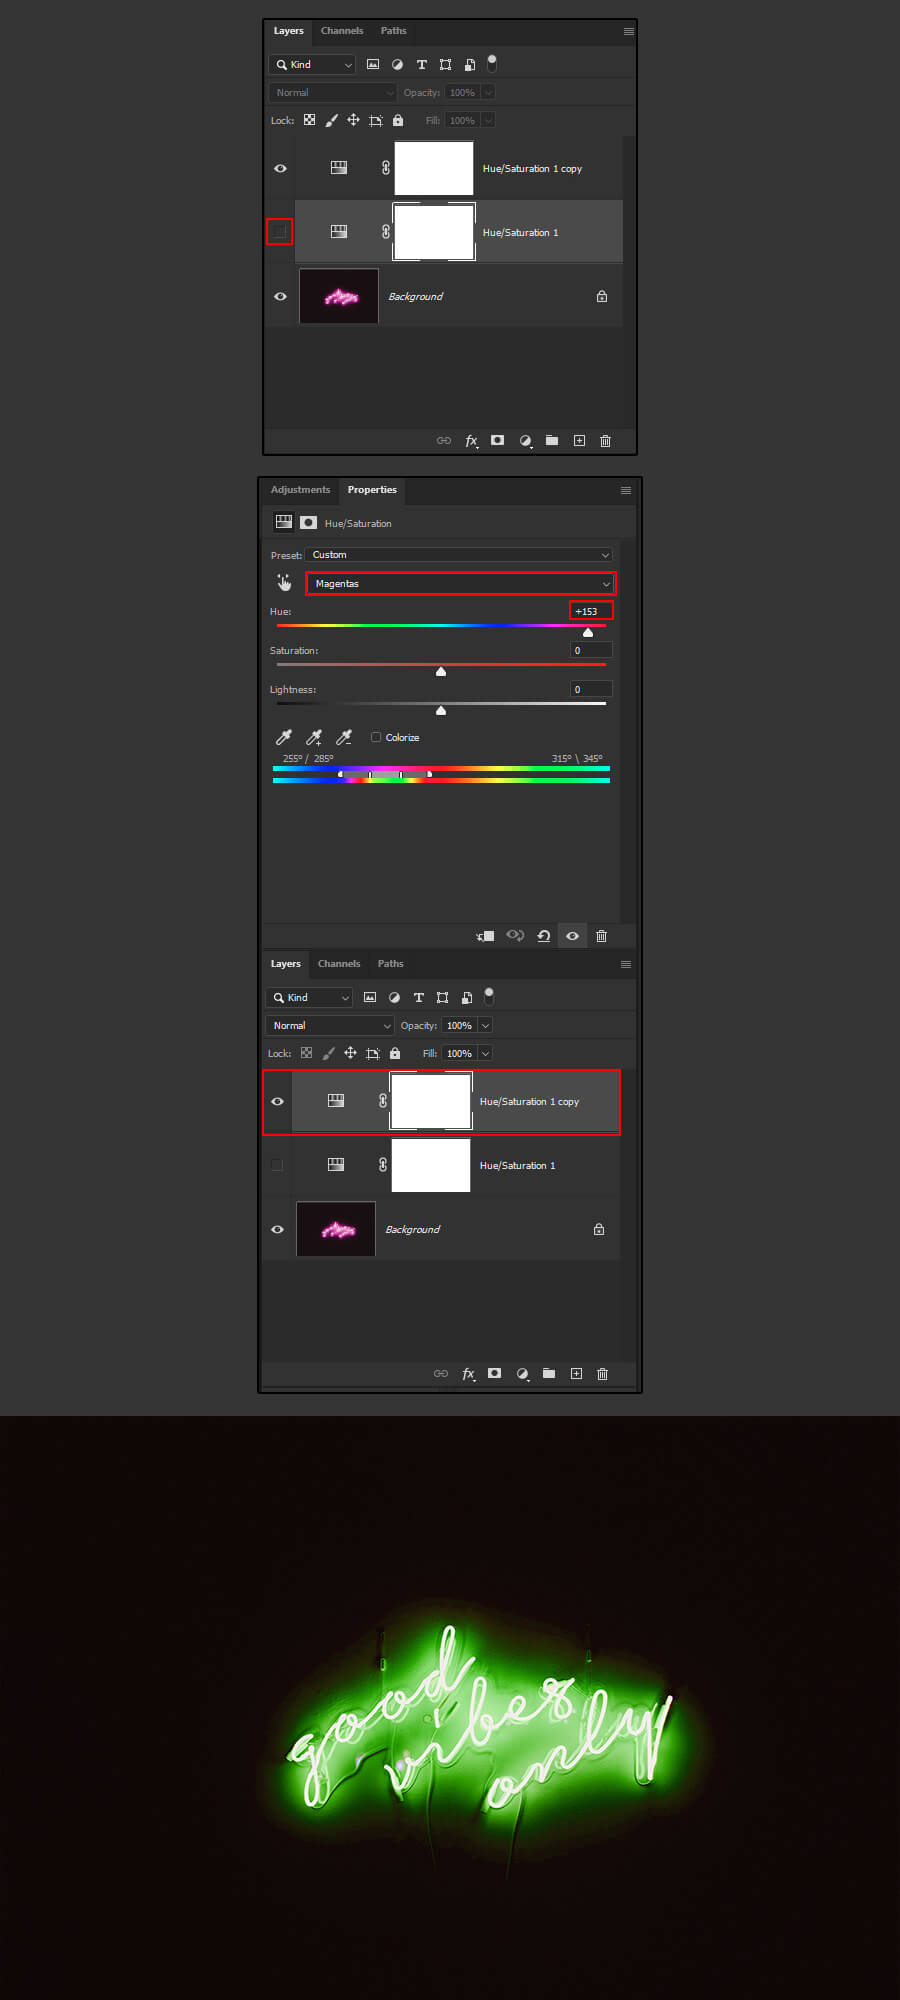
Step 3
In the Hue/Saturation adjustment layer properties, click on the small hand in the top left corner. Sample the purple light color from the neon sign. You will also notice that Master changed to Magenta.
You can now adjust the hue to your liking and pick a color you like. For this example, I’ll choose a blue color.
Step 4
Next, with the Hue/Saturation adjustment layer active, press Ctrl + J to duplicate it.
Step 5
Hide the Hue/Saturation 1 by clicking on the Eye Icon. Go to the Hue/Saturation 1 copy properties and change Master to Magenta. Adjust the Hue and pick a color. For this example, I’ll choose a green color.
Step 6
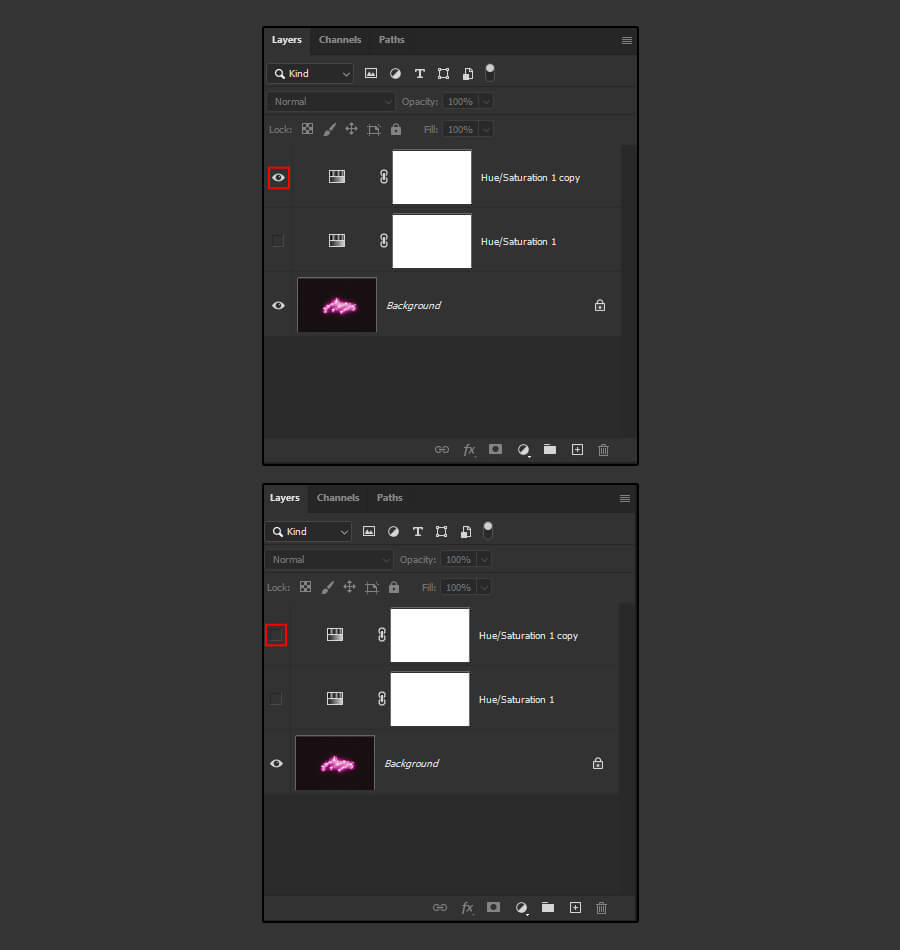
Hide Hue/Saturation 1 copy by clicking on its Eye Icon.
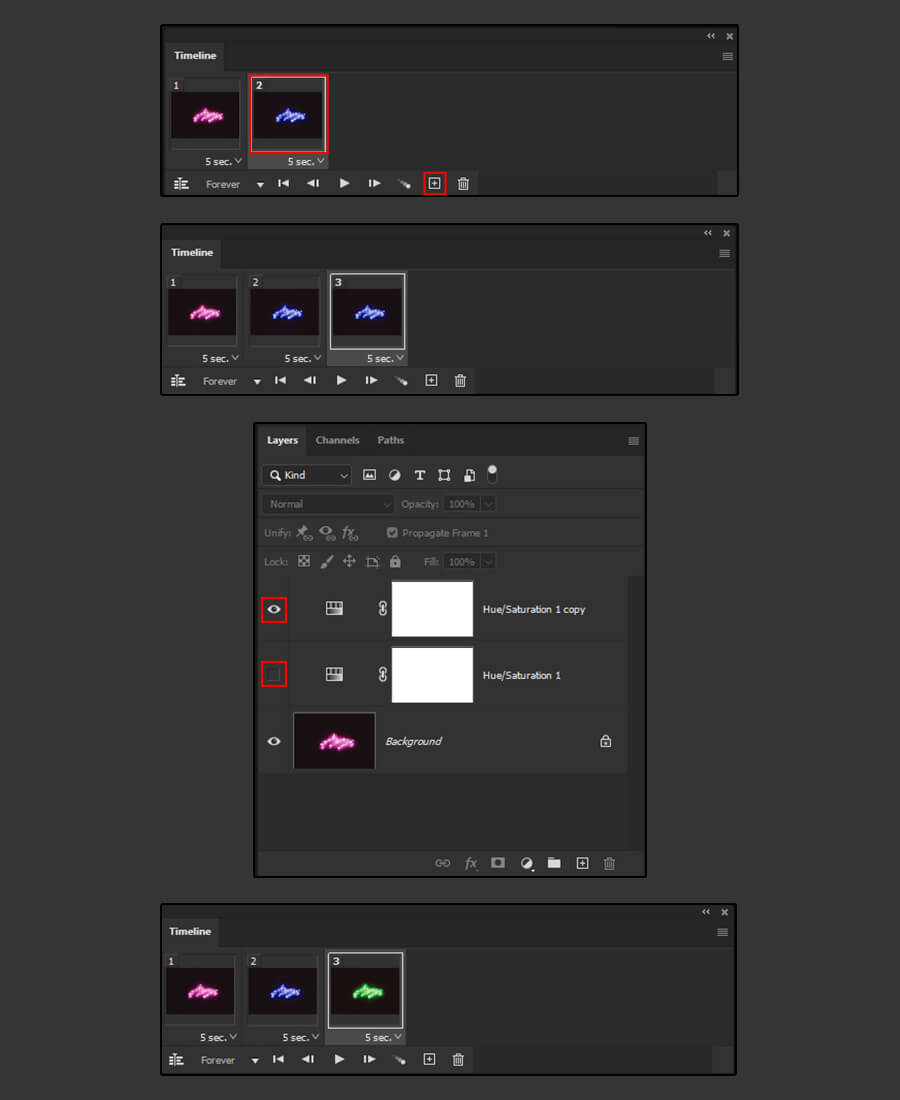
Step 7
Make sure your background layer is selected and go to Window > Timeline.
Now that the timeline is visible, select the first frame and duplicate it by clicking on the + sign. Turn on the Hue/Saturation 1 by clicking on the Eye Icon.
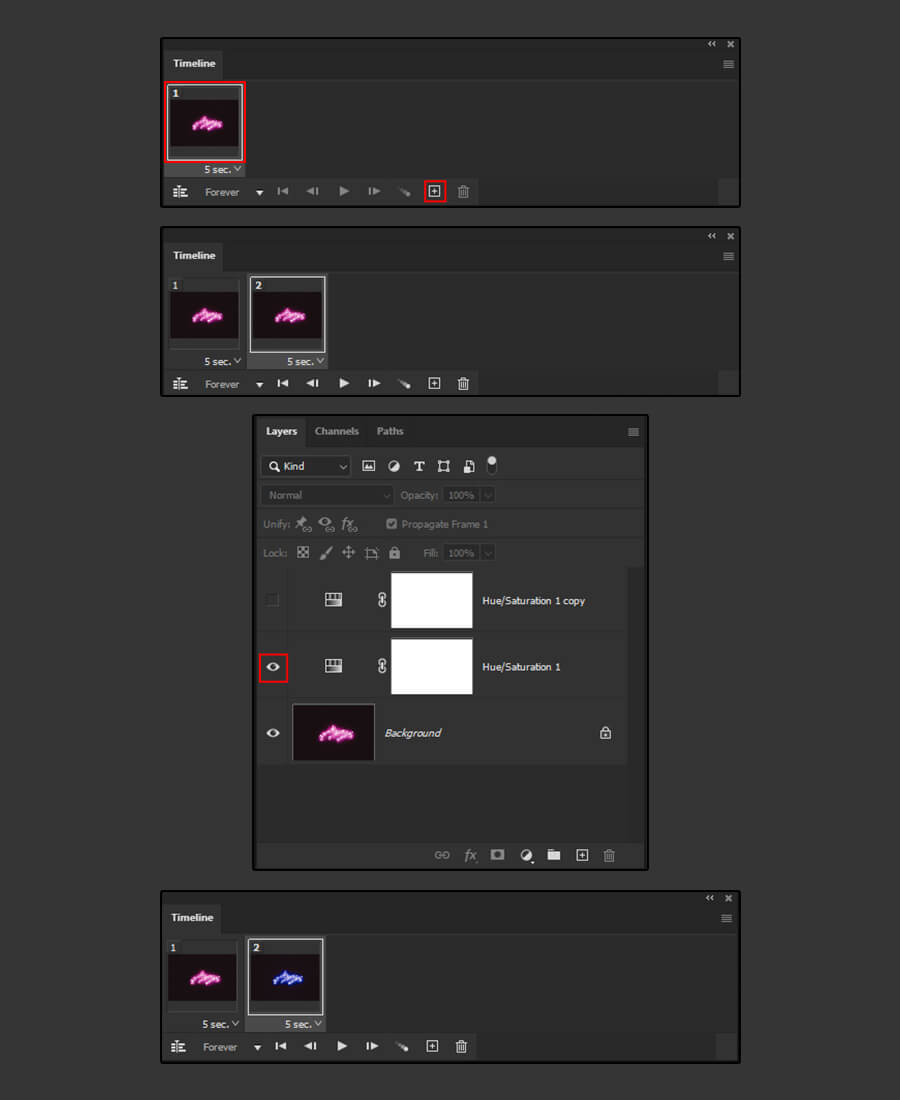
Step 8
Next, let’s add a third frame to the timeline. Select the second frame and click on the + sign. Hide the Hue/Saturation 1 and turn on the Hue/Saturation 1 copy by clicking on the Eye Icon.
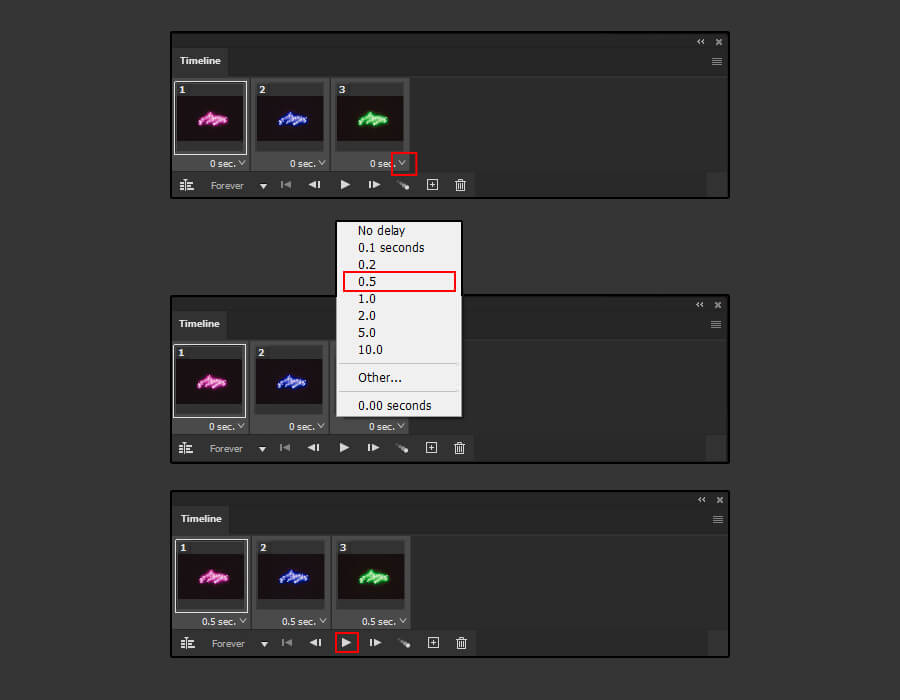
Step 9
Select the three frames by clicking on them holding Shift and change the animation speed. I chose 0.5 sec but feel free to choose the speed that suits you. Press the Play Button to have a preview of your final animation.
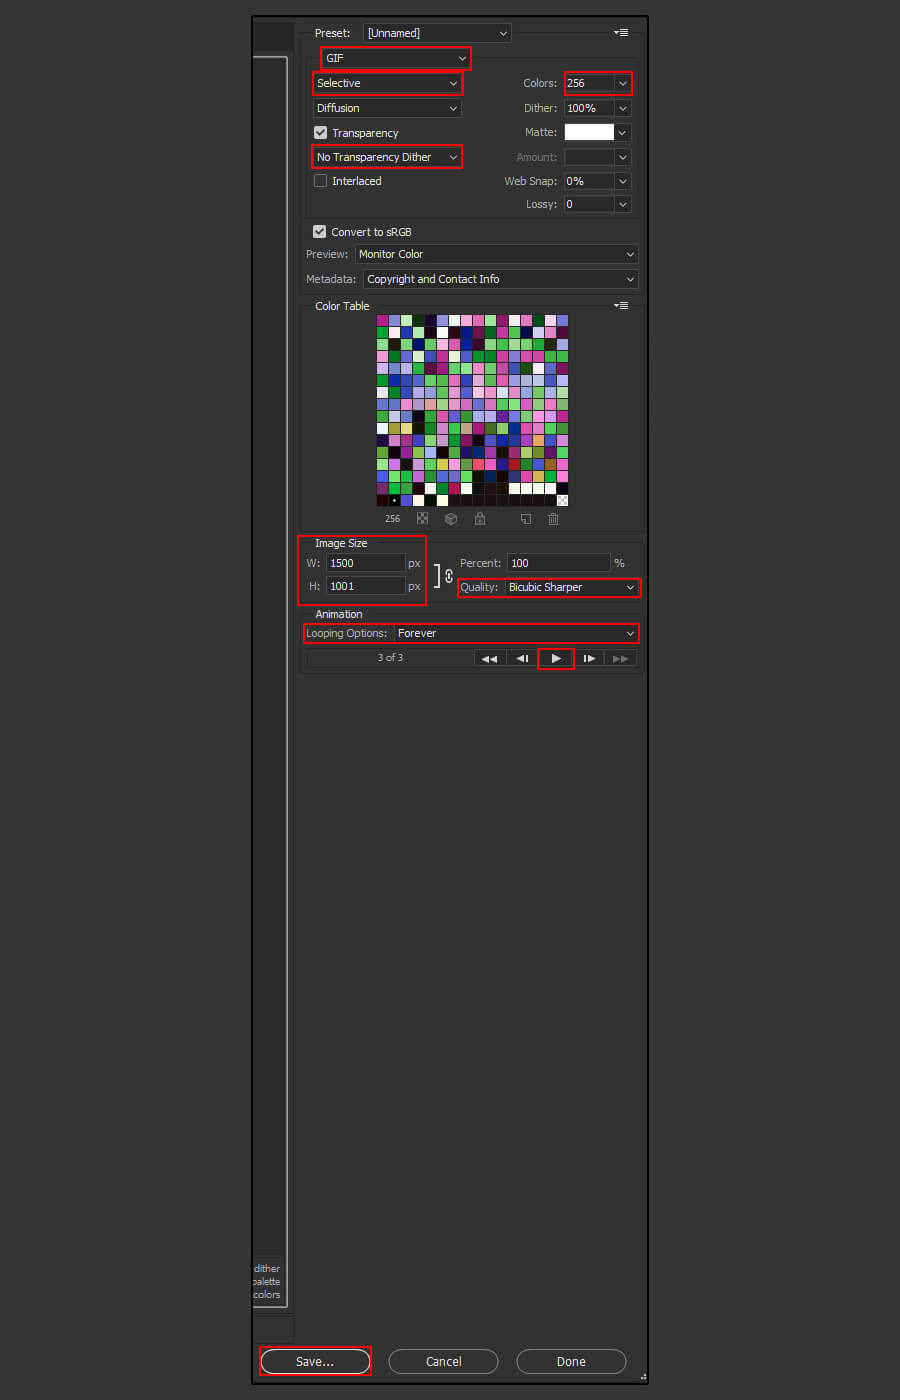
Step 10
Let’s now export the file in a GIF format. Go to File > Export > Save For Web (Legacy). You can apply the settings shown below or tweak them for your own design. Once you are happy with your settings simply press save.

After finishing this guide, you should be able to make a Color Changing GIF in Photoshop. I hope you find this tutorial to be both informative and straightforward. Please leave any questions or recommendations in the comments section below, and I’ll get back to you as soon as possible.