The orange and teal color grading has increased in popularity on social media in recent years. This color palette has burst on Instagram, and for good reason.
Orange and teal is a common color combo that combines two complementary colors, orange, and teal. It is extensively used in movies and photography because it replicates the colors of sunrise and sunset and brings images to life. To maximize color contrast, orange tones are pushed towards the highlights and blue tones into the shadows.
In this tutorial, I’ll teach you how to achieve this Orange and Teal Color Grading using the Camera Raw Filer in a similar way that I did to create a Cyberpunk Effect in a previous article.
I”ll show you how to save the Orange and Teal Color Grading settings and apply them to any of your pictures in just a few clicks.
For this lesson, I’ll use Photoshop 2022.
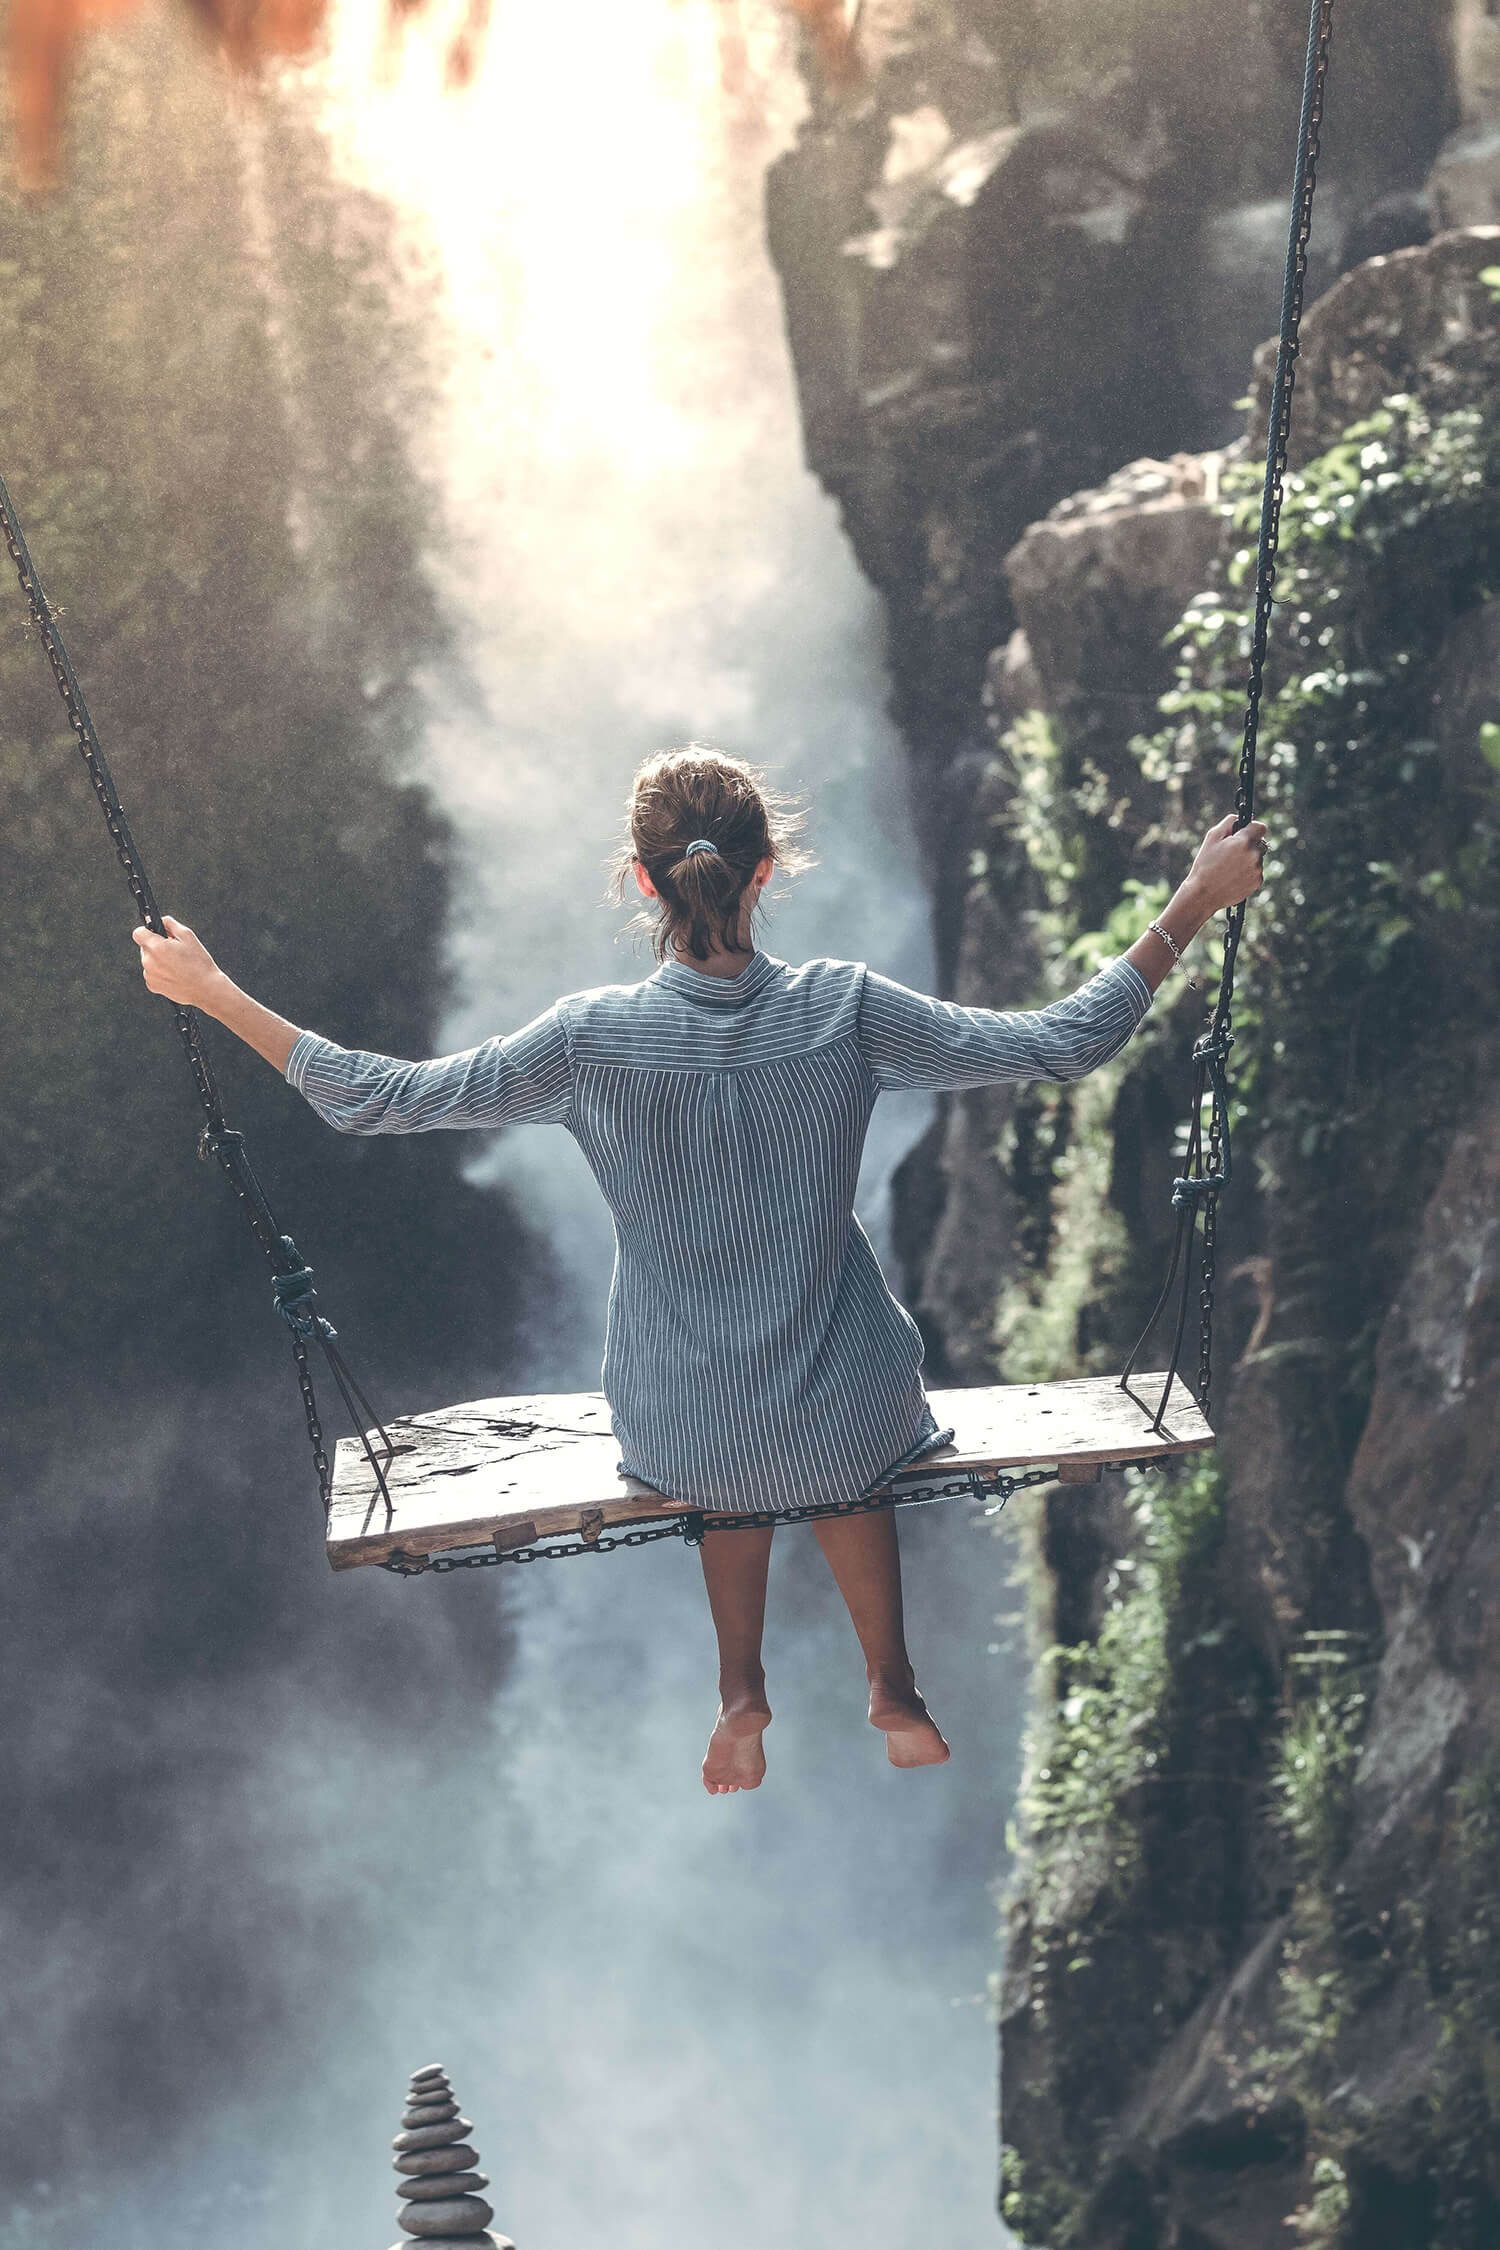
This project uses the image below download it to follow along:
Beautiful woman swings near waterfall by Artem Beliaikin
Orange and Teal Color Grading Video Tutorial
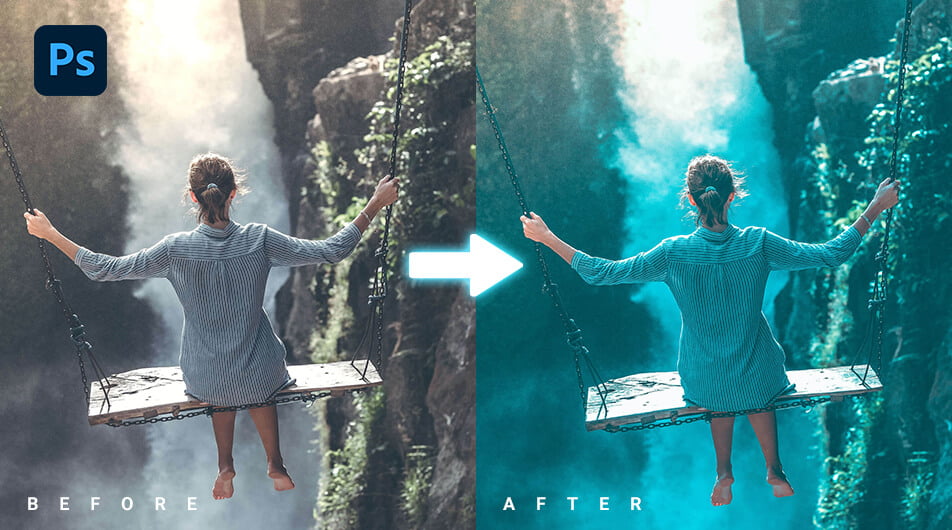
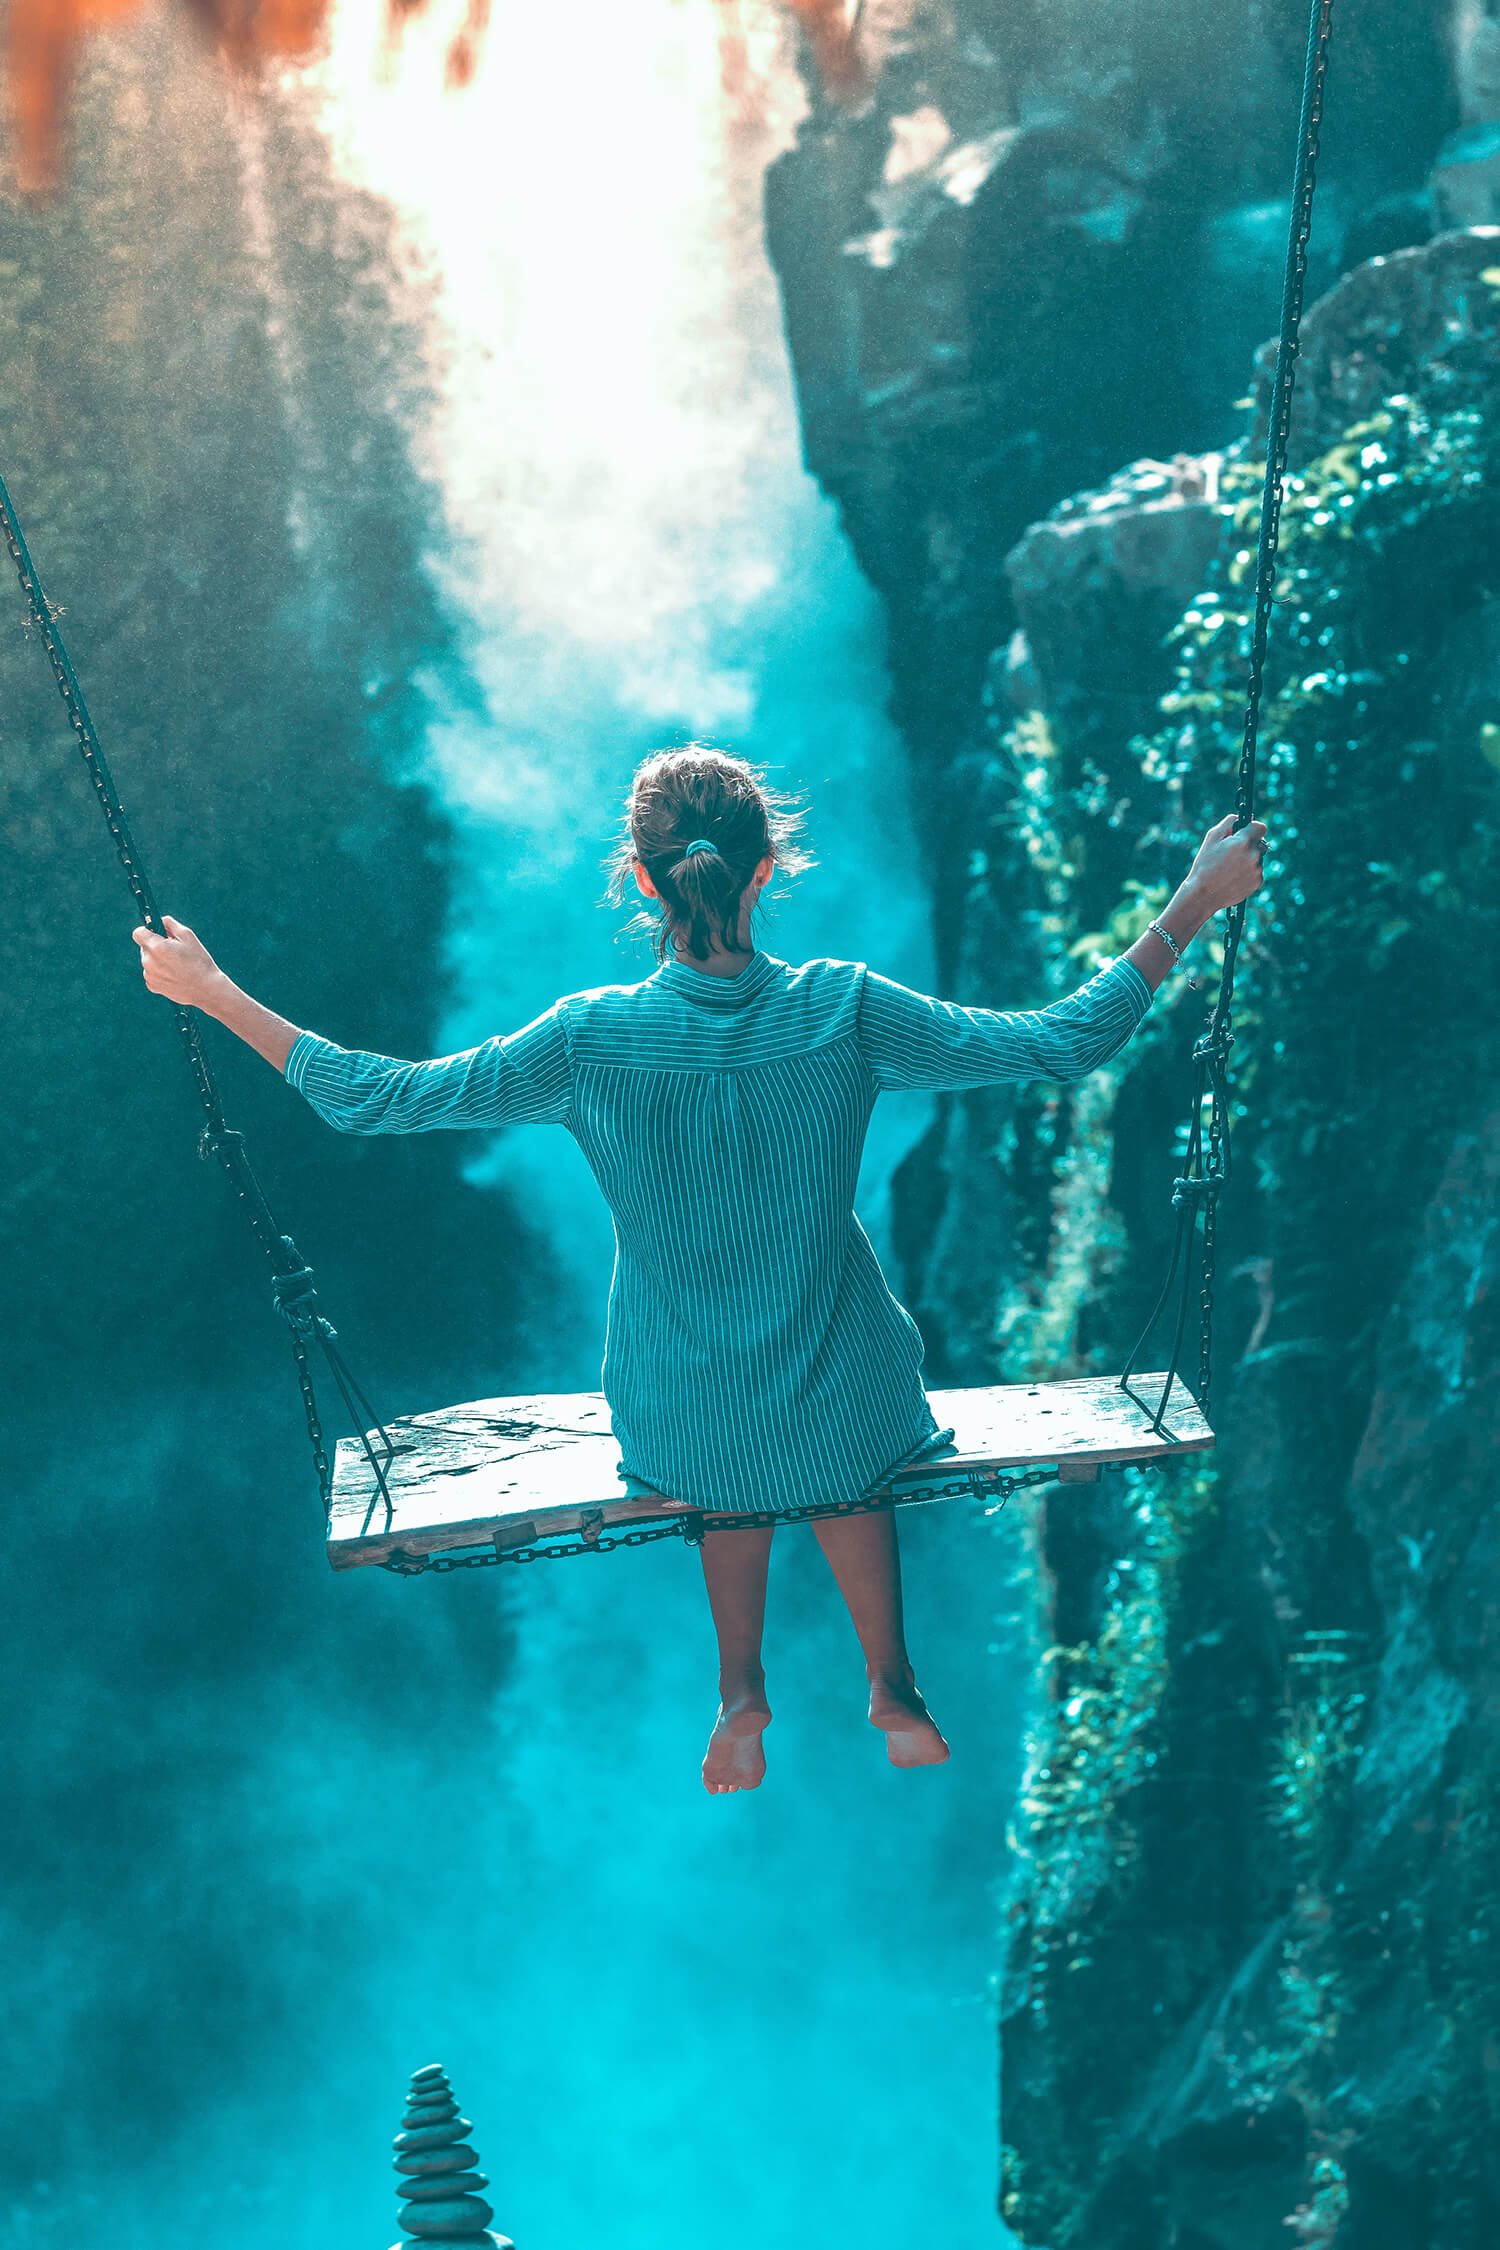
Final Image
Drag The Slider To See Before & After
Orange and Teal Color Grading
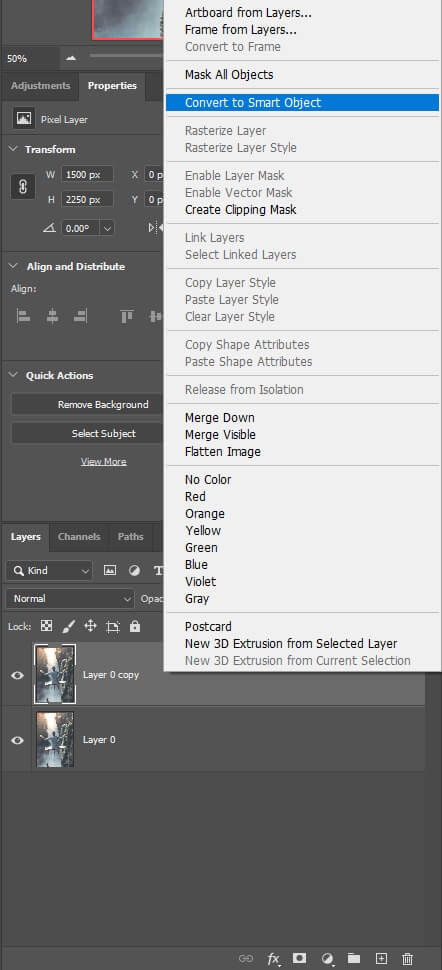
Step 1: Duplicate Your Background Layer
Open up your image in Photoshop and head over your layer panel. Select your image and press CTRL + J to duplicate it.
Then, right-click on the layer > Smart Object.
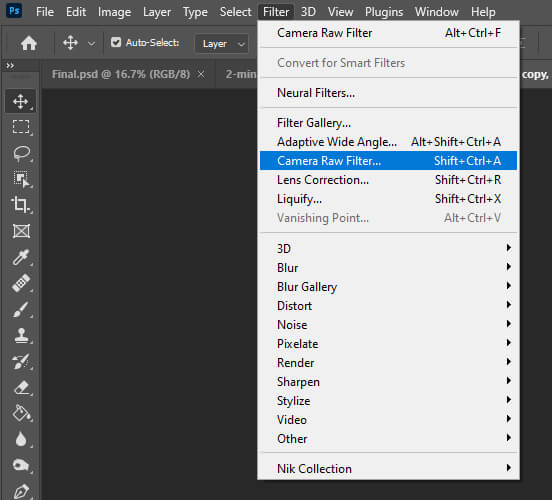
Steps 2: Head Over to Camera Raw Filter
Select the top layer then, go to Filter > Camera Raw Filter.
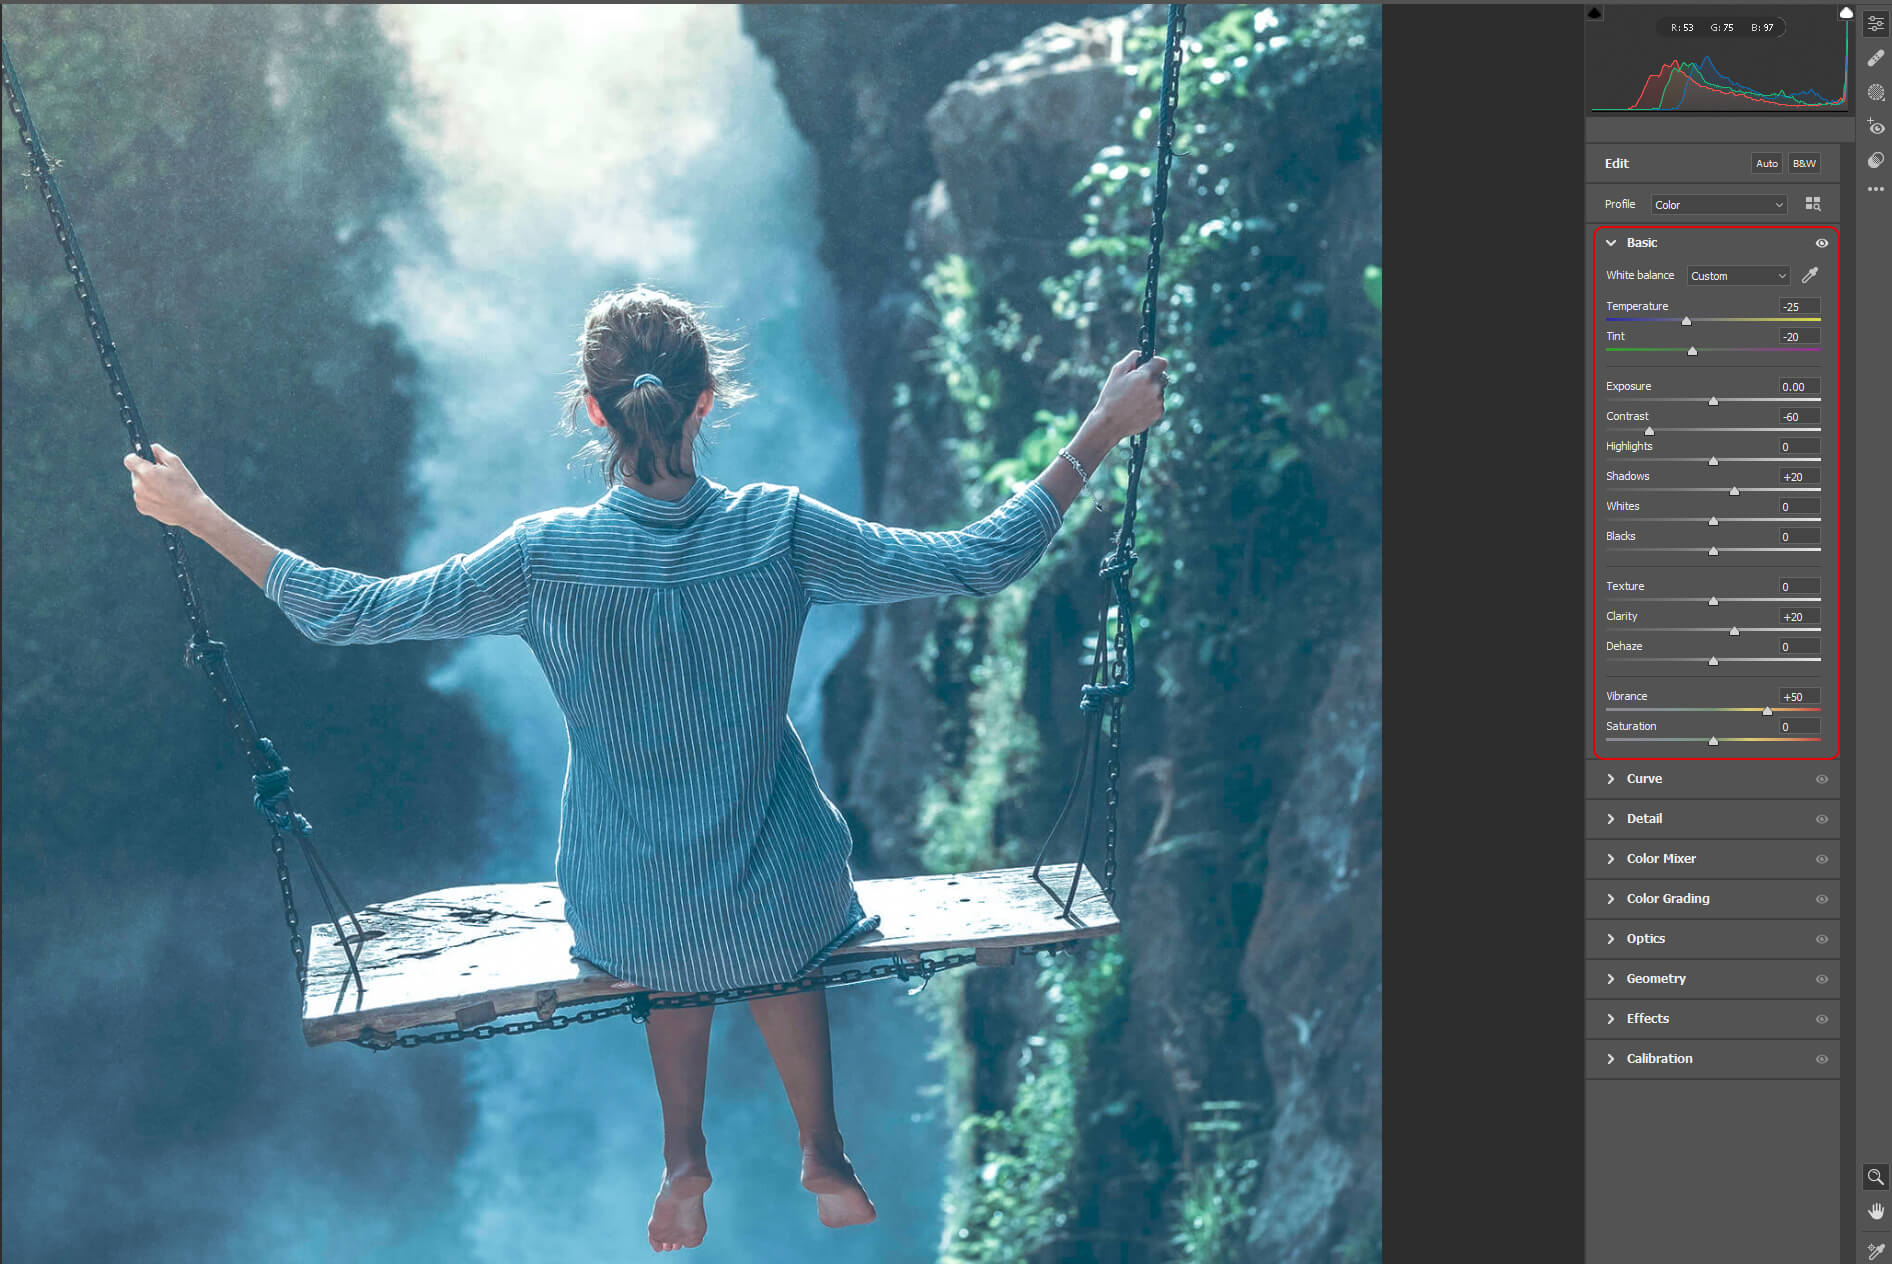
Step 3: Orange and Teal Color Grading Settings
Once inside Camera Raw Filter go to Basic and copy my settings:
- Temperature: -25
- Tint: -20
- Contrast: -60
- Shadows: +20
- Clarity: +20
- Vibrance: +50
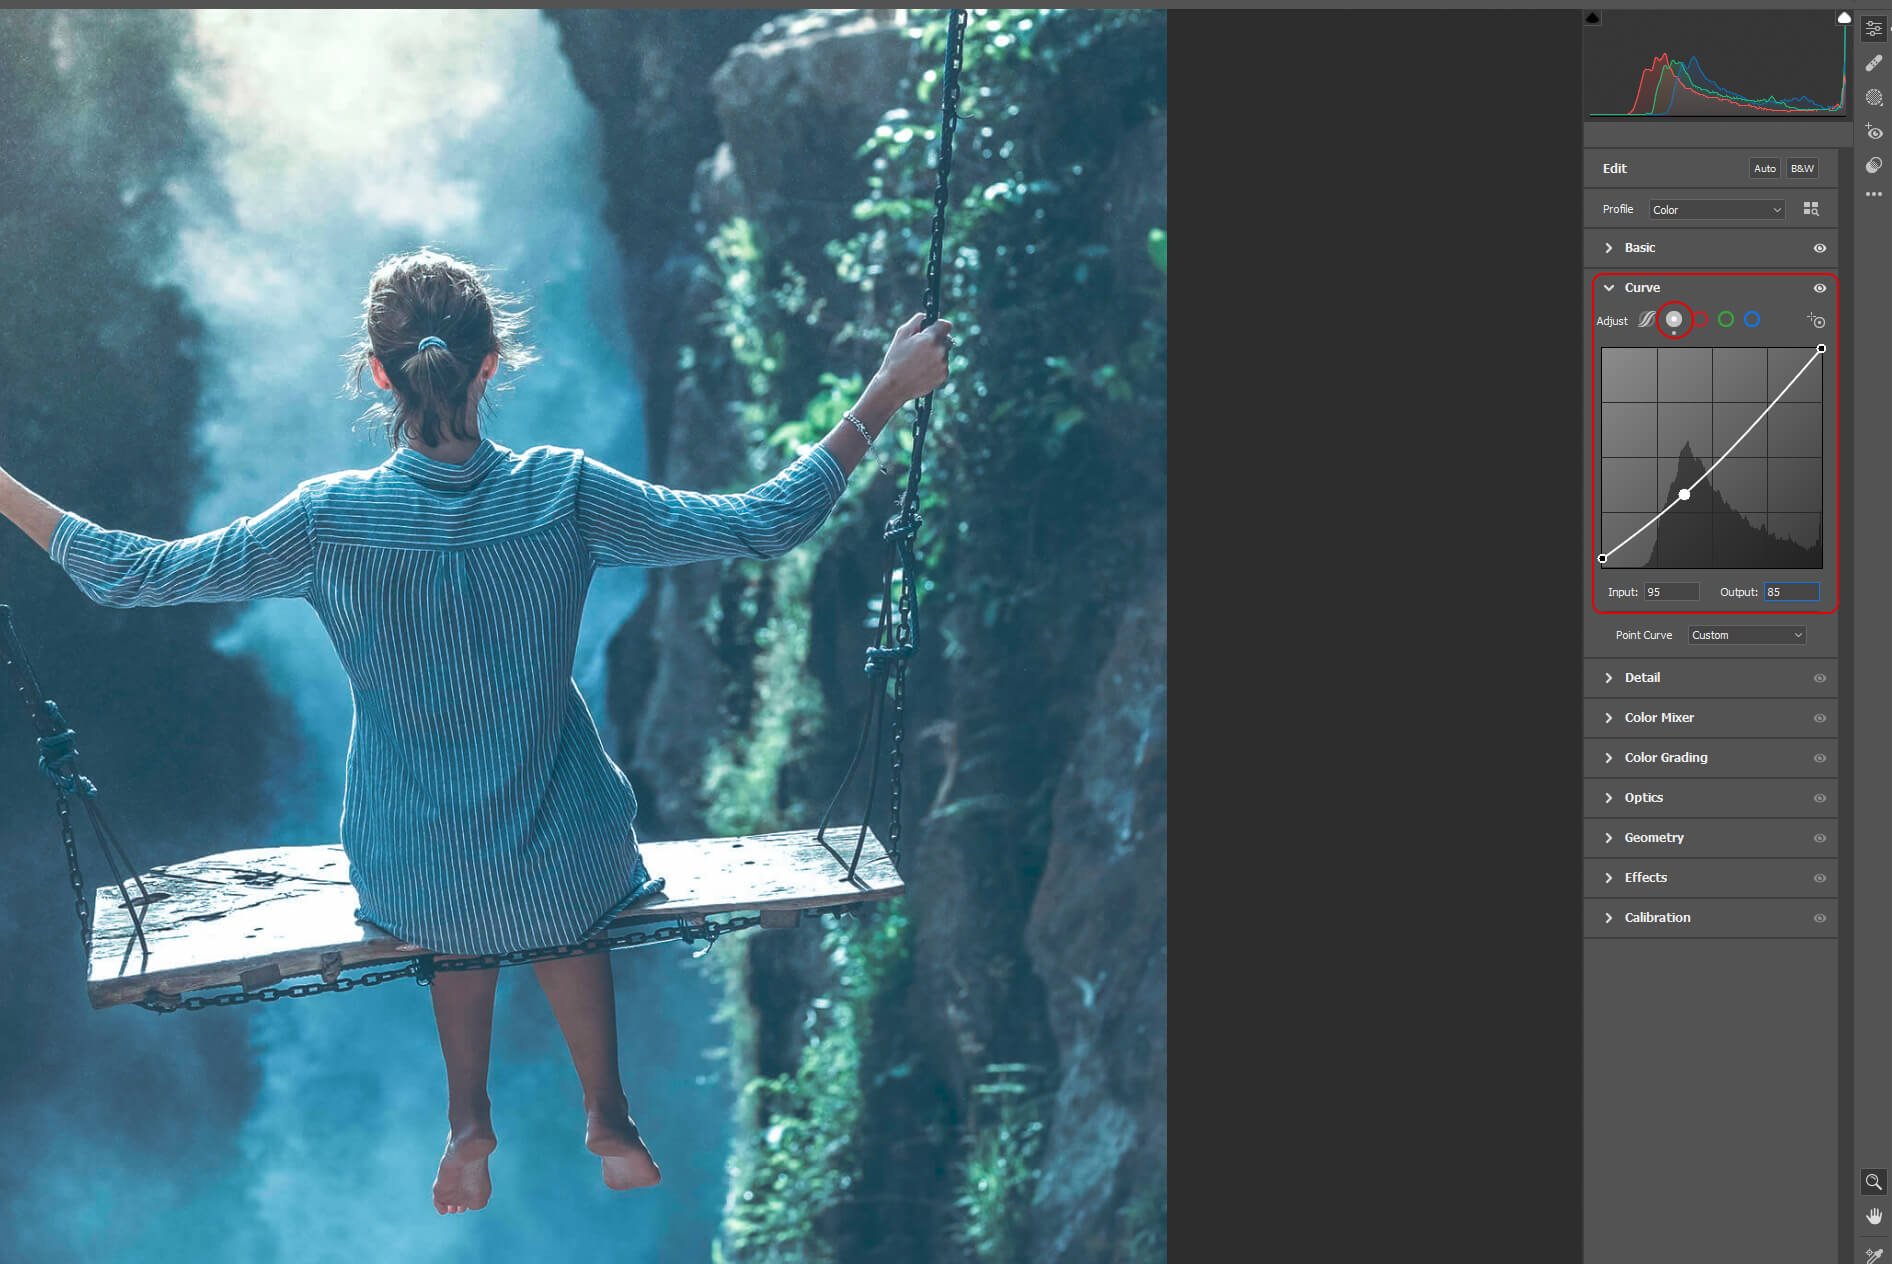
Next, go to Curve and select Click to Edit Point Curve.
Add 2 points to the Curve by clicking on it and copy the settings as follow:
First point: Input > 0, output > 10
Second point: Input > 95, output > 85
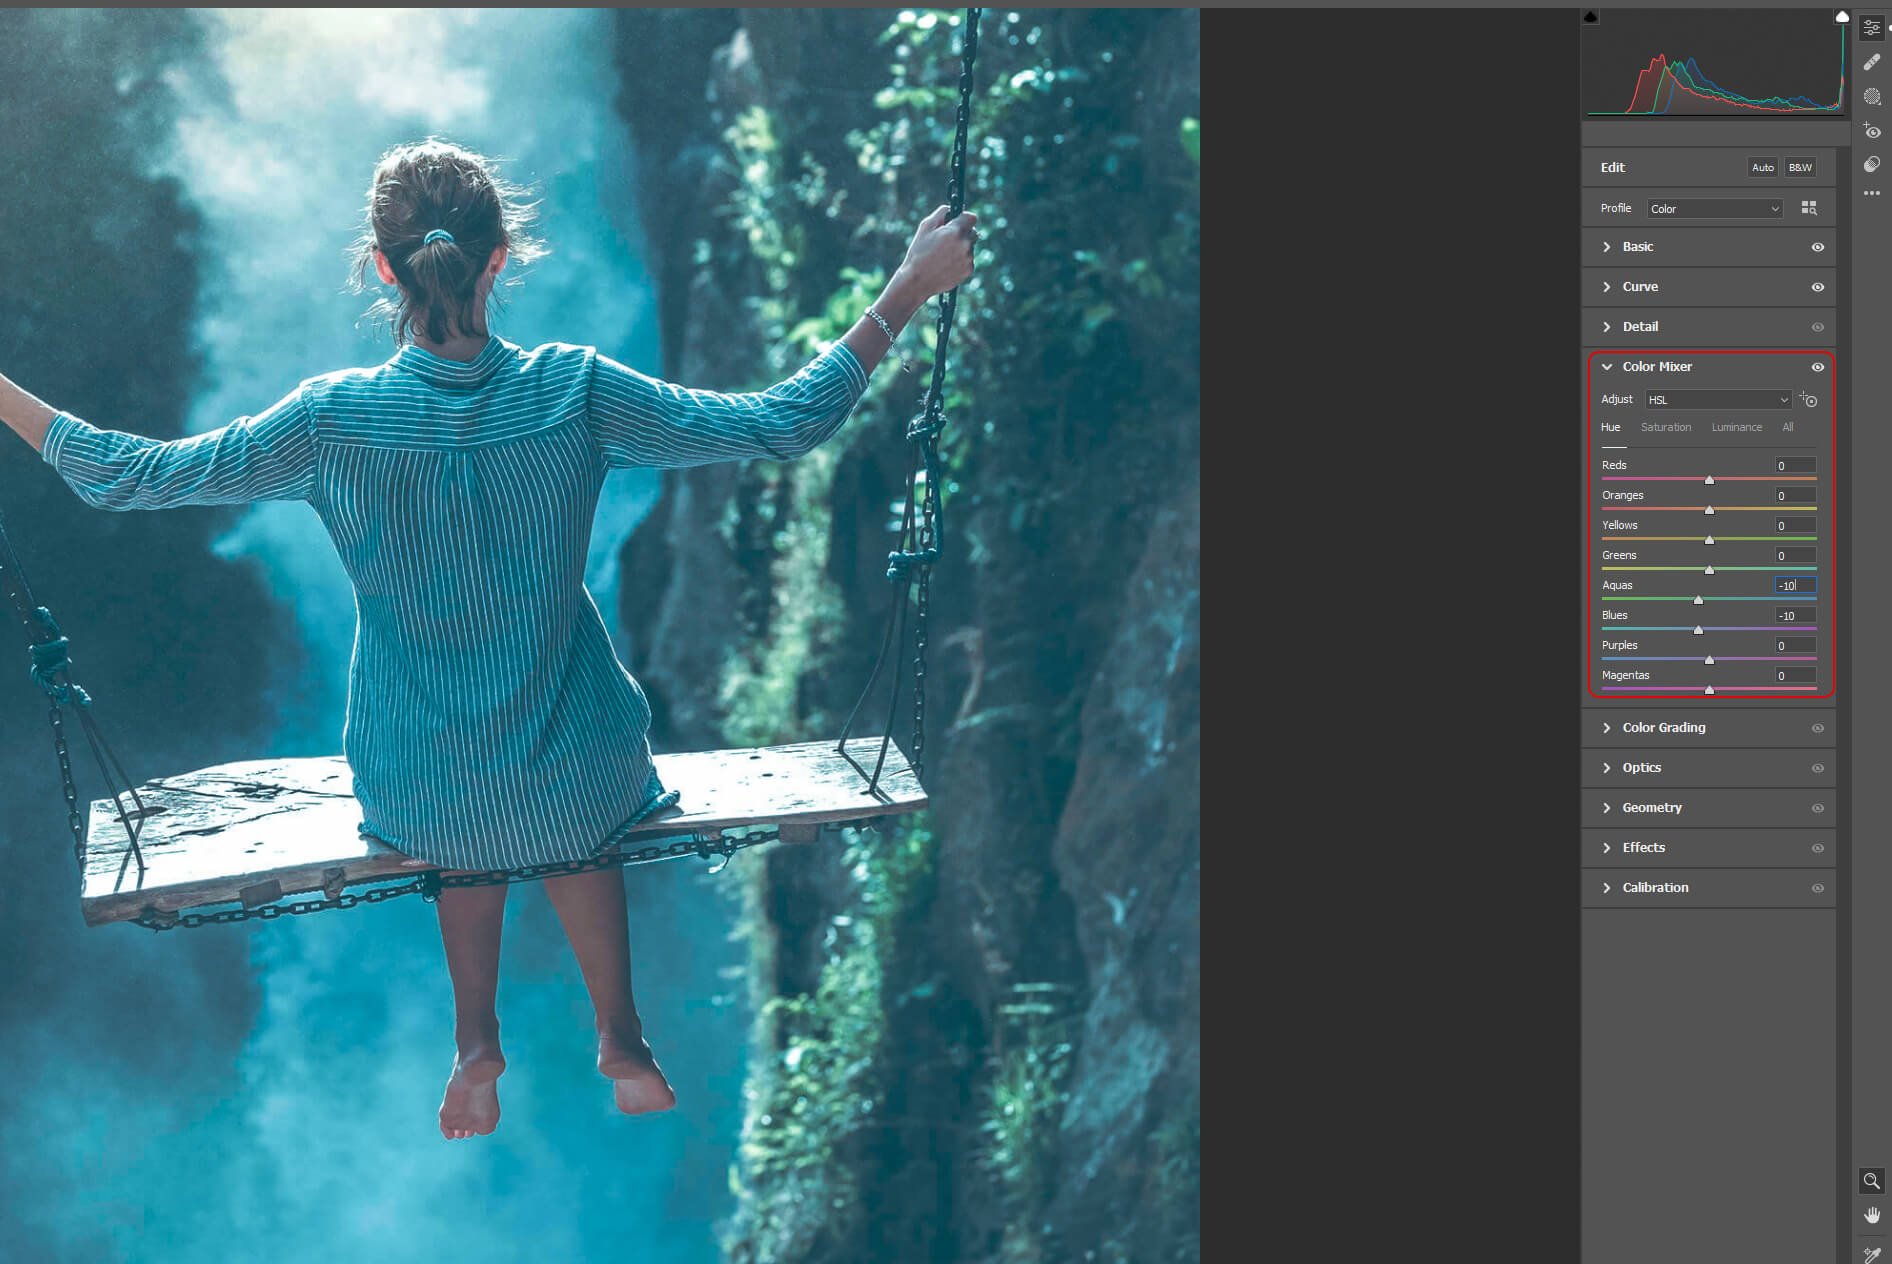
Next, go to Color Mixer > HSL and adjust the values as follow:
- Aquas: -10
- Blues: -10
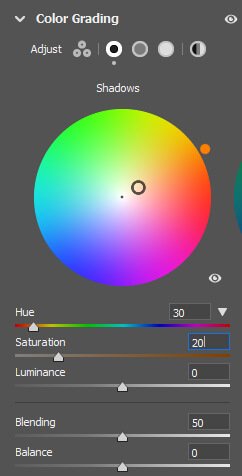
After that select Color Grading and adjust the shadows and highlights as follow:
Shadows
- Hue: 30
- Saturation: +20
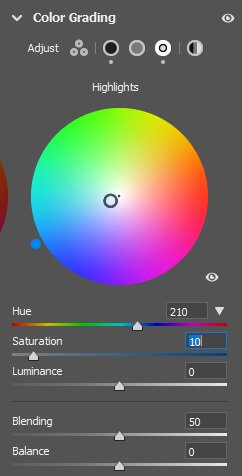
Highlights
- Hue: 210
- Saturation: +10
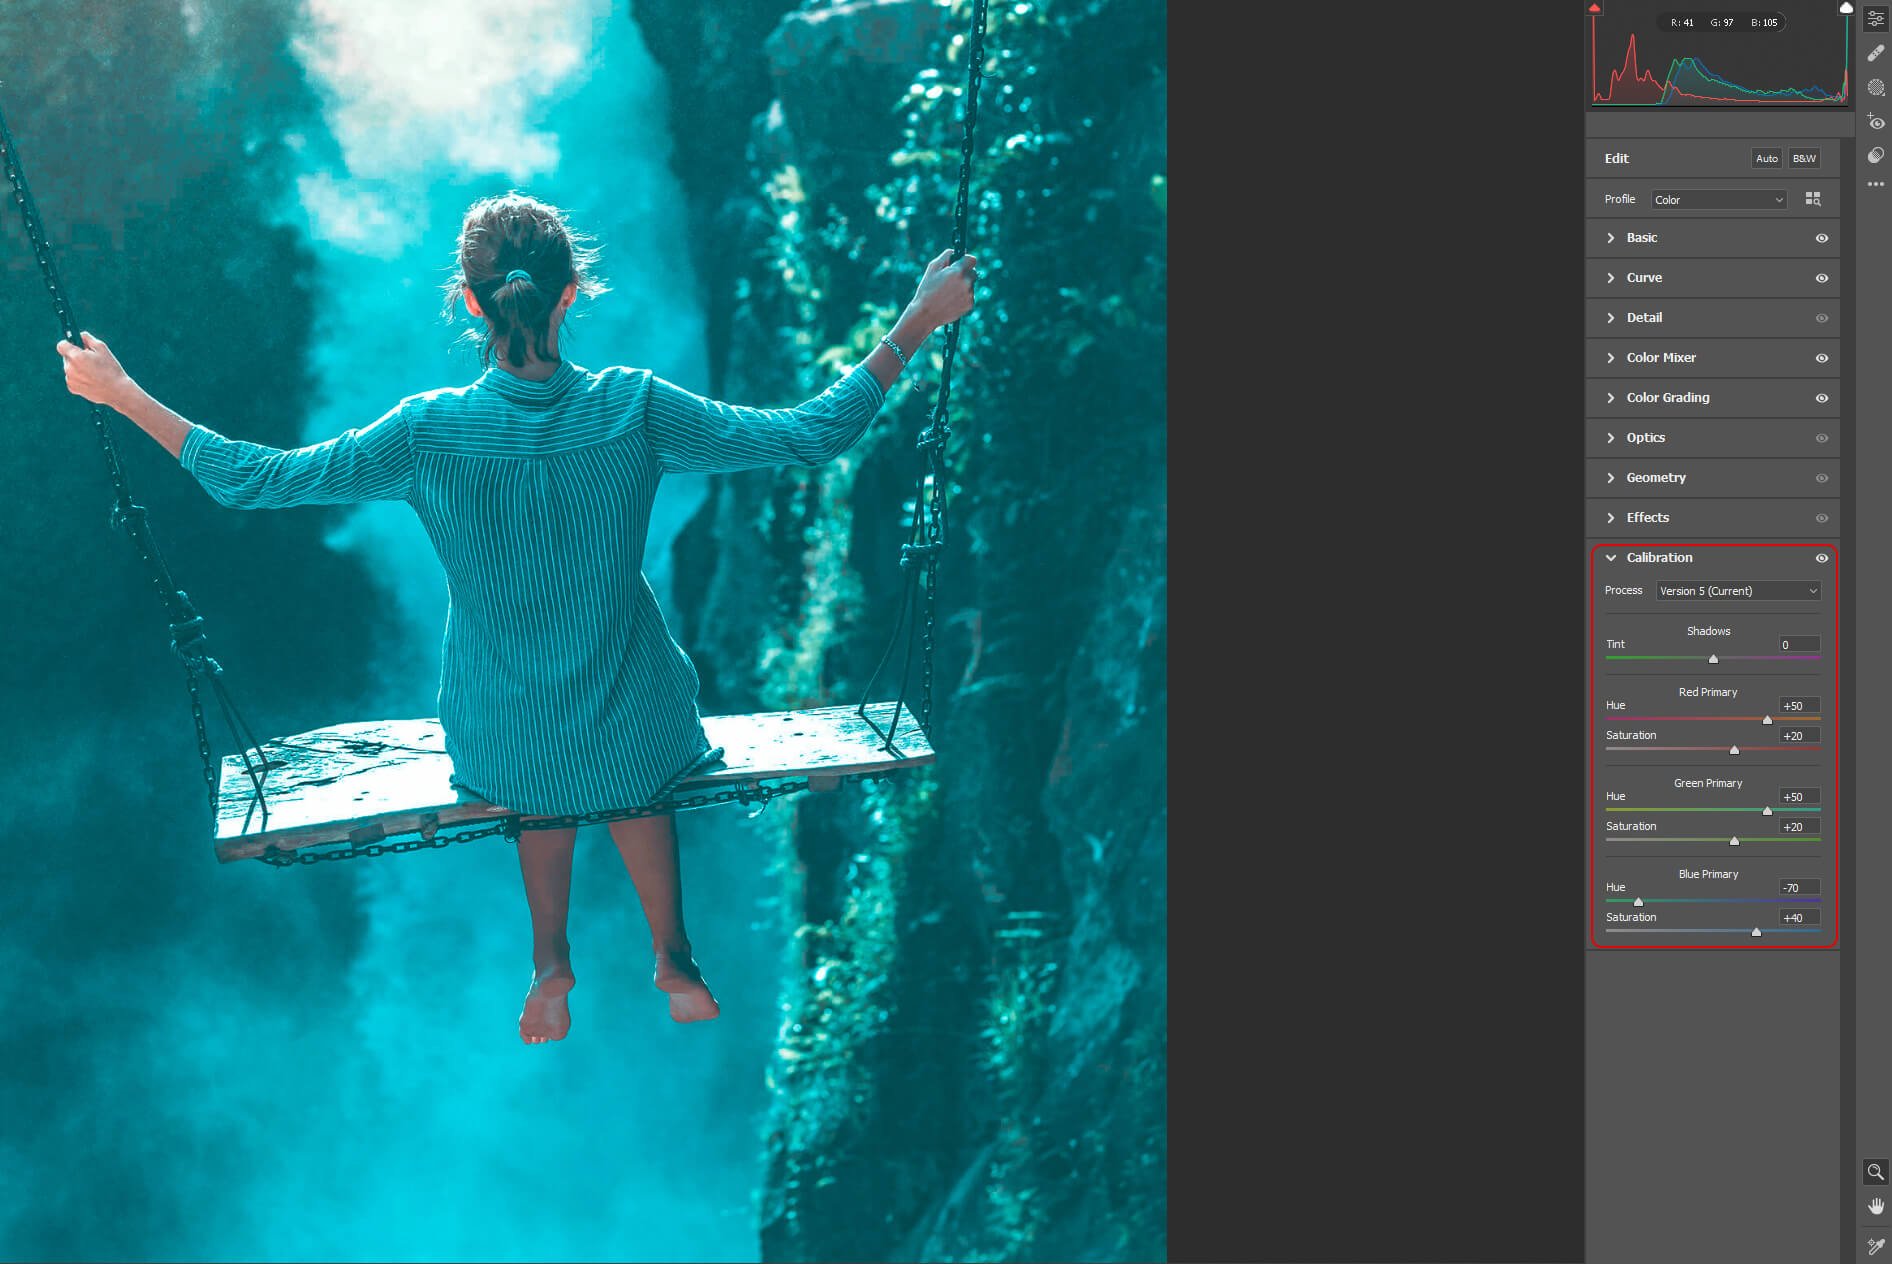
To finish with Camera Raw, select Calibration and enter the following values:
Red Primary
- Hue: +50
- Saturation: +20
Green Primary
- Hue: +50
- Saturation: +20
Blue Primary
- Hue: -70
- Saturation: +40
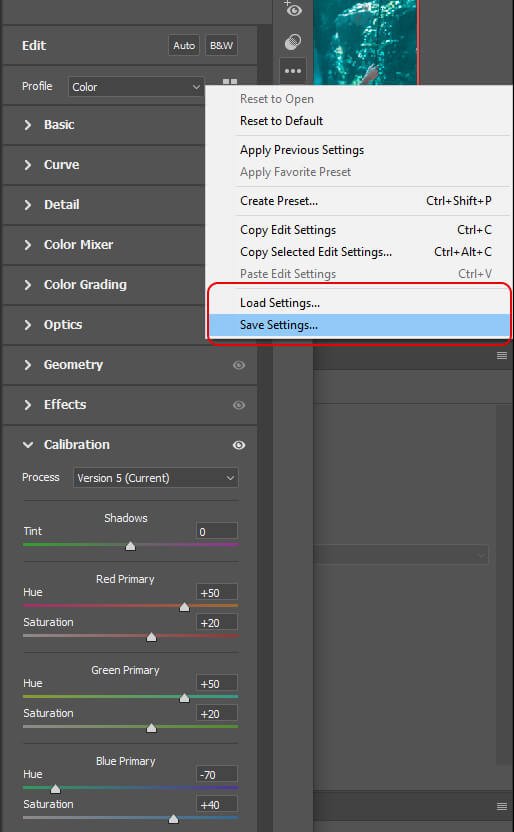
Step 4: Save Your Orange and Teal Color Grading Settings
To be able to apply these color grading settings to any pictures in just a few clicks let’s save them. It’ll allow you to load them in seconds.
Before closing Camera Raw Filter click on the three dots on the top right corner and select save settings. Whenever you want to apply those settings to an image go back to Camera Raw Filter, click on the three dots, and select load settings.
And We Are Done!

After following this tutorial, you should be able to create an Orange and Teal Color Grading in Photoshop. I hope you found this guide useful and easy to follow. If you have any questions or suggestions please let me know in the comments down below and I’ll get back to you as soon as possible.