

Photoshop‘s flexibility is one of its best features. Because of the program’s extensive functionality, you may create a broad range of amazing effects. Adding outlines around an item in a photograph is one of the most stylish but basic effects you can create.
The nice part about this technique is that it can be used in a wide range of situations. The effect is also very customizable, since you may change the color or size of the outline at any moment. And, on top of that, you can complete the entire procedure in a couple of minutes!
For this tutorial, you can use the image linked below but feel free to use your own picture for your particular design.
Image by Bruce Mars on Unsplash.
Step 1
Open the picture in Photoshop.

Step 2
Using your favorite selection tool, select the subject and press Ctrl + J to copy it onto a new layer. For this tutorial, I’ll use the Object Selection Tool.
Select the tool, draw a rough selection around the subject and let Photoshop works its magic. Once the subject is selected press Ctrl + J.

Step 3
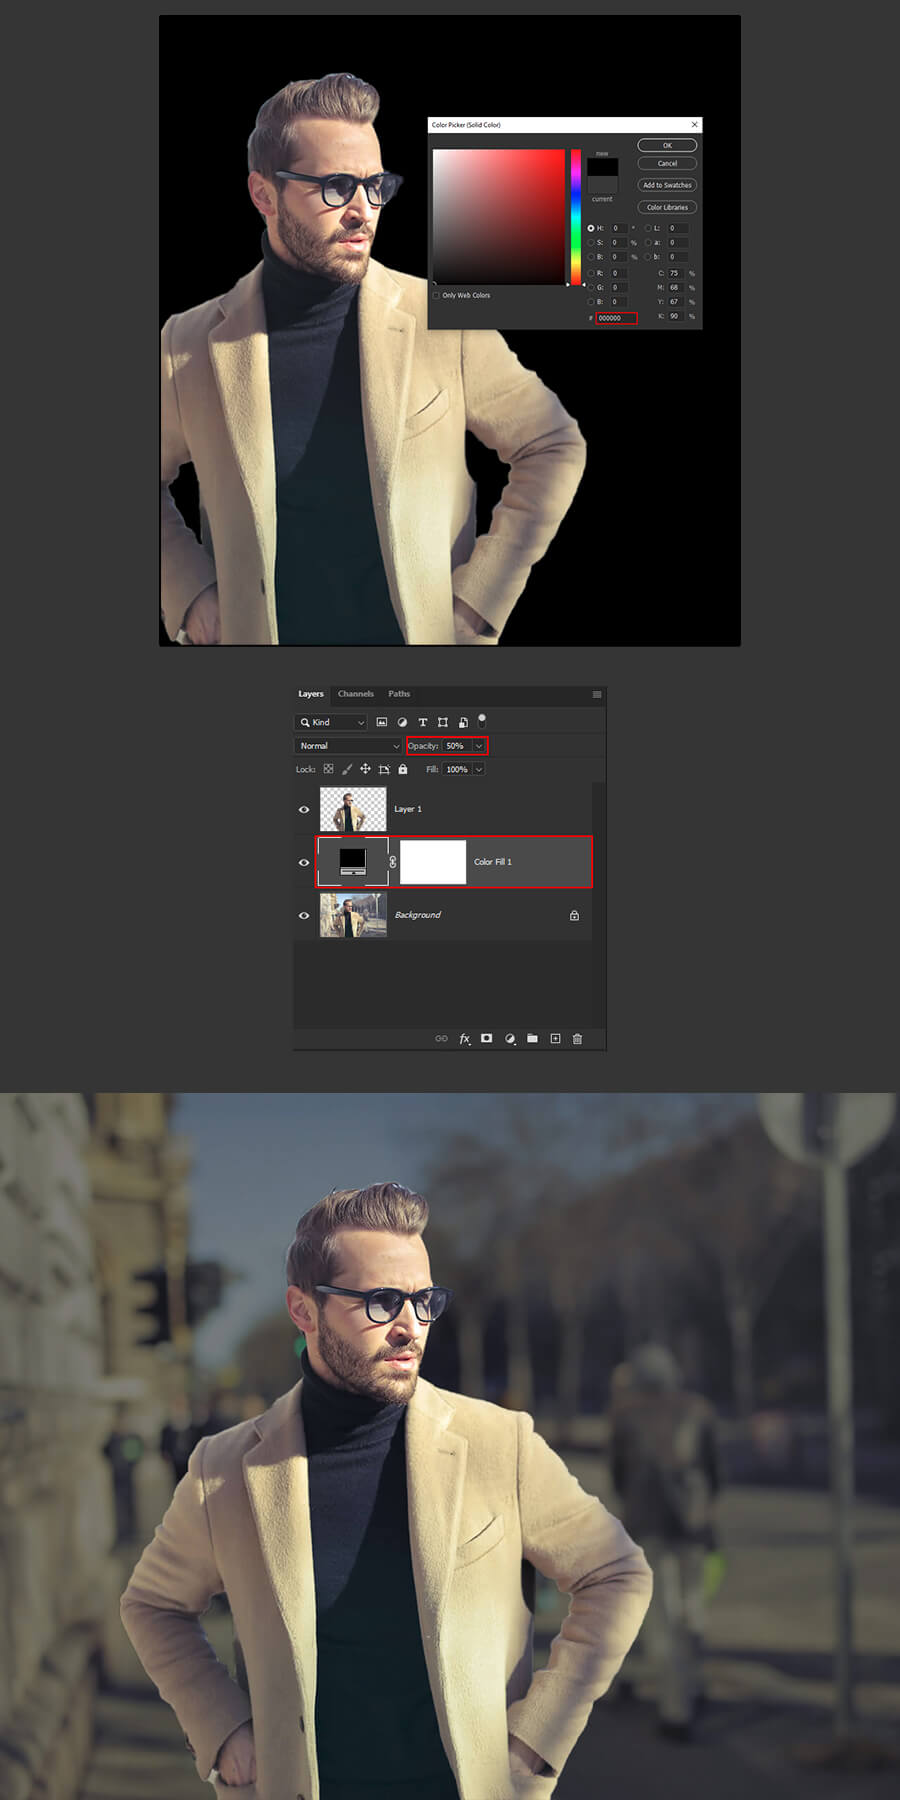
Next, add a Solid Color adjustment layer. Go to Layer > New Fill Layer > Solid Color. Set the color to Black.
Place the layer between your two existing layers and lower the opacity to 50%.
Step 4
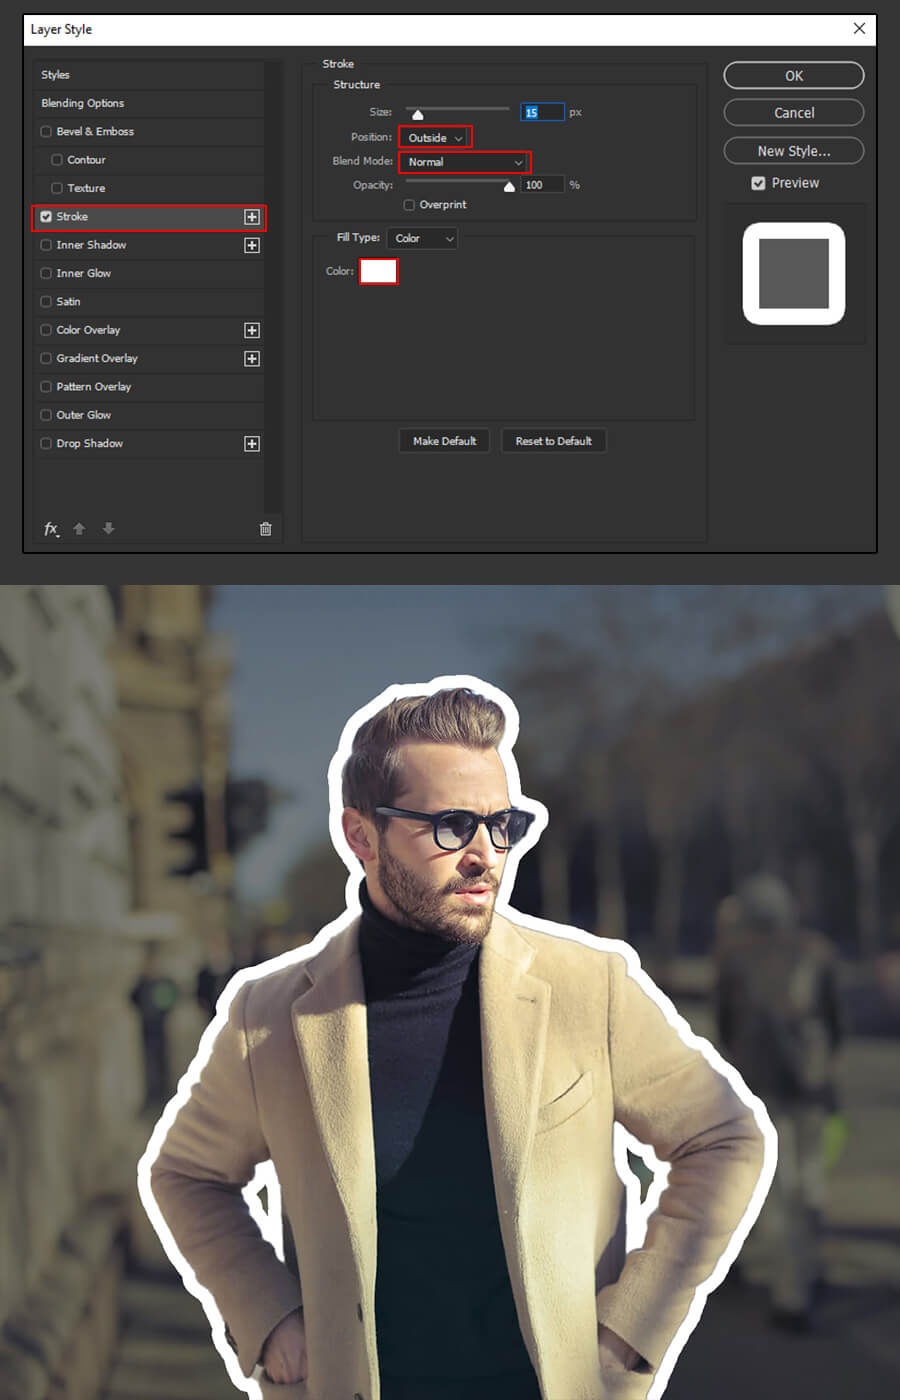
Select the top layer and go to Layer > Layer Style > Stroke. Apply the following values and click OK.
Extra Tip
If for any reason you need to change the color of the outline or its thickness, simply go back to the layer style window, pick a different color, and adjust the thickness of the stroke to your liking.
After completing this lesson, you should be able to outline any item on a picture in Photoshop. I hope you find this guide to be both useful and simple. Please leave any questions or suggestions in the comments section below, and I’ll get back to you as soon as possible.